
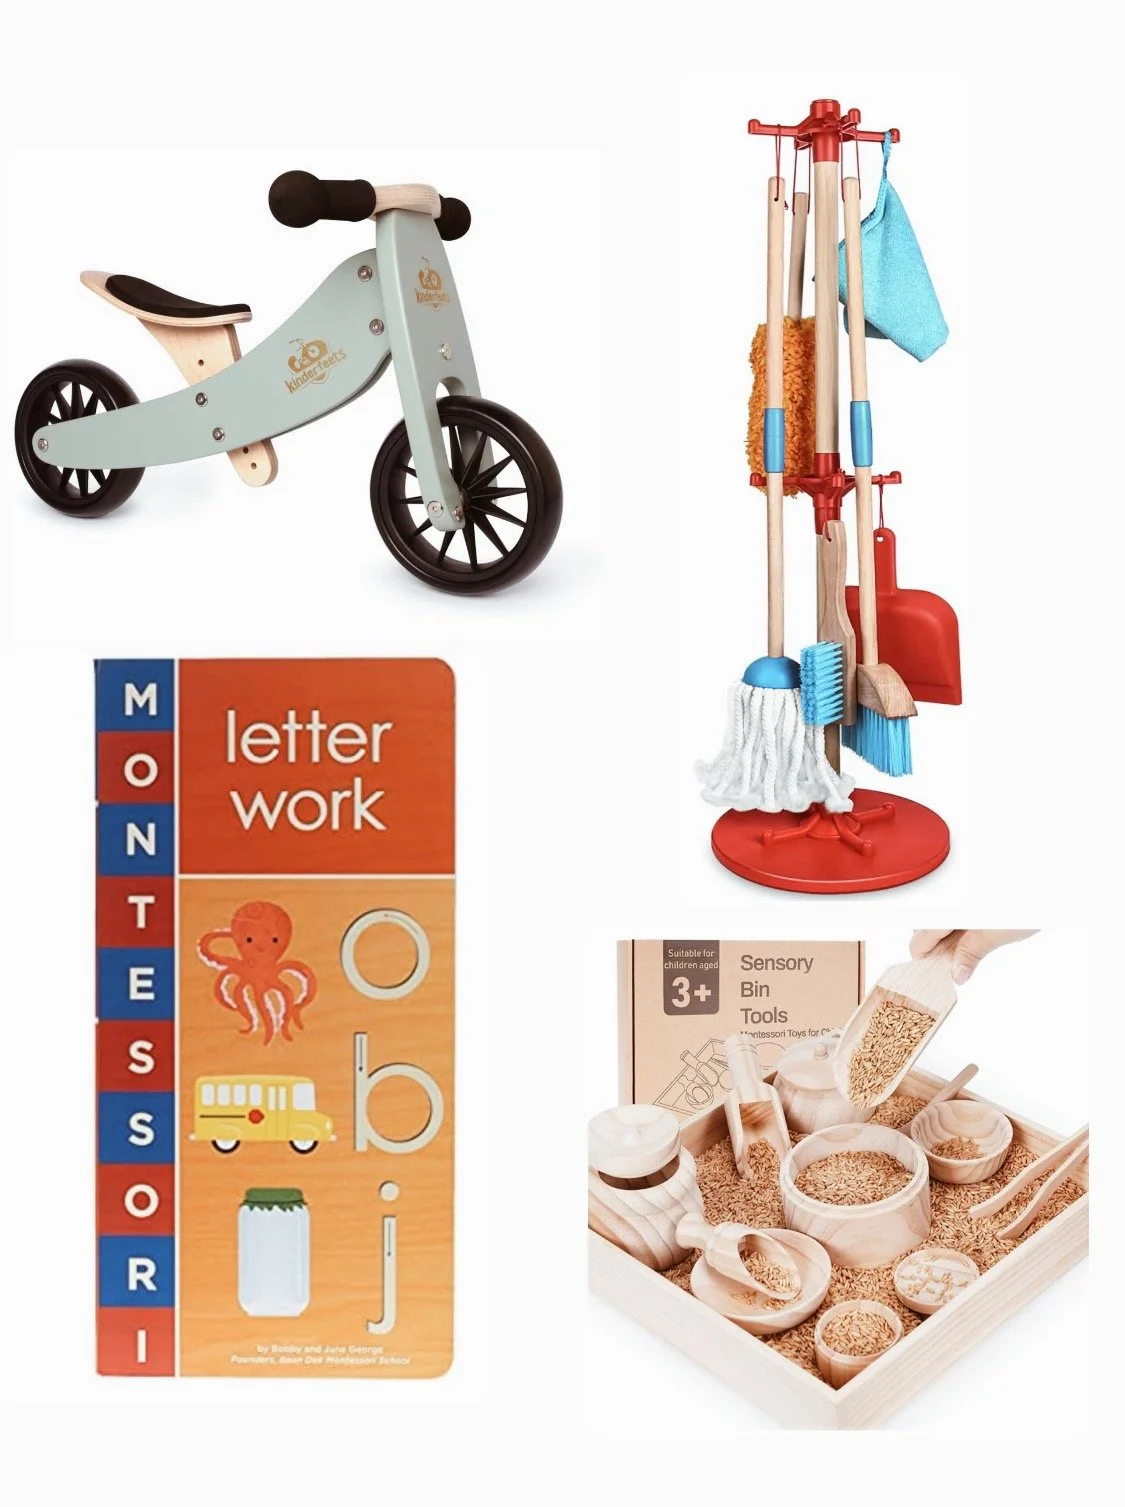
Top 10 Montessori Friendly Toddler Gift Guide
This post may contain some affiliate links. For more information, visit my disclosure page.
Birthdays, holidays, or any other time for gift-giving, when it comes to shopping for a toddler- whether it’s for your own or a gift for another, sometimes it can be challenging to find a gift that won’t just add to the clutter of noisey, loud toys, or plastic do-dads. This is a compiled list of montessori-friendly items for your toddler from toddlerhood to preschool age and beyond.
This list was curated with 3 key things in mind- to be open ended, to have a specific developmental aim, and to have the longevity to be enjoyed for years, not just months.
All item pictured are clickable to take you to the page to purchase.
1. Sensory Tray

Pouring, touching, grasping, scooping, filling, the activities are endless! This provides sensory stimulation, as well as fine motor skills such as grasping and pincer grasp.
2. Wobble Board

These not only provide balance and gross motor, but turn it over and it creates a tunnel. Prop it from the couch and it becomes a slide. Children can roll cars down the ramp, and sit inside it for rocking motion, as well.
3. Art Easel

This art easel can drop all the way to the floor so your toddler can enjoy using it, and as your child grows, so can the board. It is also magnetic, which is my personal favorite feature.
4. Kitchen

The simplicity of beautiful wood finish of the Ikea play kitchen, paired with realistic pots and pans and age appropriate utensils, this kitchen can be used for more than just play! This kitchen can be used just as the kitchen in your home is used, when equipped with the right things. Instead of play food, allow your child to prep their own snack and lunch at a kitchen their size. You can even purchase a travel sink spout for running water from the sink, or simply remove the plastic spout and replace it with a water pitcher with a pouring spout.
5. No Peddle Bike/ Balance Bike

A balance bike provides excellent gross motor, and is beginning steps for learning to ride a bike. The bike is low enough that your toddler can first push with their feet, and as they become better with balance, they will soon zoom down the sidewalk, practicing their balance skills.
6. Sweeping Set

Toddlers are excellent helpers when given the opportunity and provided with appropriate tools to do so, and they love to do it! This set is the perfect size for your toddler.
7. Wheel Barrow

Once your child has outgrown a push walker, a wheel barrow can provide the same pushing skills. This wheel barrow has two wheels in the front, which will help the child to be successful with pushing it and balancing it.
8. Kitchen Helper Tower

Bring your child up to adult level in the kitchen. This special stool provides a safe platform for your child so they can be right at counter height, allowing them to help with dishes, food prep, kitchen activities, or anything else.
9. Wood Doll House

This doll house is simple, wood, and even the dolls and furniture inside are made with beautifully crafted wood. Bonus, it can fold up and taken on the go.
10. Books/Bookshelf
Some of my favorite toddler books!


Check out this list for my top 10 baby gift guide for more ideas! Many of these items are great for your toddler, too.


Top 10 Montessori Friendly Baby Gift Guide
This post may contain some affiliate links. For more information, visit my disclosure page.
Birthdays, holidays, welcome home, or any other time for gift-giving, when it comes to shopping for a baby- whether it’s for your own or a gift for another, sometimes it can be challenging to find a gift that won’t just add to the clutter of noisey, loud toys, or plastic do-dads. This is a compiled list of montessori-friendly items from when baby is still in the womb, up until emerging into toddlerdom. This was curated with 3 key things in mind- to be open ended, have a specific developmental aim, and to be able to be used for years, not just months. As I am writing this, my daughter is approaching 2 years old (what!) and had all of these things introduced before the age of 1, and still uses them all in some way today!
All item pictures are clickable to take you to the page to purchase.
1. Topponcino

This special little pillow is the first montessori item baby uses, and is perfect for an expecting mother, or a fresh newborn. The topponcino pillow is the first form of security and consistency in the baby’s life.
2. Wood Gym

These wood gyms are great to set baby under. You can hang different things from the top, from rattles and mobiles, to nature items found outside such as leaves.
3. First Blocks

I like how these are simple, all the same shape, and have color. Simple for banging and visual stimulation of the colors, to more complex of beginning stacking and building.
4. Ball Tracker

Great for visual stimulation. Pre walkers can place the ball on the ramp at their level. As they begin to stand, they can use the tracker to balance, and place the ball in the hole at the top.
5. First Puzzle

This traditional montessori item is perfect for beginning puzzling. The simple shapes make it easy for the child to be successful. The large nob helps develop hand grip which later turns to pencil grasp.
6. Table and chair set

Children can start as early as 5 months old to start sitting on their own at a table their size. This beautiful wood set is perfect for baby through toddlerhood.
7. Riding Car

A simple riding car is great for gross motor movement.
8. Push Walker

While inclosed walkers are not montessori appropriate, a push walker is great for practicing walking and developing those muscles needed. The child can easily choose to use the walker, or stop when they are done, independently. They also can enjoy putting toys inside the front bin. These walkers are great from babies just learning to stand, to toddlers pushing their items from place to place.
9. Climbing Arch

For the baby on the move. This is not only great for gross motor and climbing, but drape a sheet over to make a hide away spot or a tunnel to crawl through, or tie colorful ribbons on the posts for a wonderful sensory activity. The imagination is endless!
10. Books
“Montessori friendly” books utilize real pictures or non-fiction stories. Traditionally in Montessori, make-believe stories and fairy tales are saved until children are able to mentally differentiate what is real or fake in their world. For young babies, books with real pictures from their world, or stories that are non-fiction, help them understand their world around them. Keep them in this bookshelf for independent access and visual order. Here are some of my favorites:


Want more ideas? Check out this list for my top 10 toddler gift guide.


Montessori from Birth: Month 5 and 6
Montessori activities for month 5 and 6
This post may contain some affiliate links. For more information, visit my disclosure page.
“The things he sees are not just remembered; they form a part of his soul.”

Dahlia using a knitted ball, also known as a montessori ball.
At 5 and 6 months, Dahlia is becoming more aware of her body, and increasingly becoming more independent with her continued growth and development. She is beginning to sit unassisted, and begins to show interest in food. She is also showing signs and interest of mobility. She is beginning to figure out how to move about her environment, and trying to move and crawl. Children all move in different ways, some army crawl, some may scoot around on their bottom, some even roll!
Development of movement and hand-eye coordination becomes more prevalent during this time. Maria Montessori called the hand the instrument of the mind. At birth the baby has a strong reflexive grasp. When an object is put in their hand, they will grasp. At around 5 months this reflex is replaced by purposeful grasping, which will later develop to pencil grasp. It won’t happen as quickly if the child is not given opportunity, experience, and practice. The child will coordinate the eyes and hand together, and at 5 months the child begins to develop binocular vision (the ability for the eyes to work together). This allows depth perception, which gives them the ability to know where things are in their environment. Visual clarity also increases.
When a 5 month old is placed on their tummy, they will make enormous effort to grasp anything in their range. At this age, children begin to sit unassisted which also gives them a new perspective of their environment. This allows for more opportunity for the visual system to develop, and the baby can see further in their visual field. This is the beginning of coordinating the hand with their vision. As the child gains new skills, movement progresses quickly, in both fine and gross motor development.
All of the activities provided during months 5 and 6 all assist and support these wonderful milestones happening and observed!
Activities
Toy on a Suction Cup 5+ months
The toy on a suction cup, also called punch ball, is an object with a suction cup base that can be attached to the floor or the table and will rock when hit. When the object makes a sound, it can stimulate the child. The child can bat, reach, and attempt intentional grasping without the object moving away from them. This activity develops hand-eye coordination. I used these and they are great because they rattle.
Knitted Ball 5-7 months
A knitted or soft pliable ball provides encouragement for moving and crawling. When the child grabs it, their fingers can get into it, offering ease with grip. The ball can be placed near the child, and they will reach out for it and encourage them to move their body. Placing it slightly out of reach will encourage them to reach, cruise, or crawl towards it. If they get frustrated, you can move the ball closer. This is a great activity for gross motor movement. As they become successful, the ball can be rolled. This ball was Dahlia’s favorite.

Dahlia sitting assisted with a Boppy Pillow
Cylinder with Bell 6-8 months
The cylinder with bell is a cylinder with pegs and a bell inside, small enough that the child can put their finger inside to grasp. It can be placed in front of the child to encourage reaching and movement. The cylinder shape rolls and encourages crawling. If they get frustrated, the cylinder can be moved closer. You can also slightly rolling it in front of them and they may follow. This activity is for gross motor movement and also auditory stimulation that is used as an incentive for moving the cylinder.
Sitting with Support 6 months
You can help your child practice sitting safely and encourage independent sitting. When a child does not have core strength yet, we can help support them. At around 6 months you can help support with pillows, a bolster, or props. You only want to put them there for a short period of time, as their core may get sore from using new muscles and strength. You can also use a Boppy pillow for assistance.

Weaning Table and Chair 5+ months
At around 5 or 6 months you can offer your child a weaning chair and table. A weaning chair is a very low armed chair. The back legs of the chair are angled to give more stability, and the height of the arms of the chair are important to keep the child from falling over. The seat is wide to support their bottom, and the legs should be short enough that the child can touch the ground . The chair itself is made of heavy wood. A weaning table is a small wood table, low to the ground. The weaning table and chair are used in combination to help transition to eating solid foods. They give the child an independent way of sitting and eating. I really like this one from Sprout Kids. It can change heights as the child grows. I also like this one.
Drinking from a Cup 5+ months
Beginning as early as 5 or 6 months old, your child can begin practicing drinking from an open cup. An open cup allows proper development of the jaw and mouth muscles, and also encourages hand-eye coordination. You can begin with a shot glass sized cup, with only a tiny amount of water. The child may explore, put their fingers in the cup, and may even pour the contents out. Eventually they will begin to bring the cup to their mouth, and learn to drink independently from the cup.

Using Utensils 6+ months
As the child continues eating independently at their weaning table, they can also begin to use utensils. Offer a spoon or fork, whichever is appropriate for eating, along with their meal. Their meal should also be in a plate or bowl, just as an adult’s meal would be. The parent can model using a fork or spoon with their meal. The child may explore the utensils, or may leave them and prefer to use their hands at first. As they become familiar with utensils, they will begin to get more comfortable using them. For foods that require spoons such as yogurt, you can first help feed them, modeling bringing the spoon to their mouth. Once they’ve eaten most of the food with parent assistance, you can offer them the spoon for the last small amount to practice themself. I like to have a set of small metal spoons and forks. They are the perfect size for small hands. Wood or metal are preferred, they are also sometimes labeled coffee spoons.
Tripp Trapp Chair
While not traditional montessori, a Tripp Trapp chair allows the child to sit at the family table, and can be pulled right up to the table. This chair is great when the weaning table chair are not available or not appropriate (for example, during a family meal). The Tripp Trapp chair can grow with the child, and allows the child to participate in family meals.
Not Recommended
There are some items commonly used for babies that are not encouraged in a montessori environment. It is important to give the child the freedom to move, and these often do not allow the freedom of movement and can also disrupt development.
Exersaucer: This is a walker that doesn’t move. They can damage their developing body. If the feet don’t touch this can cause hip issues, it also may encourage tip toe walking. The child also has to rely on an adult to take them out when they are done. Supported sitting on the floor with pillows is encouraged instead, or on the floor on the tummy or back.
Play Pen: A small portable enclosure. It gives the child no independence and they have to rely on the parent to take them out. It can also disrupt their visual development when looking through mesh. Instead, when the child becomes mobile you can put up baby gates to block certain rooms, and baby proof the room they are in.
Jumper: A seat attached to an elastic strap. Babies are often put in jumpers too soon before they can support their own weight. It can hurt their muscles and cause hip issues.
Bumbo seats: A chair that props the child into a sitting position. Babies are often put in these too soon before they can sit unassisted. This can cause pain in their core muscles, and does not encourage a proper sitting position. Placing the child on the floor is encouraged.
This list is based off of both AMS (American Montessori Society) and AMI (Association Montessori Internationale) studies and manuals. I am trained and hold an infant/toddler montessori credential in AMS.

Sources:
www.thewonderweeks.com
http://michaelolaf.com/store/index.html

Montessori from Birth: Month 4
Montessori activities for month 4.
This post may contain some affiliate links. For more information, visit my disclosure page.
“He does it with his hands, by experience, first in play and then through work. The hands are the instruments of man’s intelligence.”

Stylised Wooden Figures mobile
Dahlia is four months old! This month she has found her hands and feet, and can clasp her hands together. She can spend hours staring at her hands and reaching for objects. She can now grab objects next to her and discover and manipulate them. She often stares meticulously at them, or carefully mouths them. She also enjoys singing, her favorite is songs about butterflies (she gets huge grins and “sings” with me, cooing loudly as I sing).
Dahlia is also in the middle of the fourth mental developmental leap, world of events. Before now, she could only perceive one transition at a time. She can now perceive events, and uses all of her senses to perceive short series of transitions and sensations. These smoother transitions are also what allows her to begin to be able to grab items intentionally. She can adjust her hand movement in one smooth transition to another, in order to grab items near by. She is also beginning to manipulate her toys, by shaking them or banging them. Babies also become fascinated at events happening at this age. The dog chewing a bone, or the trees moving in the wind may catch their attention. I help facilitate her observations by moving her so she can clearly watch what piques her interest, and being conscious of those observations. She is beginning to sit unassisted in her high chair, and this has been her favorite place to be because she can clearly watch the happenings of our home in clear view.
This has been an exciting month in Dahlia’s development, my guess: she will be sitting on her own by next month!
Activities
Stylised Wooden Figures Mobile (butterflies) 3+ months
The stylized wooden figure mobile in the final mobile of the visual mobile series. It is made up of different elements made of wood that has realistic movement. Common stylized figures include whales, birds, waves, or butterflies. These provide visual stimulation, and also provide stimulation for reaching, grasping, and batting. I made my mobile, and used these butterflies hung on fishing line.
Butterfly Song (sung to the tune of ABC’s)
Flitter, flutter butterfly,
Flying in the big, blue sky.
Flitter high, flitter low.
Flitter fast, flitter slow.
Flitter, flutter butterfly,
Flying in the big, blue sky.
Three Color Spheres 3-4 months
This mobile is made up of three spheres of red, yellow, and blue, with darkest (blue) hanging the lowest. Unlike the other mobiles, this mobile is meant for batting, so it is to be hung closer to the child, within the distance that the child can bat at it at chest height. It also needs to be sturdy, and the spheres must be large enough to not be a choking hazard, but small enough that the baby can grab it. This provides visual development, as well as stimulation for reaching and grasping and hand-eye coordination and focus.

Dahlia looking at a wood book and interlocking rings.
Wood book 4 months
The wood book is the first book introduced to baby. It is simple, with alluring pictures inside. The baby can hold the solid pages, and explore and mouth it. Practice modeling reading with baby, and show how to turn the pages. This is great for visual stimulation, as well as fine motor skills. Here’s a similar book to mine.
Interlocking Rings 4 months
The interlocking rings are made up of 3-4 rings made of wood, metal, or silicon. The child can practice grasping with their whole hand or their fingers, and may wave it around to make different sounds depending on the material. This is a similar one to mine.

Disk on a Ribbon 4-5 months
The disk on a ribbon includes an attractive, colorful ribbon at least 2cm thick, and a large light weight ring made out of wood, rubber, or silver. It is suspended with elastic with in the child’s reach, at chest height. The child may bat, reach, and grab the ring and bring it towards their mouth. The ring should be big enough for the child to fit their hand through in order to grasp. This offers visual development, as well as stimulation for reaching, grasping, and batting.
Bells on a Strap 4 months
This is made up of a dowel, and a strap with 3 bells attached. The child can grasp the dowel and shake it to create sound, and manipulate it. This provides auditory stimulation and tactile experience. You can make one, or purchase this one.

Home Objects 3-4 months
A variety of different home objects provided in a basket for exploration. These should be things that are beautiful and stimulating. Examples include: honey dipper, wooden clothes pins, a spoon (wooden or metal), a whisk, different bangles, key chains, and coasters. This provides grasping and manipulating experiences and allows the child to explore the use of their hands. They may grasp, transfer from hand to hand, and mouth the objects. Ensure the objects are not sharp and don’t pose a choking hazard.
This list is based off of both AMS (American Montessori Society) and AMI (Association Montessori Internationale) studies and manuals. I am trained and hold an infant/toddler montessori credential in AMS.

Sources:
www.thewonderweeks.com
http://michaelolaf.com/store/index.html

Montessori From Birth: Month 3
Month 3 brought many new and exciting changes in Dahlia’s development, and the materials brought out during this time allows her to practice these new skills she is acquiring, and master them. These are the Montessori infant materials implemented during her third month!
This post may contain some affiliate links. For more information, visit my disclosure page.
“It follows that at the beginning of his life the individual can accomplish wonders – without effort and quite unconsciously.”
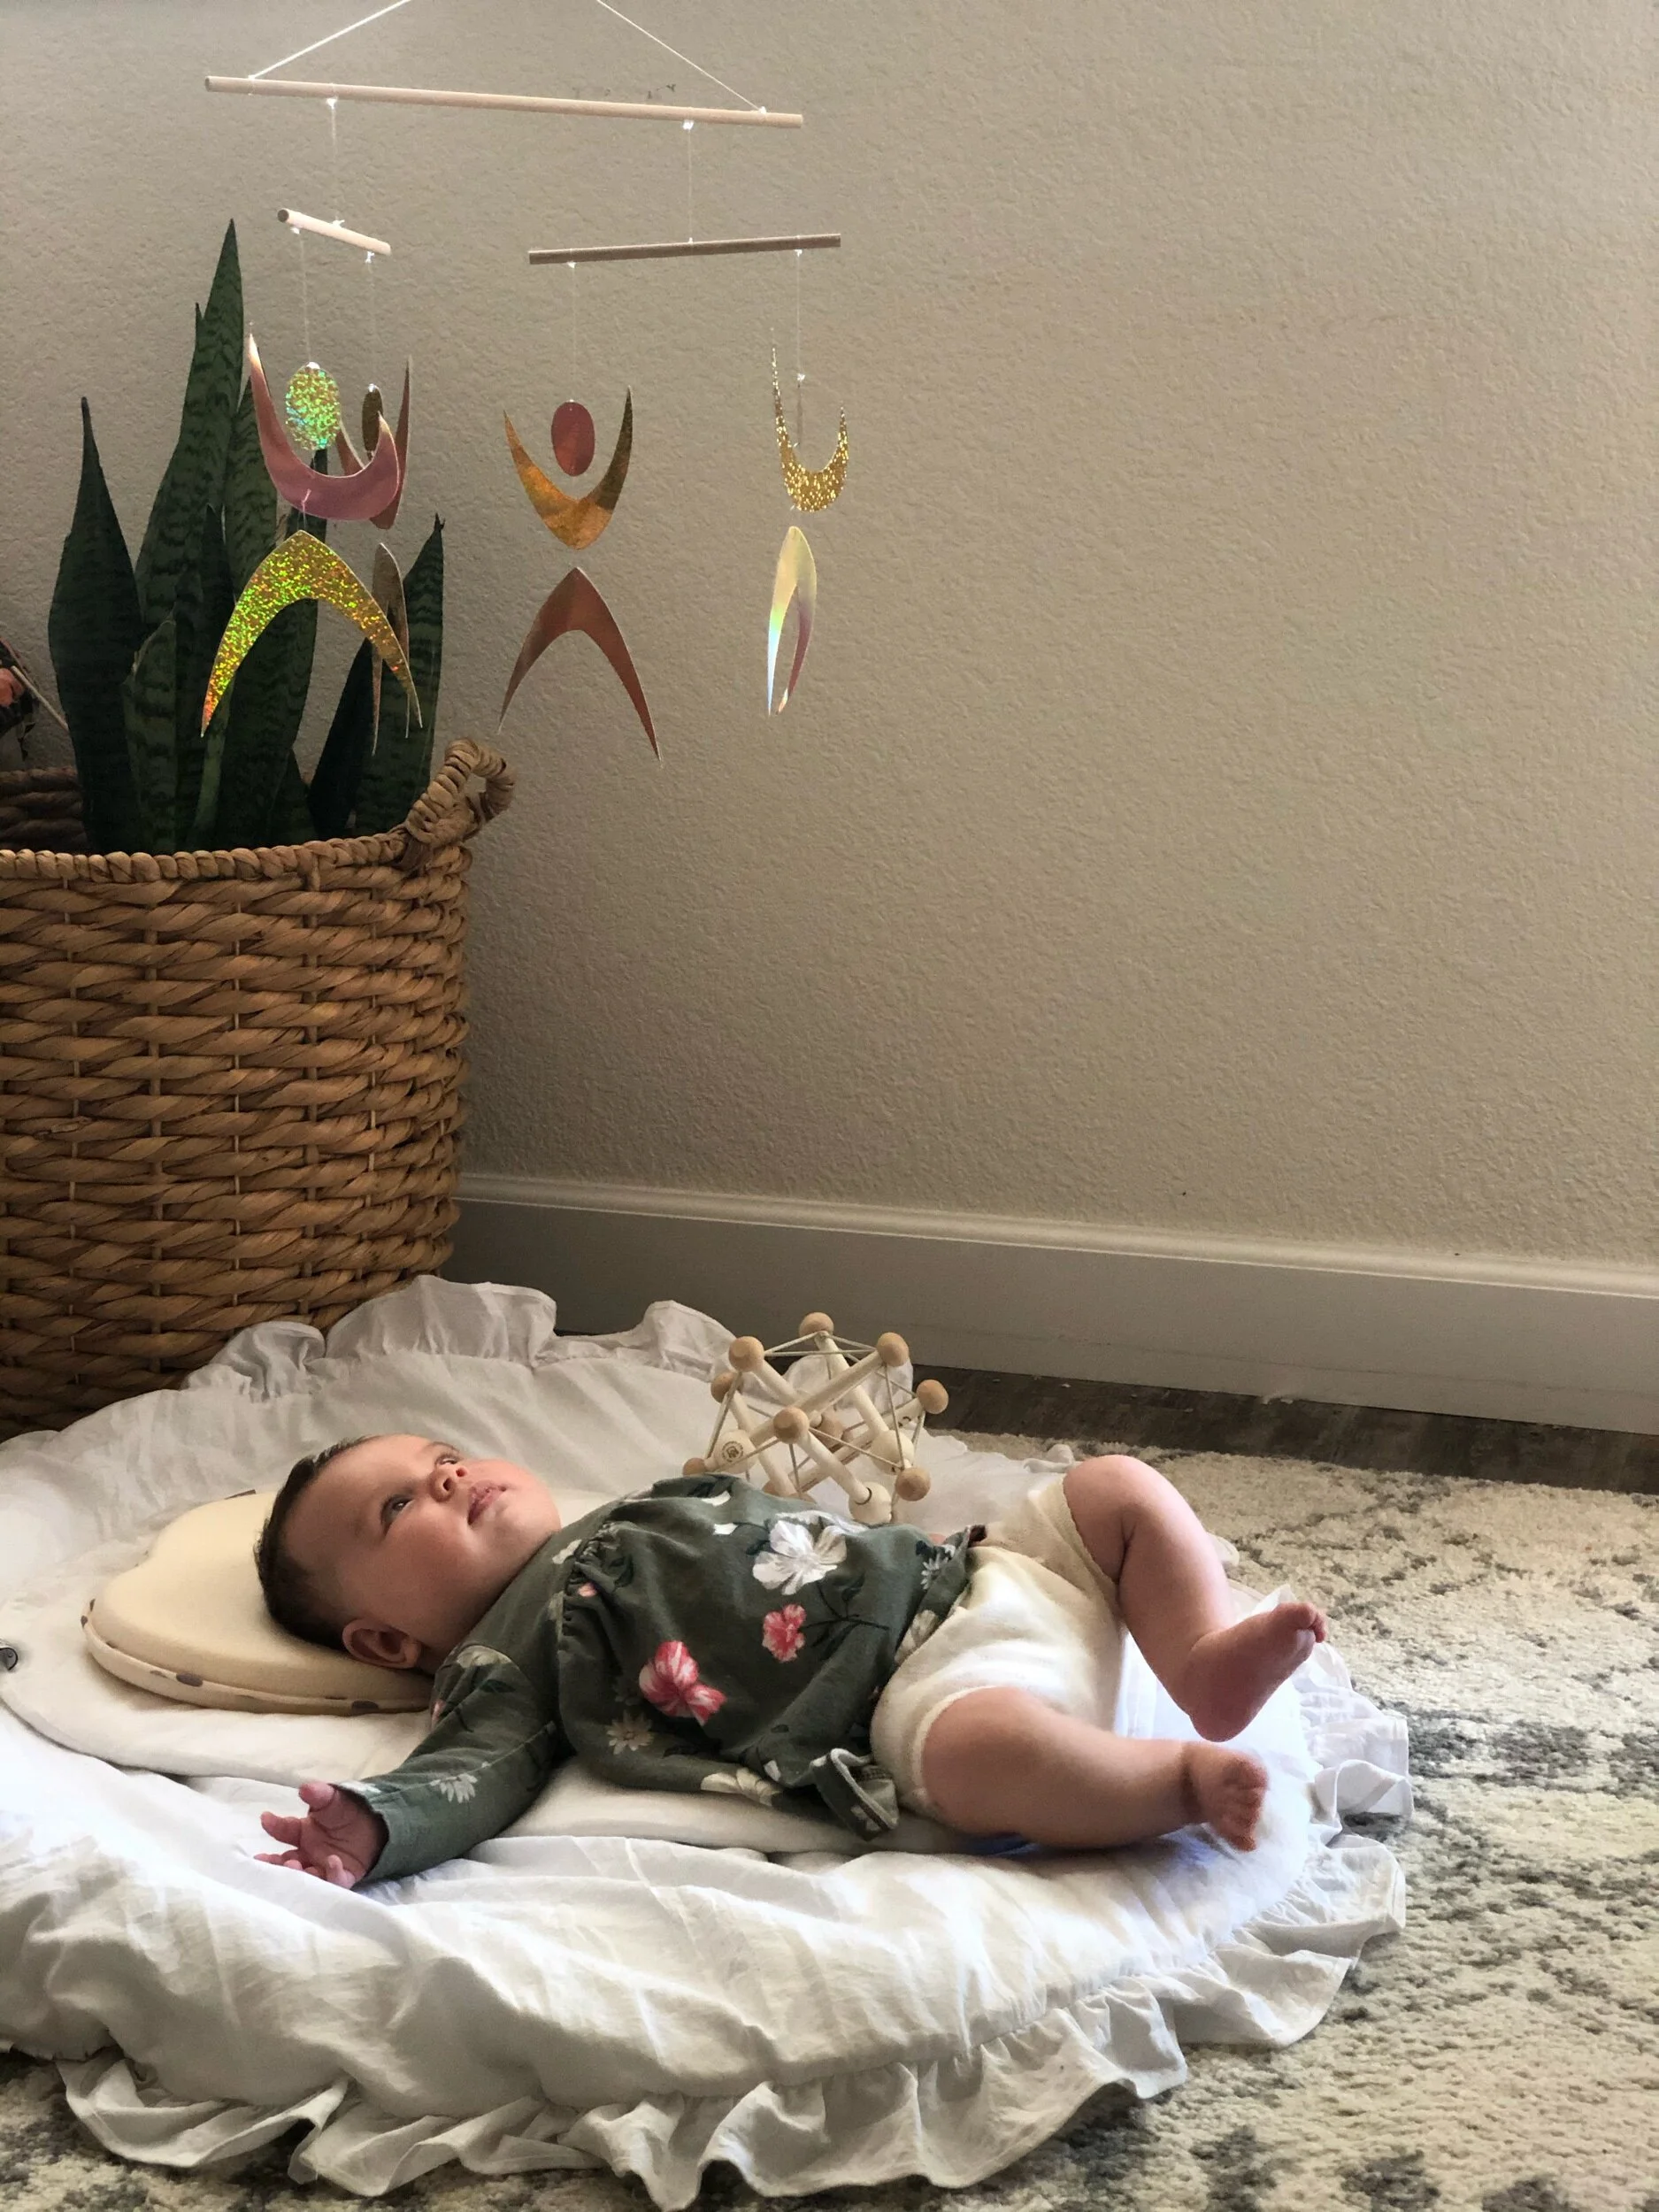
Dancers Mobile
Another month has flown by! This was our first full month sheltered in place. It’s been strange times, and focusing on Dahlia’s rapid development has surely been a distraction from everything else going on. This month her visual development seems to be skyrocketing. She is craving a lot of visual stimulation, and new things to look at. The end of the second month, Dahlia went through the second developmental “leap”. The second leap is the leap of patterns, and being able to recognize simple patterns in the world around her. This has become apparent this month, as she focuses deeply on patterns on the wall and on her materials. During this time is when baby’s often discover their hands and may practice controlling them. Dahlia spent a lot of time this month figuring out how to make a bell jingle tied to a ribbon, and has learned to mouth her own hands for self-soothing.
Month 3 brought many new and exciting changes in Dahlia’s development, and the materials brought out during this time allows her to practice these new skills she is acquiring, and master them.
Activities
Gobbi Mobile 7-10 weeks

Gobbi Mobile
The Gobbi Mobile is made up of five spheres covered in thread, in a color gradation. This mobile highlights the different color shades of a single color. This can be shades of blue, yellow, green, red, or whatever you choose! I chose to make mine in shades of a rust color. The Gobbi Mobile aides in visual development and visual discrimination, and is arranged from lightest to darkest in increasing lengths on the string. I made my gobbi mobile, you can buy this one.
Dancers Mobile 8-13 weeks
The Dancers Mobile is made with reflective paper and made to look as though they realistically move, or dance in the wind as it shines and reflects the light. This mobile has provided the most interest observed in Dahlia! The Dancers Mobile provides visual development, and more concentration and visual tracking skills as it moves slowly. You can make them, or buy them here.
Bell on a Ribbon 3-4 months
A ribbon is looped and sewn onto a bell and secured with elastic, allowing the baby to bat and pull on the bell. It is hung at chest height to baby. The sound of the bell motivates the child to want to repeat the batting, which offers stimulation for reaching, grasping, and batting. It also gives the child a point of reference to know where the bell is, and provides both auditory and visual experience. I used these bells and this ribbon to make mine.

Bell on a ribbon
Rattles and grasping:
Wood rattle 2+ months
A 4” wooden dowel with wood rings and spheres on the end provide a soft auditory experience. The baby can also mouth and grasp the rattle. I like to rub coconut oil on it to protect the wood, and also make it safe for baby to mouth. You can easily make your own, or this one is very similar to the one I made.
Rattle with bells 2+ months
A simple 4” wooden dowel with bells on each end provide auditiory and tactile experience. The baby can hold and shake it and experience the sounds it makes. You can make your own, or purchase one like this.
Other rattles 2-3 months
Bamboo cylinder, clacker, cube with bell, silver rattle - these all provide different auditory and tactile experiences.
Sqwish 2+ months
The unique shape of this rattle intrigues infants and is easy to grasp and hold. It encourages reaching, grasping, and two-handed play. It also helps with gross motor development and spatial recognition. At first, the baby can easily grasp it at any angle. As the baby gets older, they can begin to shake it and watch the beads move inside. They can also squish and pull it, and watch it come back to its original state. Get your own here.
Grasping Beads 3-4 months
Grasping beads are made up of five wooden beads threaded and knotted into a leather strap. The baby can hold them and manipulate and mouth them. The baby ca also transfer the beads from one hand to another, and also explore it by waving it around and banging it on a surface. This provides a visual, tactile, and auditory experience. I made mine using these beads, or you can purchase a similar one here.

Grasping Beads

Sqwish, grasping beads, wood rattle, and rattle with bells.

Rattle with bells
Napping on the Floor Bed

Sprout Kids floor bed
We have begun introducing naps on the floor bed. Up until now, Dahlia has been napping mostly where the family happenings are at either in her Moses Basket, on her topponcino, or in a Doc A Tot. These naps are often interrupted by the sounds of family life, so it felt like a good time to begun introducing napping on the floor bed in her room. She typically does one full nap per day on the floor bed (and its typically the longest nap!) This transition has been slow and gentle. We want her room to be a happy place, so these naps are in no way forced. When Dahlia is showing signs of sleepyness, we rock and soothe her and bring her to her room. We then lay her on her bed and often stay with her until she’s asleep. If she shows any signs of uneasyness, we pick her right up. Some days she doesn’t nap on the bed, and thats fine! It’s a slow, gentle process, and meeting her where she is at and what she is ready for.
The Montessori floor bed provides independence, as well as a means to be able to observe the environment and what is around them. In a traditional crib, the child’s view is obstructedby bars. Later on, when the child becomes mobile, the child is able to get in and out of bed independently. In a traditional crib, the only way for a child to get out is to climb, or cry for help. A common concern with using a floor bed with an infant is safety. The entire room is to be baby-proofed. There should not be anything the baby can pull down, outlets are covered, no hanging cords, and furniture is attached to the wall. The bed is only a few inches from the ground, so if the child rolls off, they will not get hurt. When the floor bed is introduced to the infant early on, the child has time to ease in and get used to it. It becomes recognized as a place to sleep. Possible distractions in the bedroom become a non-issue, because the child is used to sleeping on the floor bed and using it as such.
These are the activities I have been implementing with Dahlia during her third month of life. Her concentration continues to develop, along with her motor skills and hand-eye coordination. It’s such a gift to be able to witness her growth in development right before my eyes, and the absorbent sponge that she is!

This list is based off of both AMS (American Montessori Society) and AMI (Association Montessori Internationale) studies and manuals. I am trained and hold an infant/toddler montessori credential in AMS.


5 Tips for Stress-Free Distant Learning
Here we are, in the trenches and in the teaching role for our children. These tips help alleviate some stress for both child and parents and allow kids to take a bit of control in their learning situation in an otherwise out-of-control situation.
This post may contain some affiliate links. For more information, visit my disclosure page.

Freedom of movement to work- working on a rug.
Here we are, in the trenches of taking on the teaching role for our children. It has been a while (5 weeks, actually!) since I wrote my post about how we were handling 3 weeks of “crisis schooling” (I use the term homeschooling loosely because its not exactly what this is). When I wrote my first post, we thought schools were only going to be closed for a few weeks. Boy were we so naive back then, weren’t we cute? Now that schools are closed for the rest of the school year, I have implemented a few things to streamline the transition to learning at home. These tips help alleviate some stress for both child and parents and allow kids to take a bit of control in their learning situation in an otherwise out-of-control situation. I am a Montessori toddler teacher, and my son attends Montessori school, so while many of these tips come from my background, they are helpful for any method of education.
1. Create a Schedule
Creating a schedule is very underrated. It’s easy to just go with the flow and let the days just happen, but I notice how much more focus my son has when he has a schedule to follow and knows what to expect for the day, and how much more grounded he is. Create a visual schedule, for younger children this can even include pictures, older children can have it written out and easy to see. I don’t like to put time tables on the schedule (ie reading at 10:00am) because I feel like it puts more constraints and pressure on the day, which in turn can cause more stress. The order of what is to be done is just fine, and allows the child to know what is coming next. I like to use a white board like this.
Older children can create their own schedules, which allows them control of their day. I make a flexible list of what needs to be done for the day, and my son writes out the order of which he wants to do it, and details if needed (for instance- what our outdoor activity for the day will be or what he will have for lunch). Putting the schedule in the child’s hands also gives the opportunity to learn time management skills.
2. Prepare The Work
I can’t say this enough. In a Montessori classroom, this is known as the “prepared environment”. While it takes more time to prep in the beginning, it creates order for your child and allows them to see all of their work they will be doing, and makes the day easier. I spend Sunday night printing out all of the work for the week and separating it out into the different subjects so I can see what needs to be done for the week, and how to split up the work by day so its manageable. Every night, I put the work that is to be done the next day out on a shelf, and spread out so it is all visual (as opposed to just stacked in a pile). I use a shelf like this.
3. Create an Independent Work Space

Organized by subject and labeled using embosing labels.
Having a designated spot for all the school work so it can be laid out and organized brings out a sense of order, for both parent and child. This can be created with a shelf with spaces for each subject, so the work for each subject is easy to see and manage. I have even labeled each section with a labeler (my favorite is this one). This allows for the child to take control of their work, rather than having to wait for Mom to hand them their work, and who doesn’t feel more relaxed when their work is organized?
Don’t have room for a whole shelf? Even a paper organizer that allows each subject’s paper work separated out will do, or even folders for each subject with the days work in each.
Along with the designated work space, also provide areas to do the work. One of my favorite tools from Montessori is a work rug. Sometimes it’s easier to work on the floor, with more space to spread things out for a better visual as opposed to a table. Having a rug to put it all on keeps things a little more organized. Allow your child to work where they are most comfortable, and that could change by the hour! The freedom of movement really helps reduce stress that can come with school work and feeling stuck. Allow them to work at a table, on a rug on the floor, with a clipboard on the couch, or our favorite- outside!

Work station. Shelves separated by subject and labeled
4. Explain the Expectations
As we start our day, I give my son a recap of the work that is to be expected for the day. I show him what worksheets he is doing for each subject. This way, he knows the expectation of what he needs to get done. It isn’t a surprise, or unknown. He is able to manage his day and his time without feeling overwhelmed or that there is no end to the work he needs to accomplish. We as adults feel calmer when we know our expectation of work that needs to be done, and so do our children.
5. Give You and Your Child Grace!
You can have everything planned out, and some days it is just more challenging to stay on task and focused, and that’s okay. Adults have those days, and so do our kids. Give yourself and your child grace! If you see they are getting overwhelmed or stressed and anxious, save that work for later, save it for tomorrow, or just skip it altogether. We are all doing the best we can, and it’s okay to throw that fractions worksheet out if it’s causing stress and frustration.
Don’t forget, we are all in this together! I hope some of these tips help, and bring your home peace and grounding.


Simple Sourdough Bread
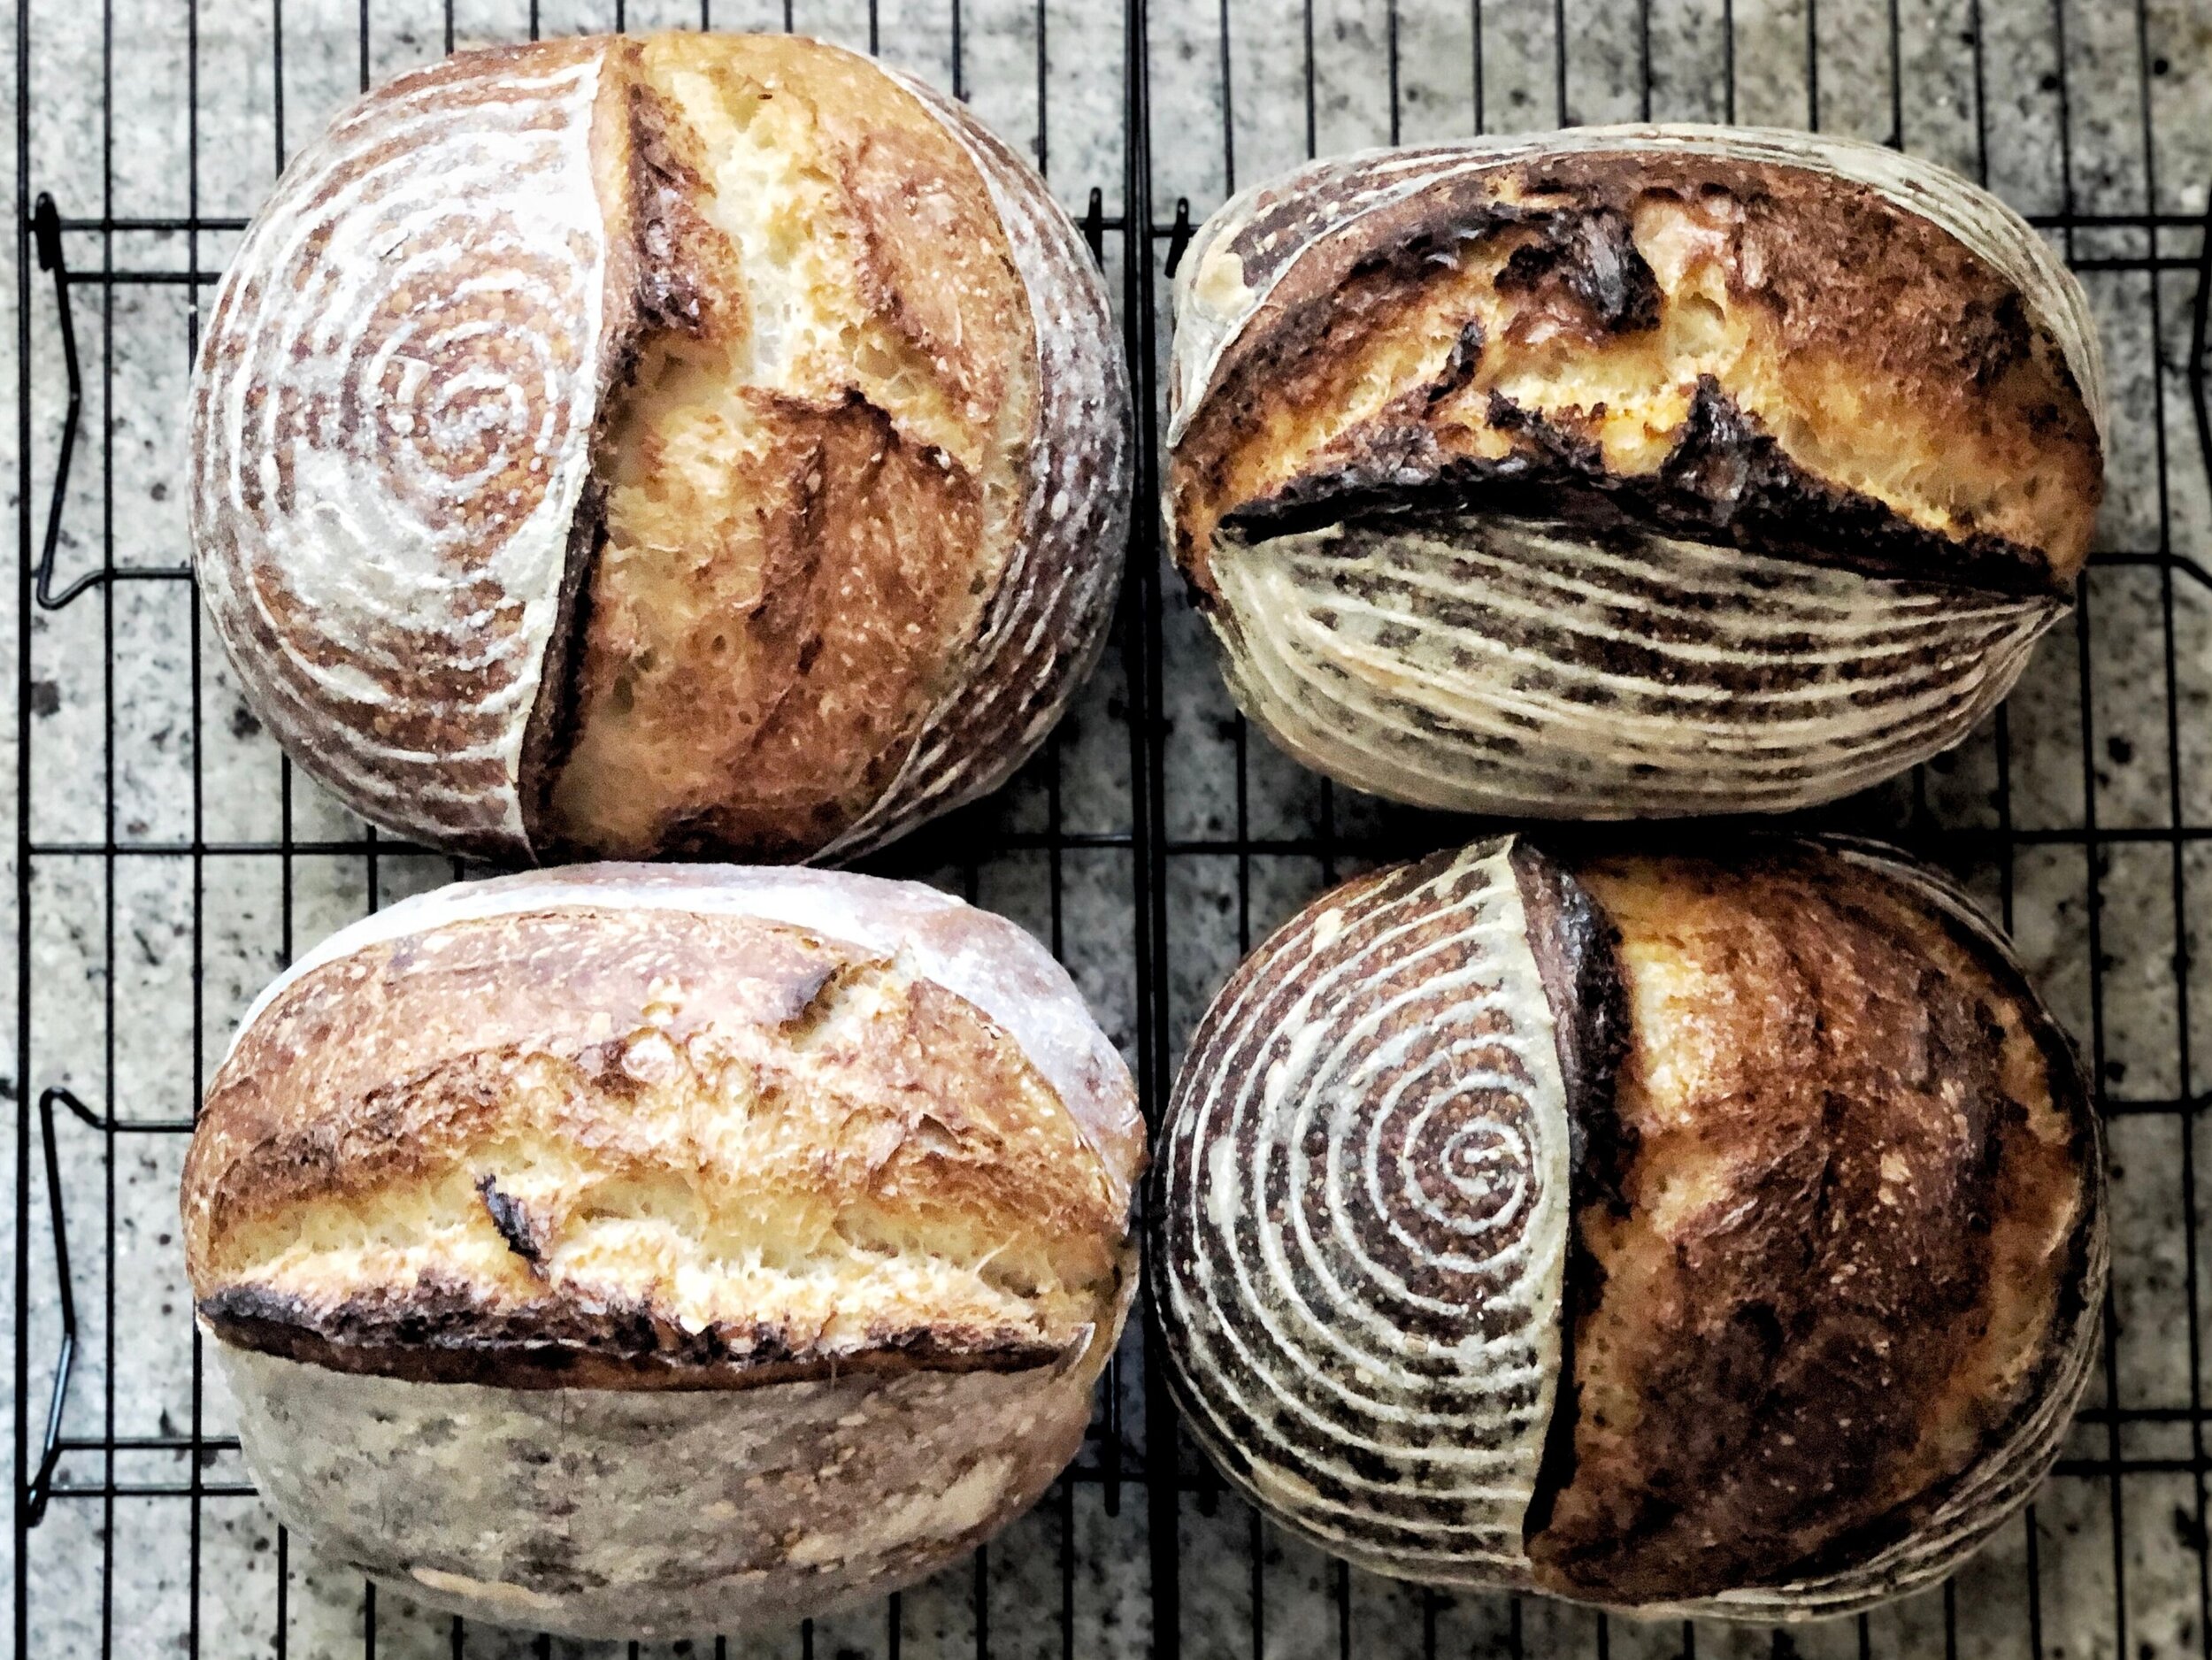
So you want to make sourdough bread? When I first decided to dive into the world of sourdough, it was very overwhelming. This is my no-fuss, simple sourdough method and sample schedule. It is great for both beginners and experienced bakers who want an easy recipe, but still get artisan bread results.

So you want to make sourdough bread? When I first decided to dive into the world of sourdough, it was very overwhelming. All I wanted to do was bake a simple loaf of bread, but I wanted it to taste good and be done right. With a quick search, there are so many different methods out there and so many different levels of mastery when it comes to this sticky, bubbly dough. Making sourdough bread is a process that teaches patience, and learning to trust all your senses. It is not about simple measurements, but instead is about learning how your dough behaves, and working with it. The reward at the end is no other feeling, the moment you pull out a beautiful naturally risen loaf of bread.
This is my no-fuss, simple sourdough method and sample schedule. It is great for both beginners and experienced bakers who want an easy recipe, but still get artisan bread results. This is also a great schedule that fits into a work schedule, so you can make fresh bread during the week!
This post may contain some affiliate links. For more information, visit my disclosure page.
What You’ll Need
Ingredients:
Active sourdough starter. I made mine by following this video.
Bread flour
All purpose flour
Sea salt
Supplies:
Food Scale Sourdough bread is more predictable when everything is measured by weight. I was a sceptic, but having a scale in my kitchen is now my more favorite tool!
Dutch Oven or Clay Bread Baker This doesn’t have to be an expensive high-end dutch oven. In fact, my little clay baker I found at a thrift store produces better results than my dutch oven, in my opinion! Use what works. I have even used a roasting pan with a lid.
Bowl Scraper It makes handling the dough much easier when taking it out of the bowl.
Bench Scraper Another tool that is necessary when handling and shaping the dough.
Parchment Paper You don’t want your dough stuck to the pan!
Banneton- These specialized baskets made for proofing the dough really upped my bread game and produce better results. The shape of your banneton depends on what you are using to bake with. Get a round one if you’re using a dutch oven, and an oval one if you’re using a clay baker. You can also use a bowl and towel.
Danish Dough Whisk Optional, but I like using it while stirring my dough.
Lame Knife Optional, for scoring the dough. You can also use a regular sharp knife.
Sample Schedule and Instructions:
Day 1
3:30pm Feed starter
I like to feed my starter with rye or whole wheat flour. These flours contain more bacteria for the yeast, and often produce a more active and bubbly starter. When the starter has doubled in size, it is ready for baking. Depending on the temperature of your home, your starter could take longer or shorter to double in size. When my house is extra cold or extra hot, I put my starter in the oven to give it more of a consistent temperature. Turning the light on in the oven produces just enough warmth for a happy starter if your house get very cold. You can put a rubber band around the jar holding your starter to give you a line on where it began, so you can visually track its growth.
I follow this recipe when feeding my starter
25g starter (discard the rest)
25g All purpose flour
25g whole wheat or rye flour
50g water
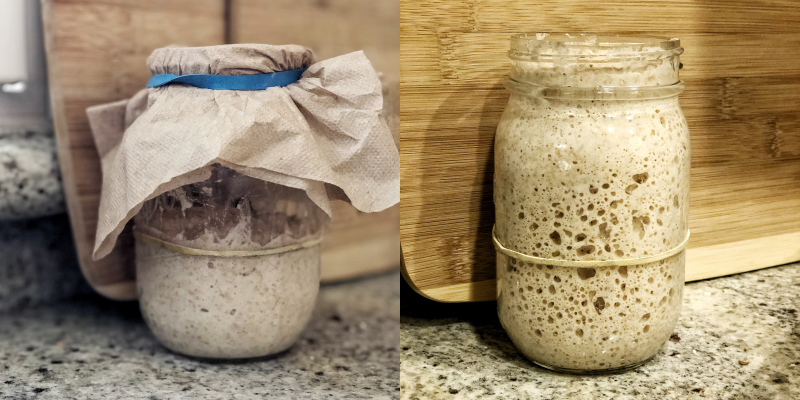
My starter when I first mixed it, to 5 hours later and ready for baking.
8:30pm Mix dough
My starter takes roughly 5 hours to double in size. Yours may be ready earlier or later. Once it has doubled in size, it is ready for making dough!
50g active starter that has doubled in size
250g Bread flour
250g All purpose flour
350g luke warm water
9g sea salt
I like to use half bread flour and half all purpose. Bread flour has a higher protein content, and helps the dough rise more when baking. All purpose flour gives the dough a more airy texture and flavor. I begin by first mixing the water and starter, to ensure the starter gets fully mixed. I then add the flours and salt. I combine all of the ingredients using the danish whisk, and then finalize the mixing with my hand, to ensure all of the flour is mixed in. Tip: Wet your hand first to get less dough to stick. Expect to still get messy!

Left to right: Starter, starter + water, flour + salt, mix with danish whisk, after mixing by hand & ready to rest
You don’t need to mix it fully, it will be lumpy. Let is rest for 30 minutes covered with a damp towel or plastic wrap.
After 30 minutes it is time to give the dough a stretch and fold. This helps to strengthen the gluten, producing a strong and tight, yet airy bread. First loosen the dough from the sides of the bowl with your hand. Then pick up a corner, stretch just enough as not to break the dough, and fold over the top. Grab the next corner and repeat. Do this for about 1 minute, until a ball begins to form with the dough.

Stretch and fold. After stretching each side and folding down towards the center until you feel the dough strengthen (about 1 minute) it is ready for bulk ferment.
9:30 pm Bulk Ferment

Now it is time to bulk ferment over night. Cover the bowl again with the damp towel or plastic wrap. Again, you can put your bread in the oven to ensure it has a consistent temperature all night long. During the winter I keep the light on as well, to give the dough a little warmth. Let it sit for 8-10 hours.
Day 2
7:00am Preshape
Take the dough out using a bowl scraper. I try to take it all out in one big scoop by first scraping all the sides. Try not to handle it too much. I then preshape it into a ball using my bench scraper. Make sure to flour your hands and the bench scraper. I do this by pushing the bench scraper into the bottom of the dough ball, and turning it slightly. As you keep doing this, the dough begins to form a ball and tightens at the top. Again, try not to handle the dough a lot. You can even just let the dough rest as-is. Once in preshape, let rest for 10 minutes.

From left to right: After resting, before preshaping, and after preshaping.
7:15am Shape
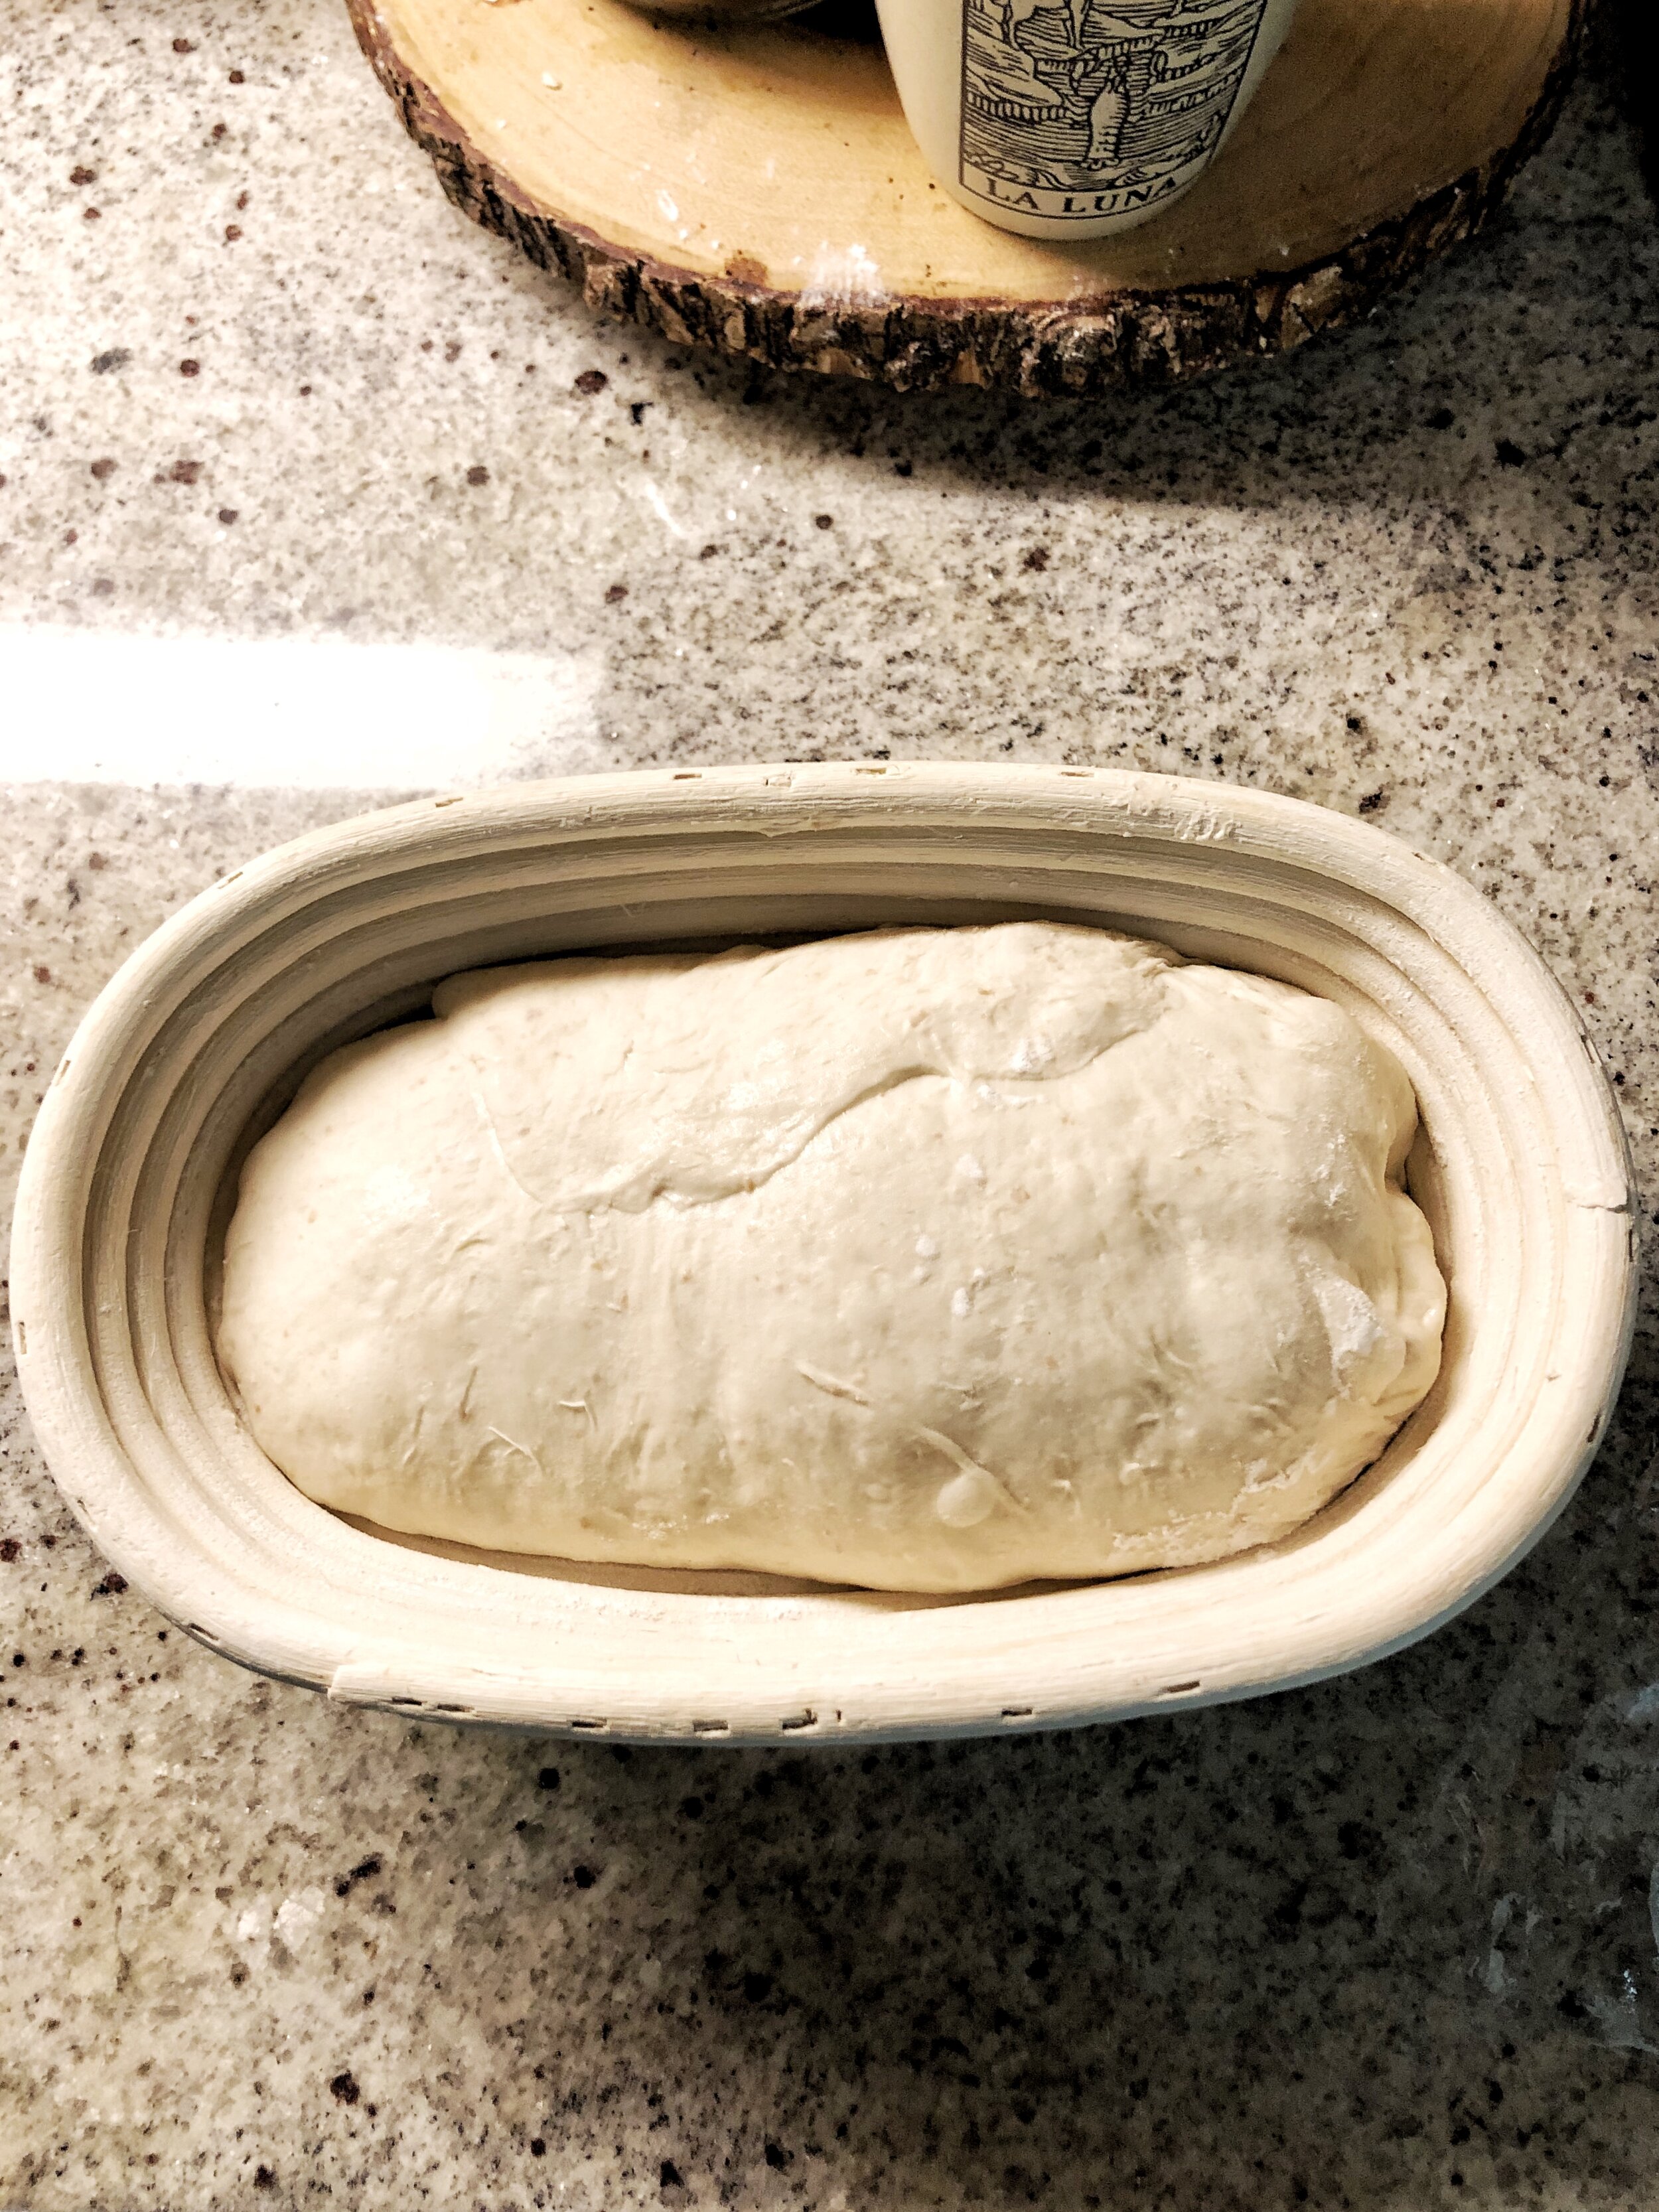
After shaping. Placed in the banneton.
Flour the top of the dough ball and flip it over using the bench scraper. Take the right side (using your bench scraper to help if the dough is sticky onto the surface) and stretch is over toward the left side. Then take the left side and stretch it over toward the right. Next take the bottom and stretch it toward the top. Finally, take the top, and roll it down. Depending on the shape of your proofing basket or bowl, you can keep it round for a bowl shape, or roll it tight so it becomes more oblong for an oval shape. The key here is to try to make it tight. I then flip it back over and give it a generous layer of flour. Rice flour is great for creating a nonstick surface, but any flour will work. Gently pick up your dough ball, and place it into the proofing basket, face down. Cover it with plastic wrap or a towel, and let it proof at room temperature for 30 minutes to an hour.

Shaping
8:00am Cold Retard

Ready for the fridge.
At this time, I like to give my dough a cold proof, or retard the dough. This firms it up so it holds its shape better. I place the dough and basket into a plastic bag, rubber band the end, and put it in the fridge for at least an hour. It can stay in the fridge all day long if needed, I have even heard of people letting the dough retard for nearly a week! (I have never let mine sit that long, so don’t take my word for it) if you’re running low on time and want to get your dough baked, you can also stick it in the freezer for 15 minutes, or bake it without the cold retard. In my personal opinion, the cold proof gives the dough a better shape overall.
10:00am Bake (Turn on the oven at 9:00am)
Preheat the oven with the pan inside at 500°f 1 hour before baking. You want the oven and pan HOT. Take out the dough right before baking. I put cold dough directly into the hot pan. Tip: Use parchment paper! I cut my parchment paper so it has little handles, so I can easily take the bread out once done. Take the dough out of the fridge and out of the bag, place the parchment paper on the dough and flip over onto the counter. Quickly score your dough, make sure to go deep enough. Sometimes I need to make a few passes to ensure its a deep enough cut. The score will help your dough rise more, I like to do a simple slit down the middle. Place the dough right into the pot, and put the lid back on and straight into the oven. The lidded pot produces steam inside, which allows the bread to rise before the crust gets too hard. If there isn’t enough steam, the crust will harden before the dough rises all the way.
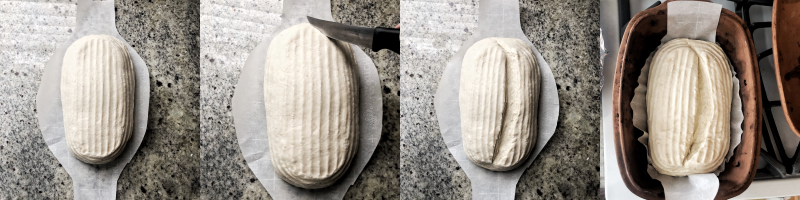
Scoring.
Bake for 20 minutes lid on at 500°f
Take off the lid, reduce heat to 450°f, and bake another 30 minutes until the crust develops a deep brown color.
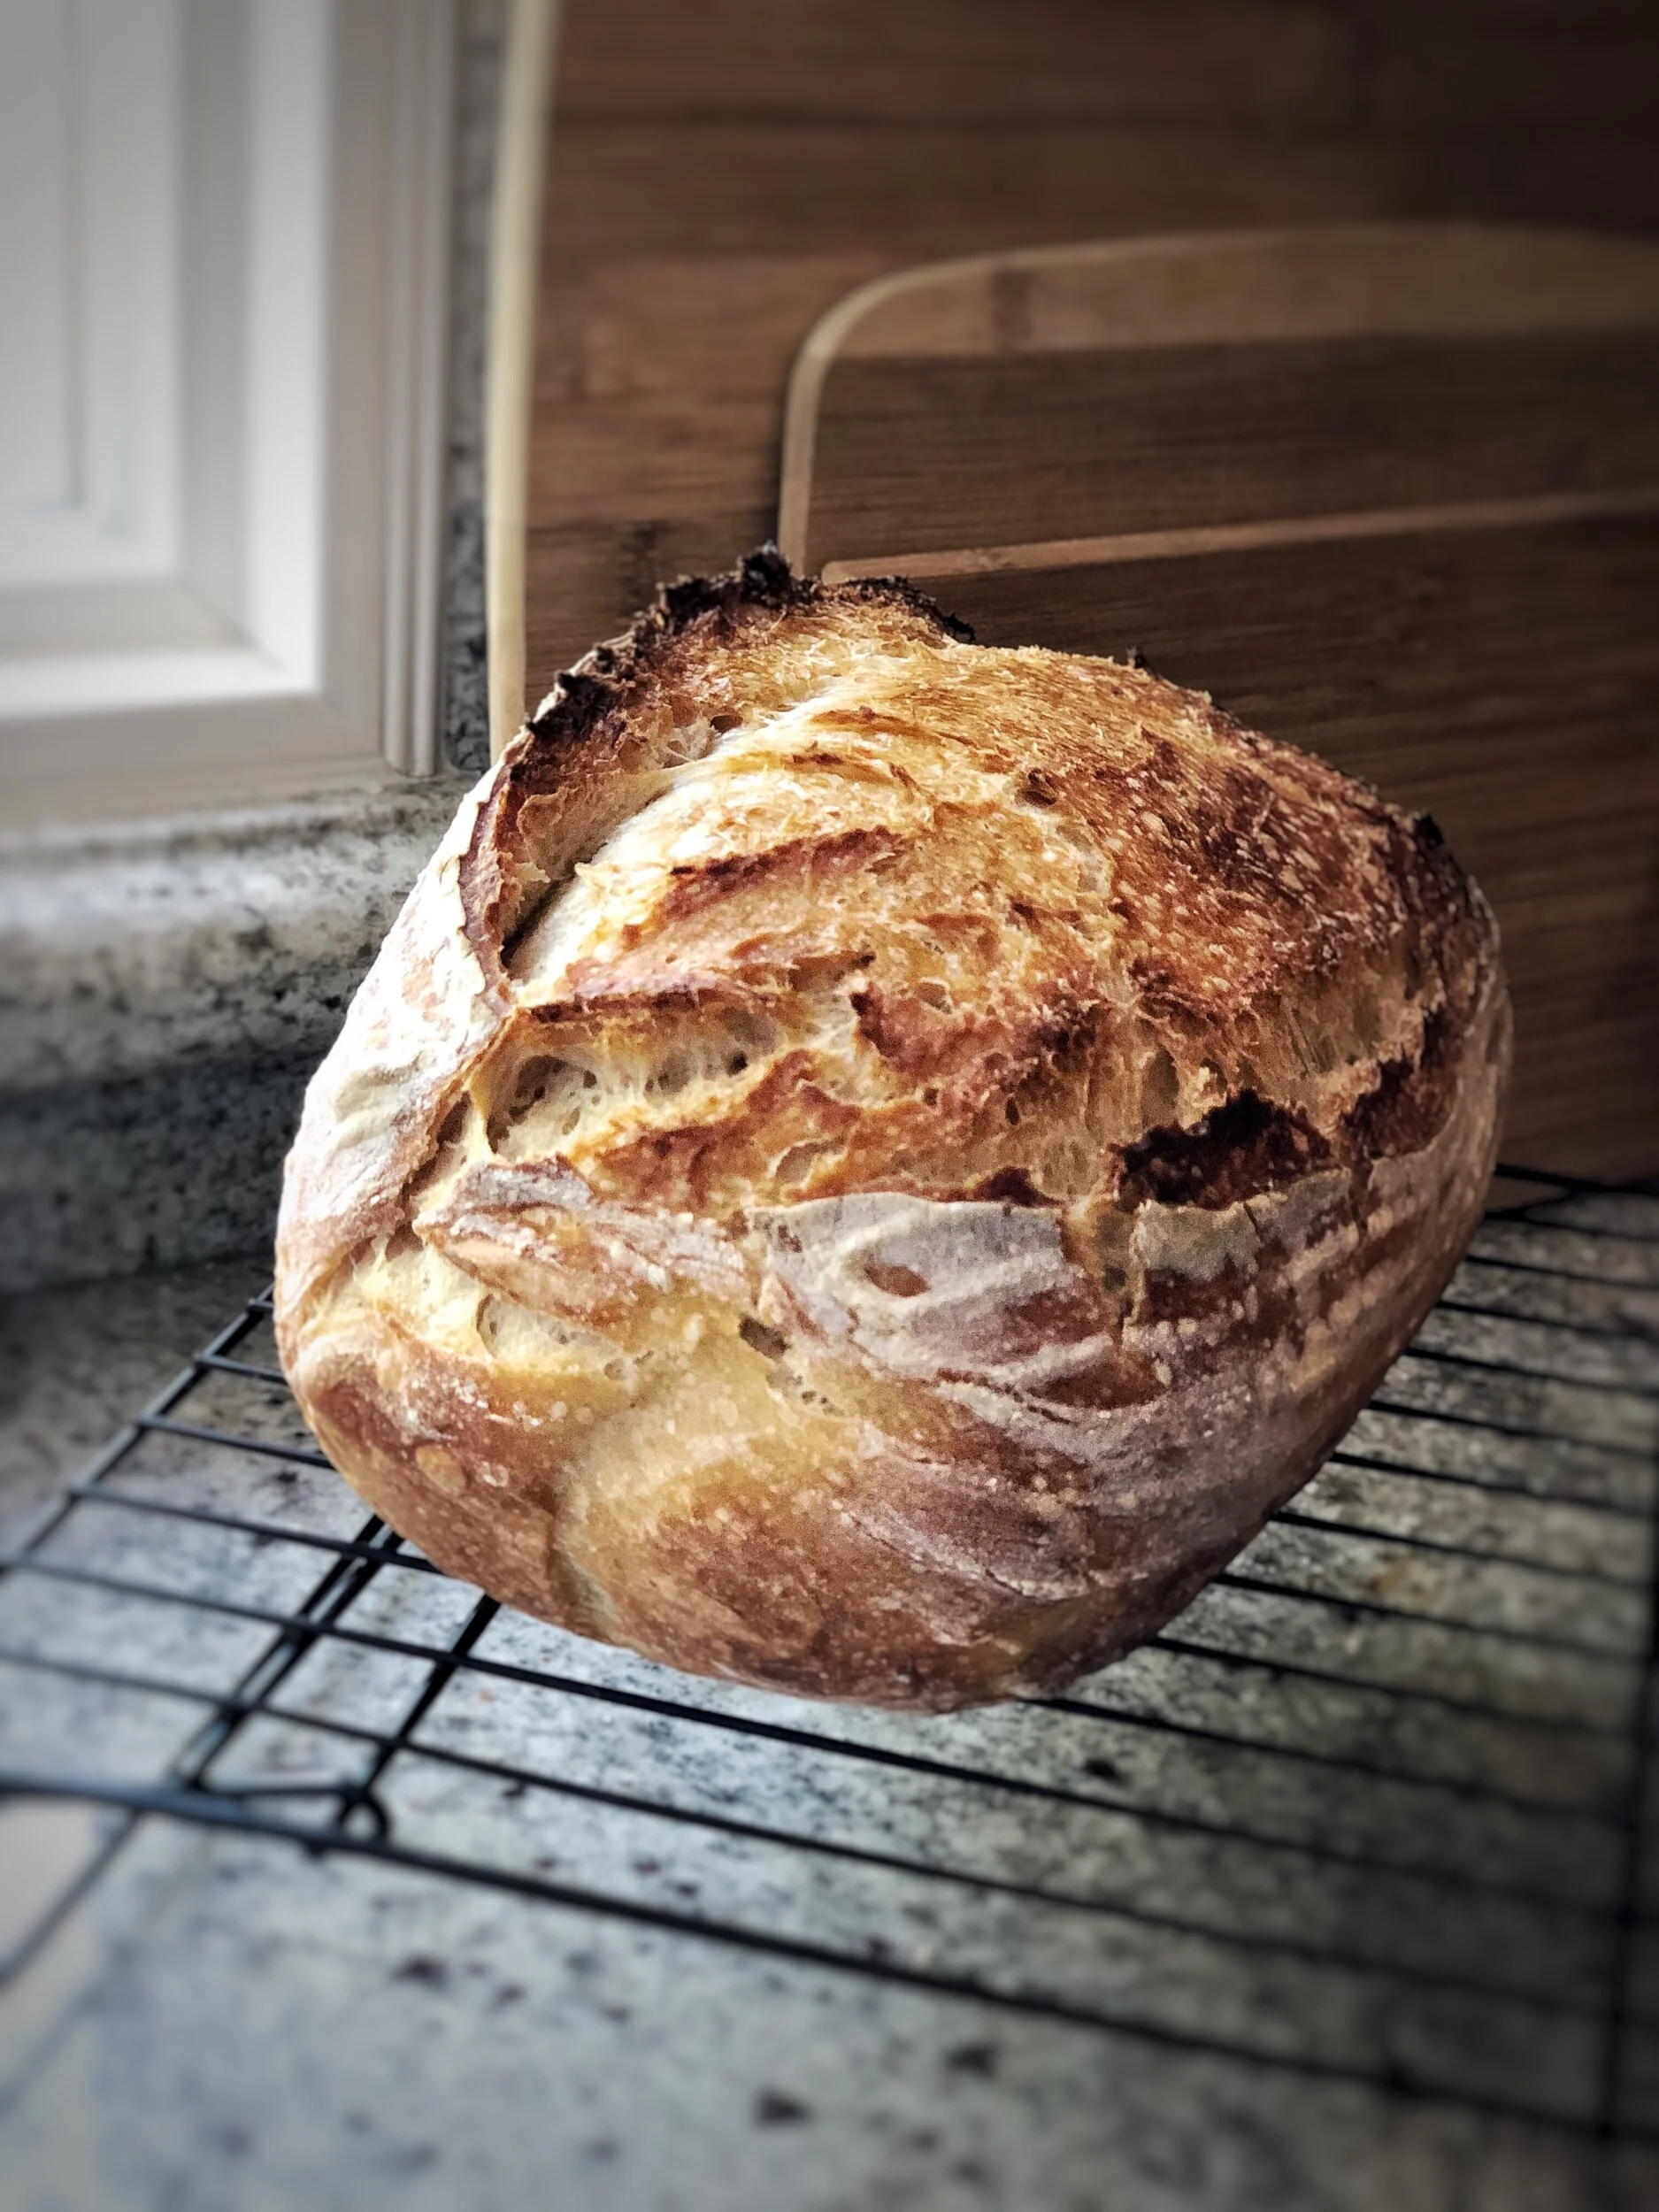
Take out, cool, and enjoy! Best served warm, with butter and sea salt. :)
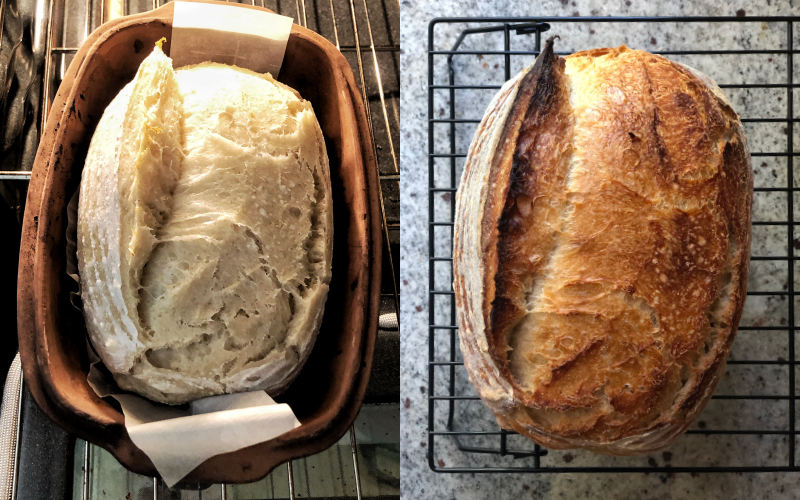
After 20 minutes in the oven with the lid on vs. the final product.
Shopping List
Bread Flour
All Purpose Flour
Whole Wheat Flour
Round Banneton (for dutch oven)
Oval Banneton (for clay baker)

DIY No-Sew Cloth Wipes
These easy to make no-sew cloth wipes are great to have on hand, and are so universal! Use them instead of paper towels, napkins, baby wipes, or even toilet paper!
Since when are wipes a hot commodity? With so many unknowns happening, and things like paper towels and toilet paper being treated like currency, I decided to make cloth wipes to have on hand just incase. They are very universal, and can be used as paper towels and napkins in the kitchen, baby wipes after being soaked or sprayed, or even what’s called the “family cloth”, thats right, reusable toilet paper (maybe not my preferred use, but to each their own). These are easy-to-make cloth wipes without any sewing.
This post may contain some affiliate links. For more information, visit my disclosure page.

Supplies:
Receiving blanket (or any flannel fabric)
Pinking shears
Directions:
Fold blanket into quarters. Cut into even squares using the pinking shears (this will keep the fabric from fraying). Then fold and cut those squares into quarters too. This results in 16 7”x7” square cloths. If using a flannel cloth instead of a receiving blanket, cut into equal 7”x7” squares.

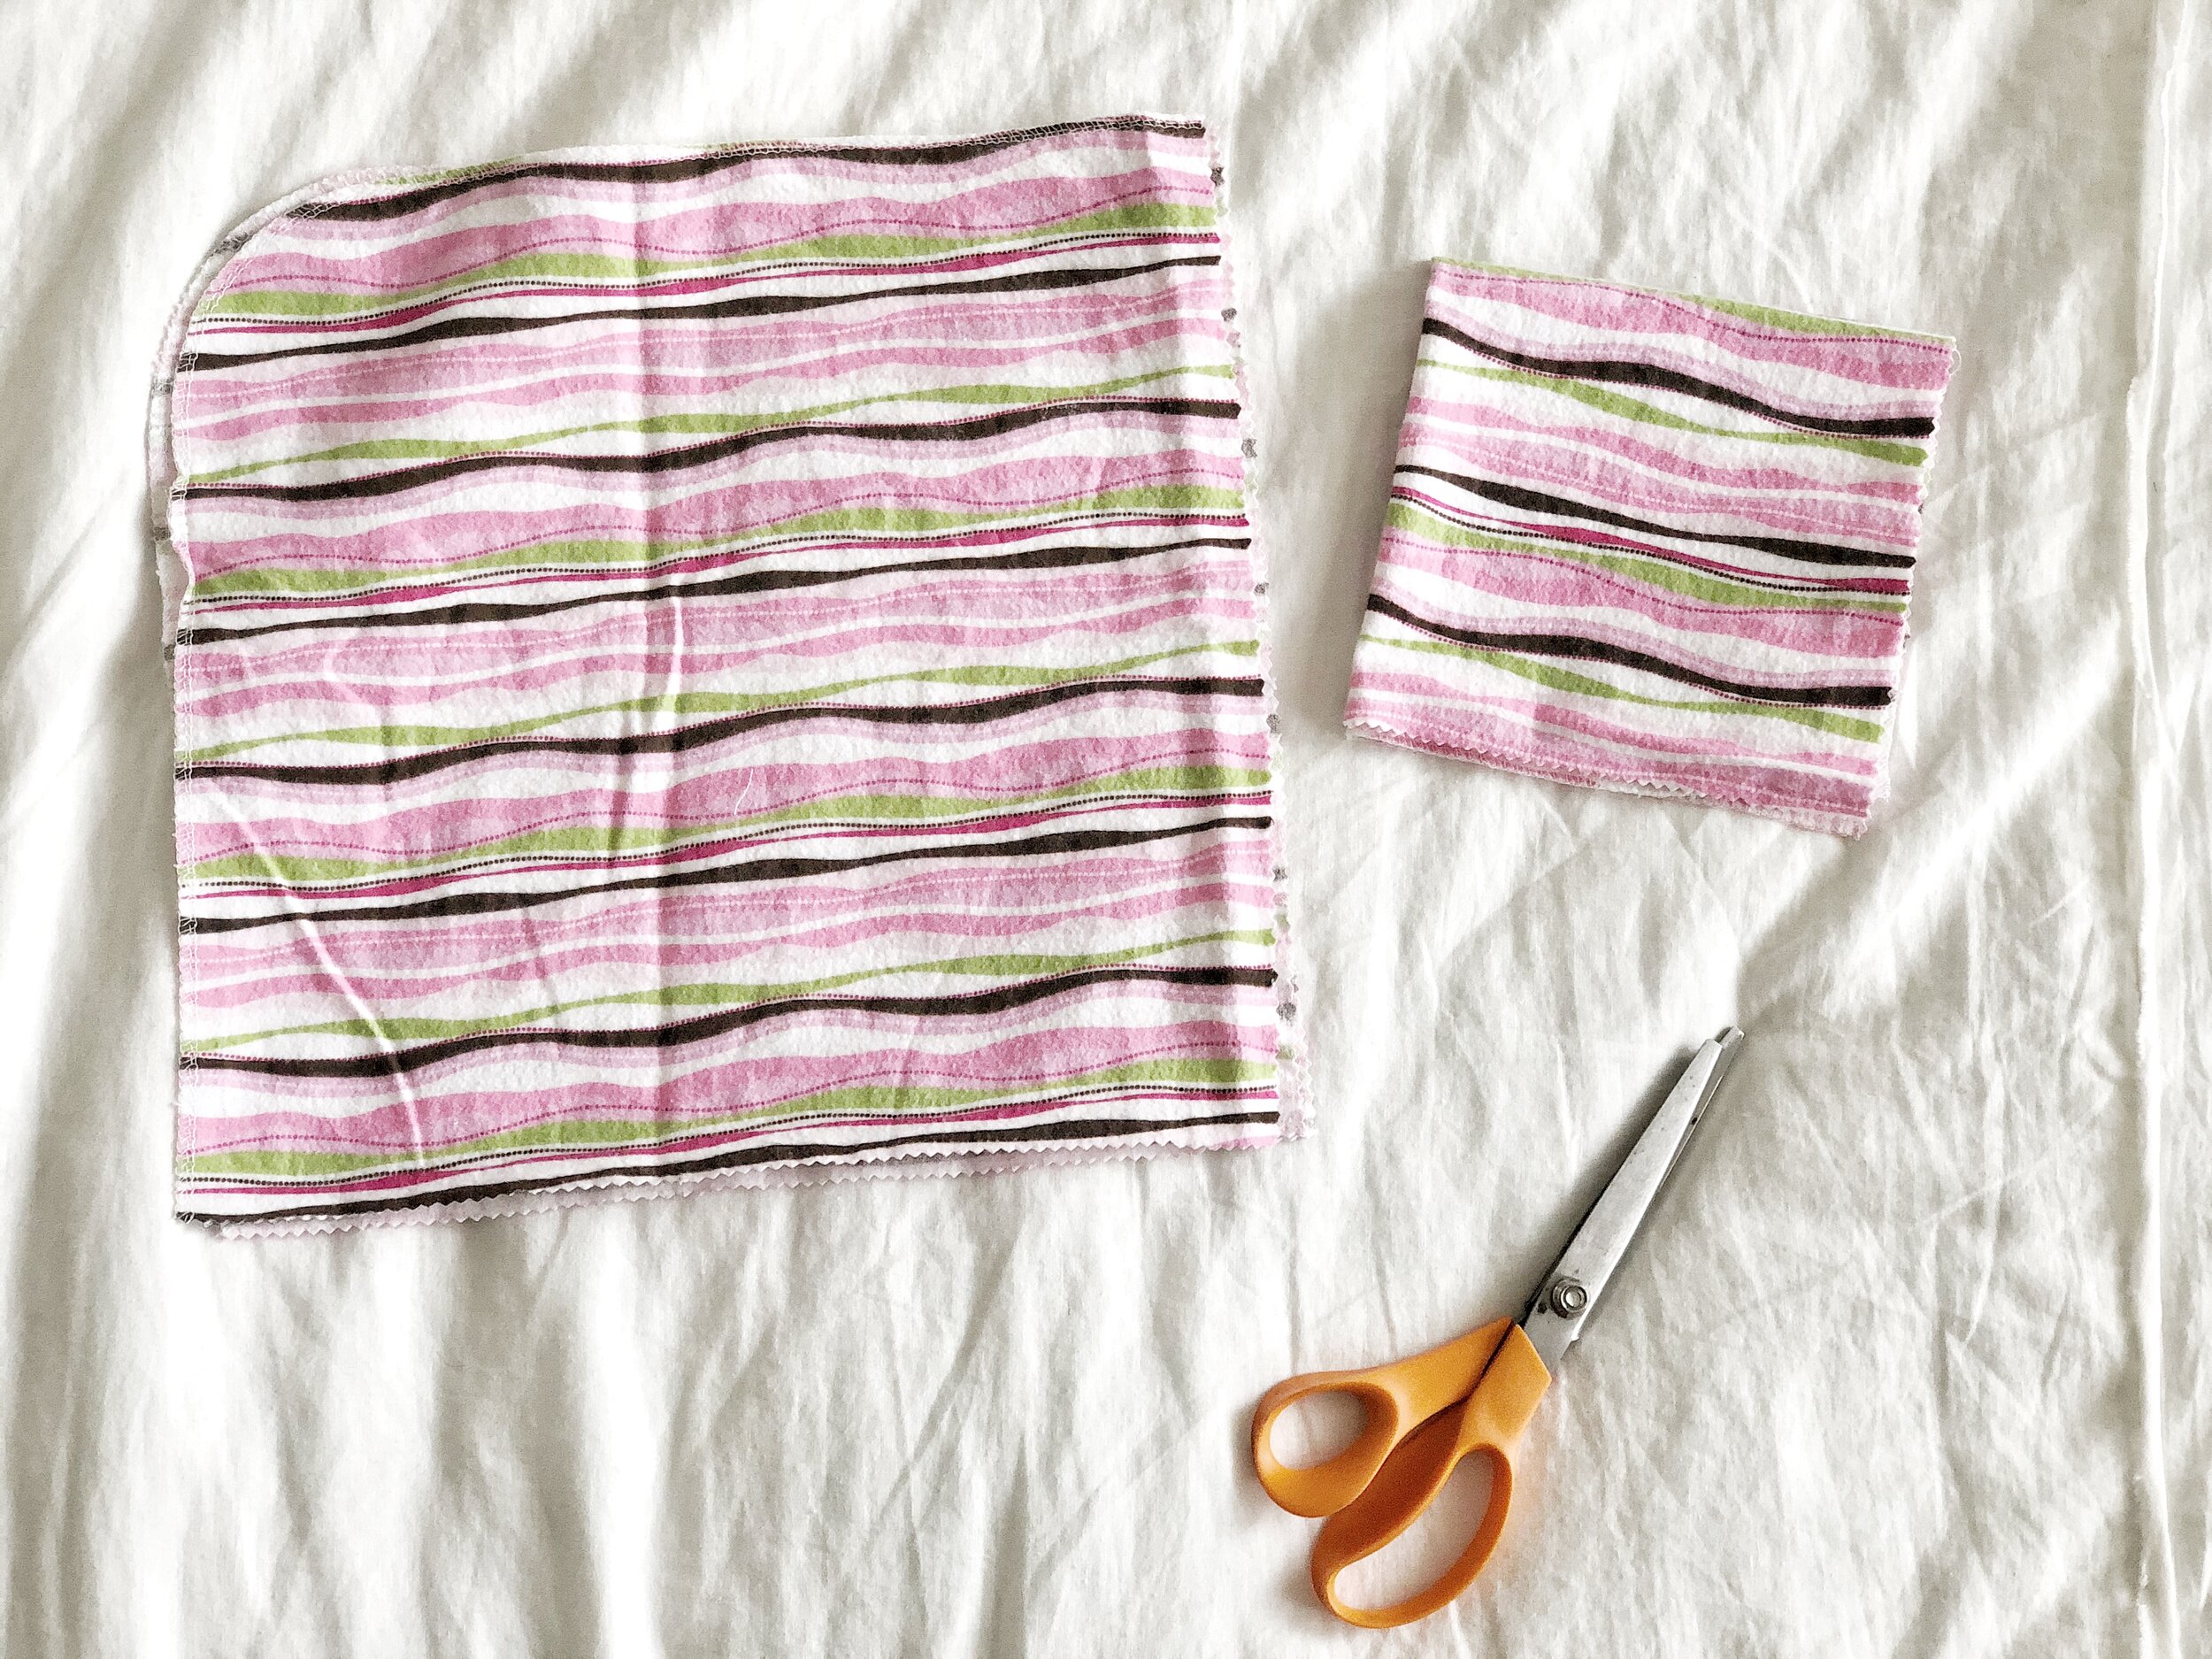
I made my cloth wipes using old receiving blankets. They can also be found through garage sale sites and thrift stores for those on a budget. These are the pinking shears I used.
Whether you want to be more eco-friendly, or you just are trying to be prepared for the possibility of a wipe shortage, having a set of cloth wipes is great to have on hand!


Montessori From Birth: Month 2
Montessori activities to do with your baby during their second month of life.
This post may contain some affiliate links. For more information, visit my disclosure page.
“The first essential for child’s development is concentration.”

Dahlia is already almost 2 months old! During her second month, we have continued offering a lot of visual development work. At around five weeks old, babies go through their first developmental leap. This first leap is known as the world of changing sensations. During this leap, babies go through a rapid growth in the development of their sensations, and become more interested in the world around them. Their visual range goes from just 10 inches, to being able to see beyond two feet. During this time, babies also begin responding to their caretakers as they take more notice in their surroundings. Due to all that is happening in her developmental stage, the focus this month is her visual development and grasping and exploring items around her.
Check out what we did month one here.
Activities
Black and White Book 4 weeks +
This is an extension to the black and white cards. This fold out book stands on its own, allowing the baby to observe the pictures independently while on the movement mat. This is a great activity to utilize during tummy time, giving the baby an added interest to look at. Tummy time is essential for strengthening the head and neck muscles, and practicing movement.

Observing the black and white book while doing tummy time.
Octahedron mobile 5-8 weeks
The octahedron mobile is the second of the Montessori mobile series. It is introduced once the baby begins to loose interest of the Munari mobile, around 6 weeks. The octahedron mobile provides more color discrimination and mental organization, with the three primary colors. It also provides visual tracking and 3-dimensional geometry, connecting our world to the 3-D shapes.

Gazing at the Octahedron Mobile
Observing the Home and Nature 5 weeks +
Now that the baby is beginning to notice their world around them, it is a great time to explore the house and outdoors with them. Stop at the mirror, the interesting light, the picture with a lot of patterns on the wall. Gaze at the tree’s leaves blowing in the wind, the flowers on the ground. Dahlia’s favorite thing to observe in our house is a Native American patterned rug hanging on the wall. Walk around and talk about the things you see and the baby seems to be looking towards. This allows them to see more of their environment and surroundings, and an understanding of their world.
Grasping:

Interlocking disks
Interlocking Disks
This is two wooden circular disks interlocked in the center. This beginning grasping work can initially be placed in the baby’s hand using their reflexive grasp. Once the grasp changes from reflexive to more intentional, the baby will be able to reach with a whole hand to grab the disks. An older baby will begin to do hand to hand transfer of the disks.
Crinkle Paper
Crinkle paper is excellent for babies to begin grasping. It is easy to hold in their hands, and has the added interest of the sound it makes when crinkled and squeezed. This gives both auditory and tactile sensory.
Ring with Ribbons (Ribbon Kite)
This one is easy to make at home. A wooden ring with colored ribbons tied on, the ribbon can be used for interest and holding above the baby for visual interest and tracking. The thick wood ring is easy to grasp, initially the ring can be placed in the baby’s hand. An older baby can wave it like a “kite”.
Rubber Ball with Protrusions
This rubber sphere with protrusions is great for beginning grasping. The baby can grasp it in all directions, and also teeth and suck on it. It can initially be placed in the baby’s hand and the child will manipulate it and suck on the protrusions. An older baby will begin hand to hand transfer with it, and may bang it against the ground and explore different ways of using it.

The ring with ribbons can first be held above the baby’s head for visual tracking.
This list is based off of both AMS (American Montessori Society) and AMI (Association Montessori Internationale) studies and manuals. I am trained and hold an infant/toddler montessori credential in AMS.
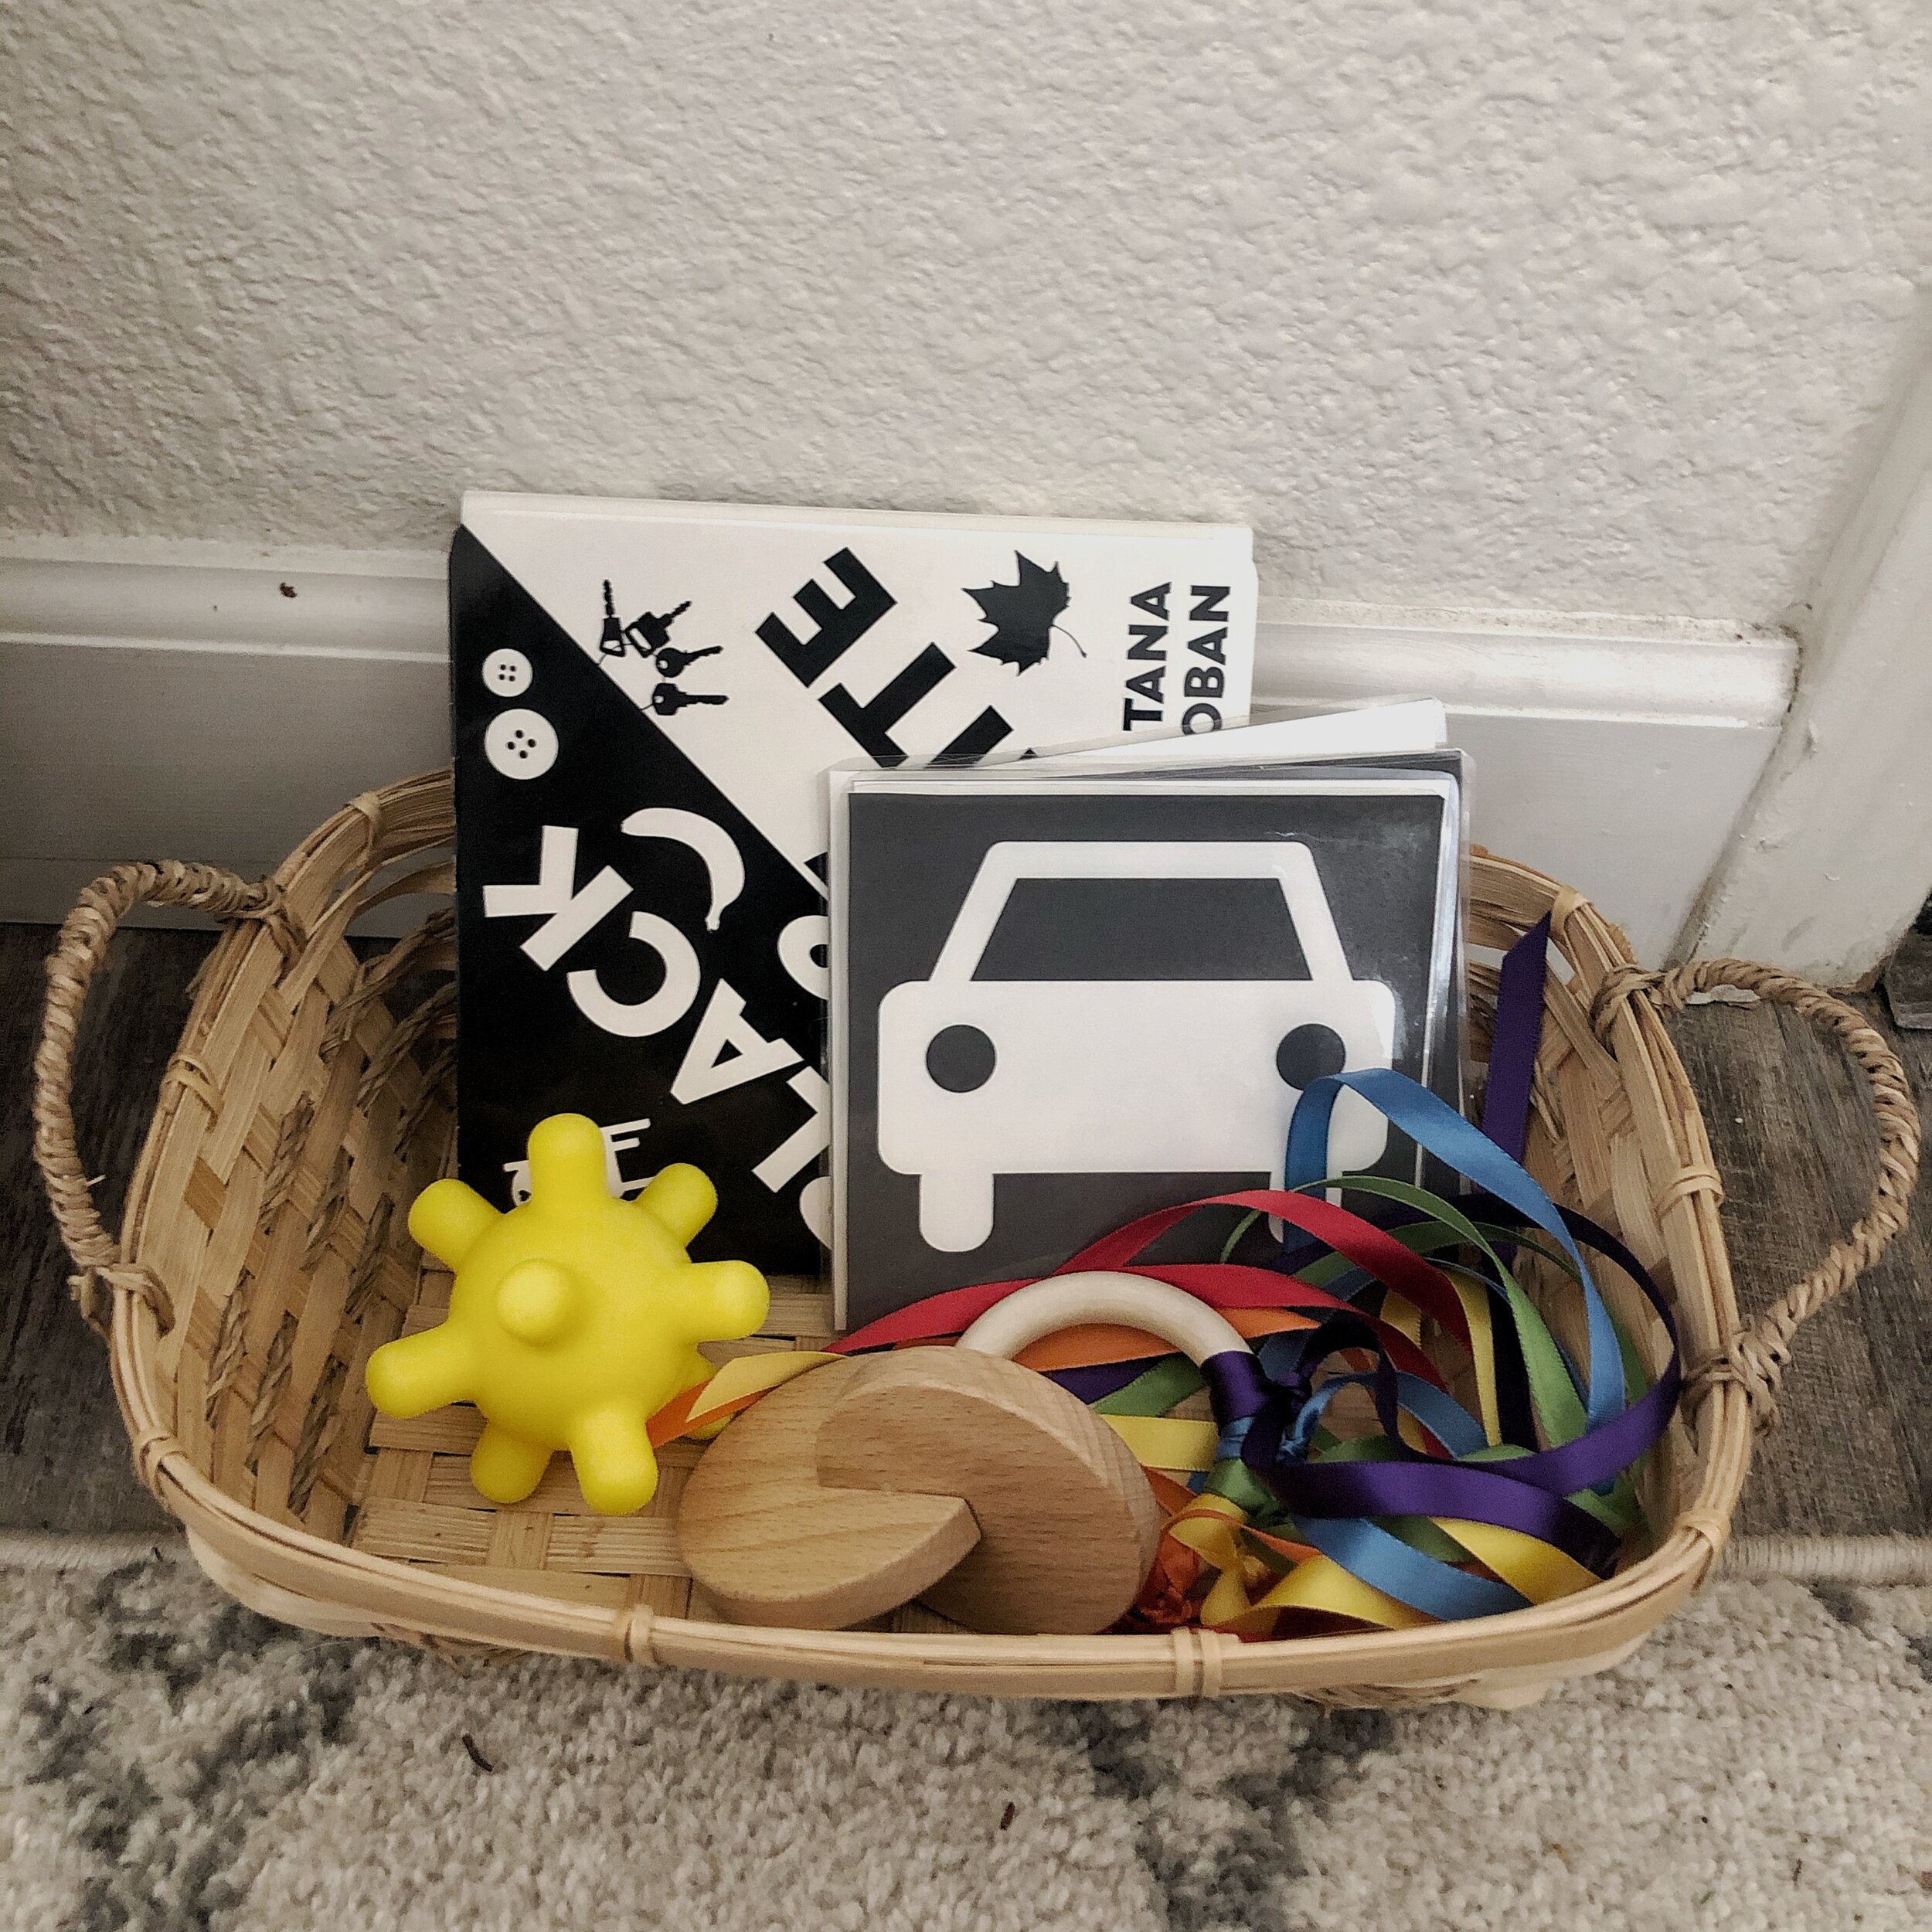
I like to display the toys in a basket in the movement space.


Montessori Schooling At Home
These closures are a reminder of what is needed in society today. To slow down, get that much needed family time, and relearn about ourselves. We have a chance to figure out our hobbies, get those things done around the house we keep telling ourselves we don’t have time for, and get that needed time with our kids. Ultimately, our kids need us, not the lessons.
This post may contain some affiliate links. For more information, visit my disclosure page.

Here we are. Suddenly having to homeschool all our kids due to school shut downs and shelter in place mandates. I had the best intentions. I looked at all those colorful, cute homeschooling schedules to follow. We woke up, went to our local coffee shop to support small businesses during this time, and came home. I explained to my 7 year old that this time isn’t meant to be a vacation. Schools are closed but we are still to be learning and gaining an education just as he would be doing at school. He said he understood. We had our agreement. Wonderful.
We got home, I sat down and got to work to getting an online program up and running that he could do, while I researched what else we would be doing for the weeks to come. First thing I tried doing was log into one of the online learning programs. Strike number 1. The gate-way was timed out. I tried the tablet, laptop, and my phone. It wouldn’t budge. I assumed due to the major influx they are probably having on their servers right now. I took a deep breath and harnessed patience. Finally I got to a screen. Timed out again. This continued, meanwhile my 6 week old begins to get cranky. I told the 7 year old to put the TV on for some background noise for her. Strike 2. Of course that doesn’t work, meanwhile the program gets me closer to signing up. I finally get through, fill out the info, and get to what’s supposed to be the home screen. There’s nothing. I try logging in on the tablet instead. Nothing. The patience is slowly dwindling. The baby is getting fussier and fussier by the minute. I quickly look for other online programs to take its place, some math ones, perhaps? I look, but they all seem like cheesy games. The baby starts crying again, the original program still wont load, and now we’re just sitting here, 7 year old is watching Inside-Out, baby is nursing for the fourth time, and the page still wont load, and now its already almost lunch time. Strike number 3, and we’re out.
I had the best intentions.
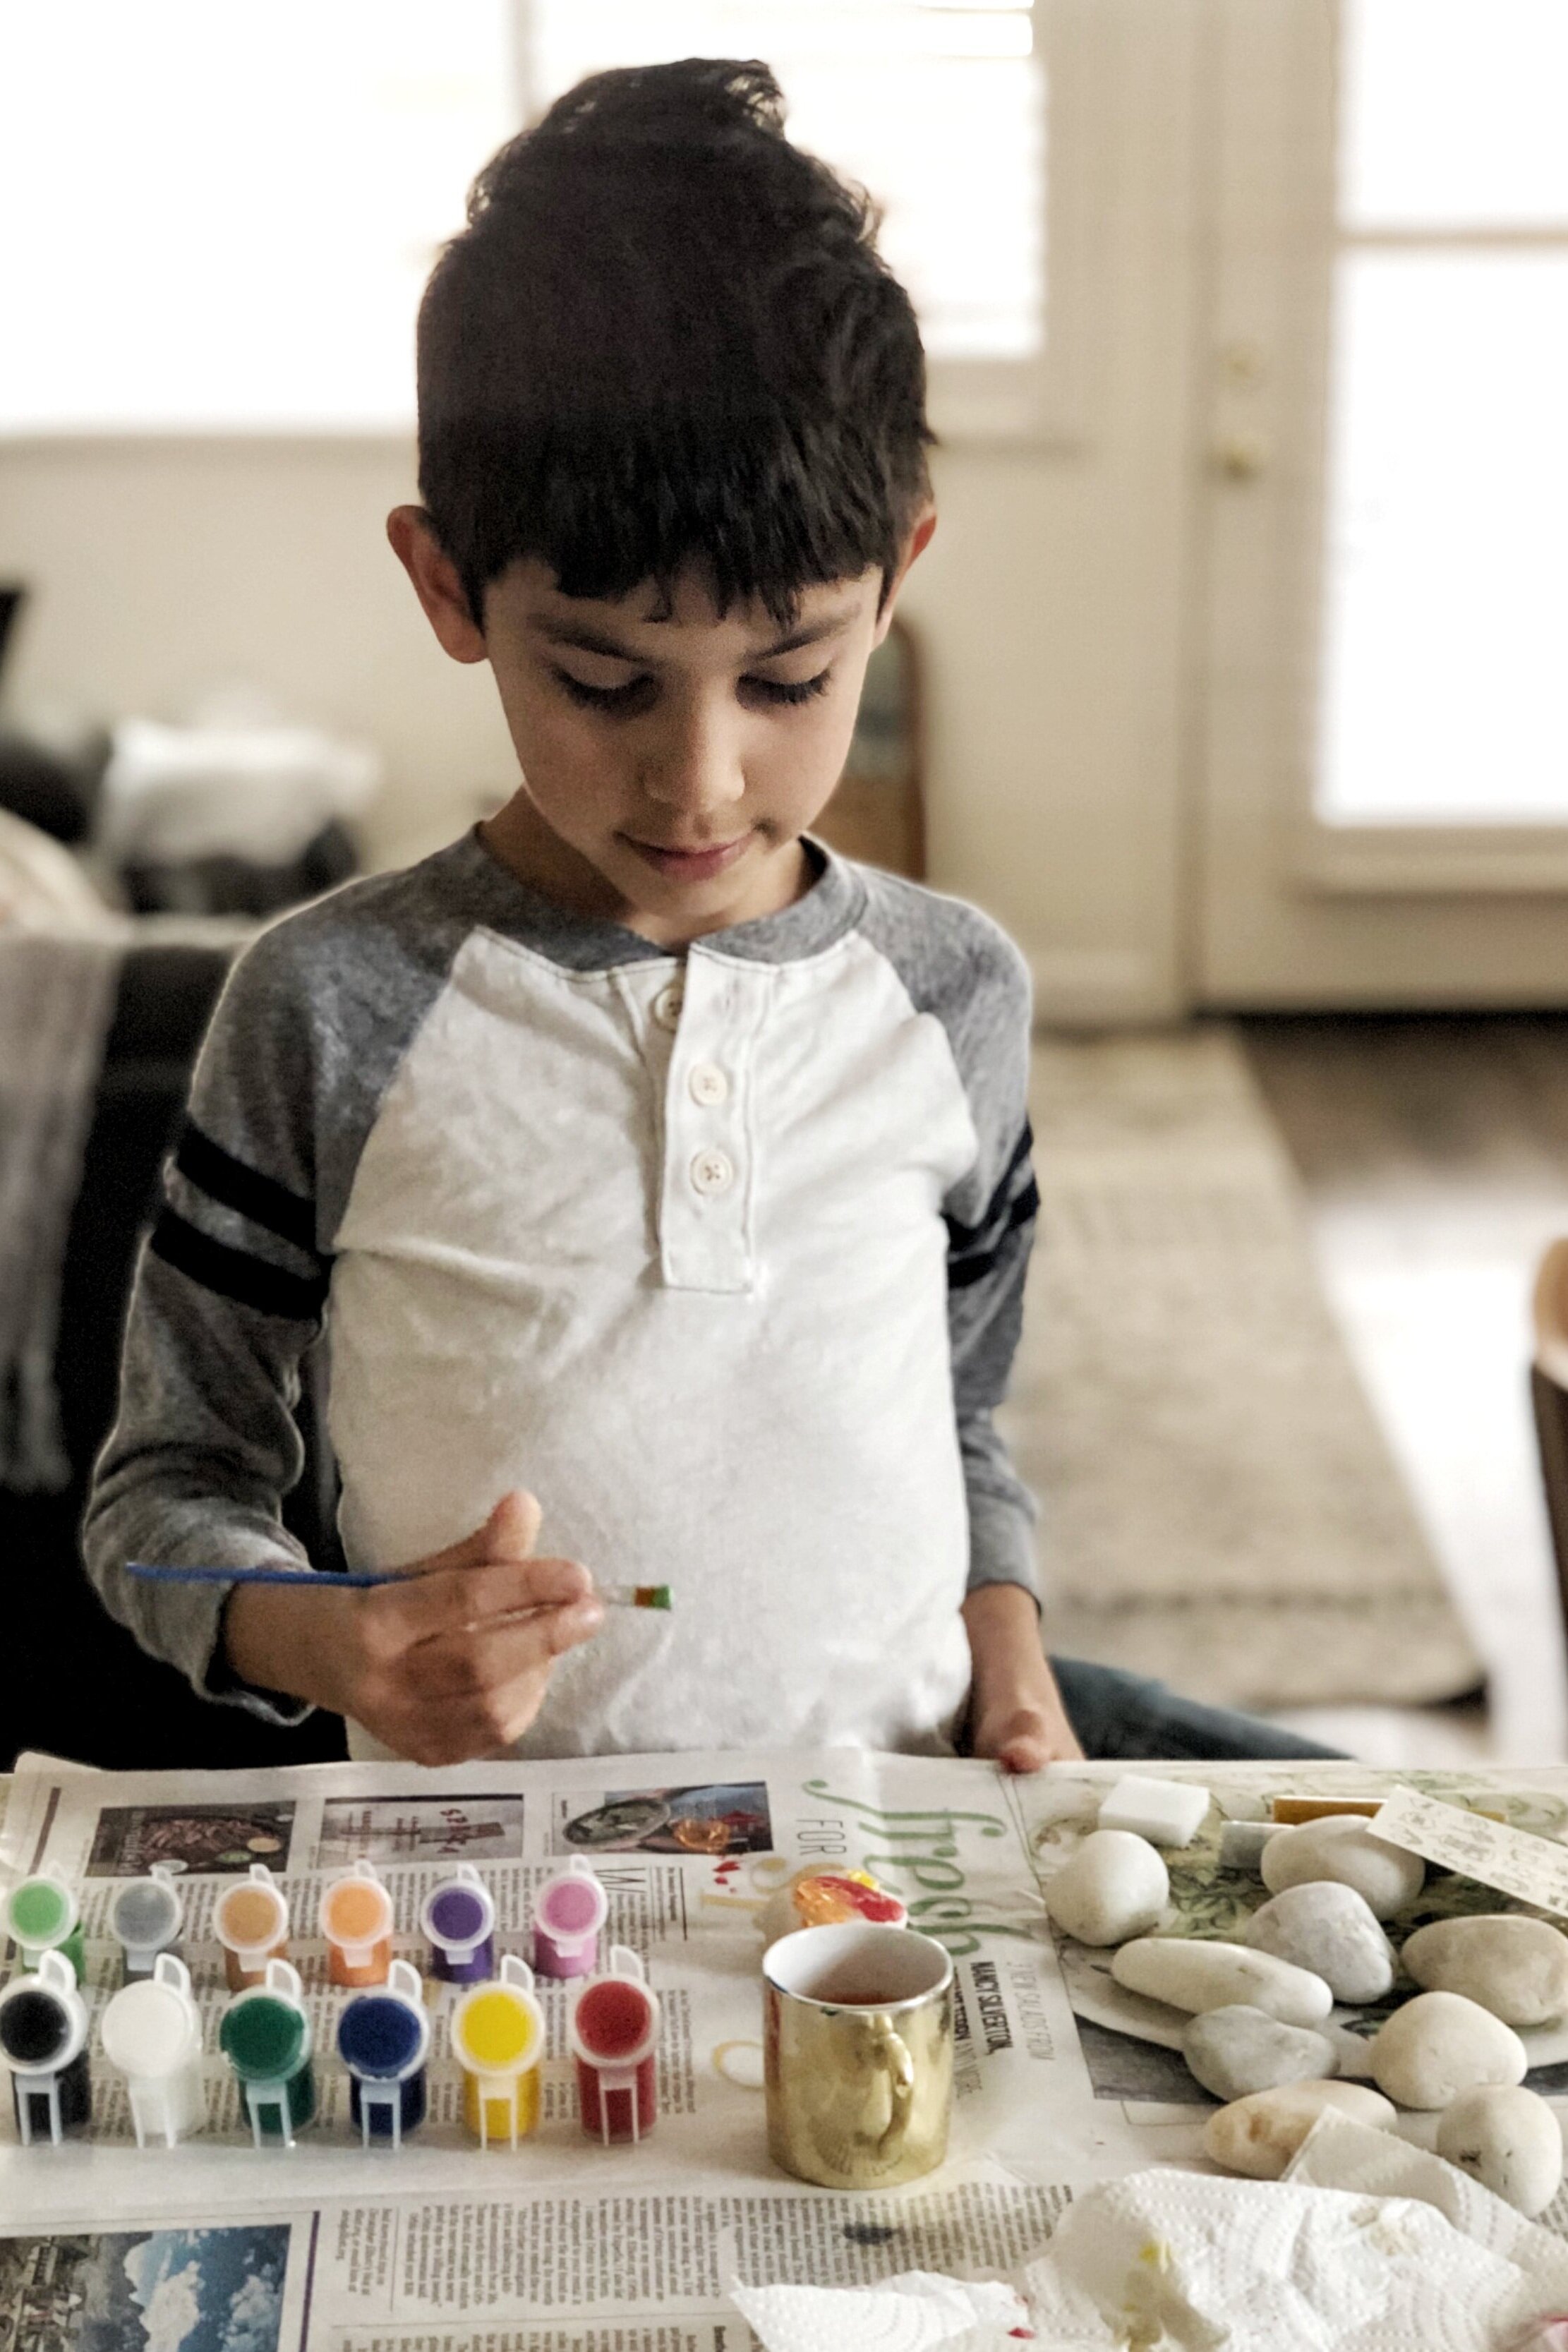
I have to remind myself, Montessori is hands on, and practical life is the foundation. So for now, we are going to refocus ourselves, and do what I know best, and is a lost art to our children these days. Math and Language will have to wait. He is going to learn some practical life skills around the home. As lunch time rolls around, instead if quickly pulling something together, I am going to show my son how to make his own lunch, which he will be doing every day. We will also be doing laundry together, vacuuming, sweeping, doing the dishes, and folding his clothes. All of these lost skills that are necessary. How? Well, everything I am doing about my day anyway, he will have to follow.
In the Montessori Elementary classroom, the children create their own schedules. So we will follow suite. Each morning my son will create his schedule of the day. In his classroom this includes math, language, science, history, and cultural. However at home, it instead includes the following:
Outdoor time/Walking the dog
Art
Household chores/ care for the pets and plants (laundry, dishes, ect whatever is needed to be done)
Lunch and what he will be making
Free choice (board games, legos, screen free“fun”/open ended activity)
Quiet Time (reading, mindful time: yoga, meditate, crystals)
Educational TV (national geographic, kid friendly documentaries, ect)
Each morning he chooses the order of the activities and their details (such as what he will have for lunch, which free choice activity he will do). We are not writing down the time frames for each activity, only the order which we will do them. This keeps it flexible, and less pressure. Having a schedule helps him stay focused, have something to look forward to, and keep him grounded throughout the day and giving him some normalcy. Kids need routine, they need structure, but it doesn’t have to be rigid.
School will be implementing remote learning for the academic aspects, and we will shift our schedule accordingly once that becomes available. For now however, this will be our focus.
During this time, it is important to give ourselves grace. These closures are a reminder of what is needed in society today. To slow down, get that much needed family time, and relearn about ourselves. We have a chance to figure out our hobbies, get those things done around the house we keep telling ourselves we don’t have time for, and get that needed time with our kids. Ultimately, our kids need us, not the lessons.
Shopping List:
Some of our favorite games:
For other Montessori at home resources, visit this website.


Moon Water
Moon Water is water that has been charged by the light of the full moon. This specially charged water can have many uses and is commonly used to cleanse negative energy, and can help you move into a grounded and positive state of mind.
This post may contain some affiliate links. For more information, visit my disclosure page.
Moon Water is water that has been charged by the light of the full moon. This specially charged water can have many uses and is commonly used to cleanse negative energy, and can help you move into a grounded and positive state of mind.
Making Moon Water
-Fill a clear glass vessel with purified filtered water. This can be a bowl, jar, or bottle. Avoid plastic.
-Sprinkle the water with sea salt.
-Place the container in the moonlight. This can be on a windowsill or at a clear area outside.
-Add crystals, gems, flowers, or incense around the jar for more energy. Be sure to use tumbled stones that wont break down in the water.
-Collect your Moon Water in the morning!
Uses for Moon Water

-Make a Cleansing Spray: mix moon water, sea salt, rose water, frankincense essential oil and lavender essential oil into a small spray bottle. I like to use this kind.
-Add to your bath for cleansing and relaxation.
-Energize, cleanse, and charge your crystals.
-Drink your moon water- take a couple sips to empower yourself with the moon’s energy.
-Use it to make coffee, tea, or to cook with.
-Diffuse moon water in your home. Help clear the air and enhance the oils that you use.
-Water your plants with it.
Enjoy!
Shopping List


5 Things I'm Doing Right Now to Boost My Immune System
During this time anxieties may be running high. It is more important now than ever to take precautionary measures with our health, and make sure the immune system is working as best of our abilities. Here are five quick and simple ways I have been naturally boosting my immune system and building my defense!
This post may contain some affiliate links. For more information, visit my disclosure page.
During this time anxieties may be running high. It is more important now than ever to take precautionary measures with our health, and make sure the immune system is working as best of our abilities. We have to give the immune system the basic building blocks it needs to function it’s best. Here are five quick and simple ways I have been naturally boosting my immune system and building my defense!
Get good sleep!
Your body is unable to fight off infection when it doesn’t get enough sleep. To ensure good sleep, use a magnesium spray before bed!
Boost your gut health.
Studies show that gut health is essential to fight off disease. Eat fermented foods daily- this can be a shot of Apple Cider Vinegar, yogurt, sauerkraut, or kombucha. You can even make Fire Cider! If you’re unable to eat fermented foods, try this probiotic supplement to boost your gut health.
Eat your greens!
Whether it’s a daily green juice, or my favorite Vitamineral Greens, make sure you’re intaking your greens to keep your body healthy so it can get to work defending off infection!
Mushroom Power
Medicinal Mushrooms are excellent for fighting a virus and keeping the body healthy. Mushrooms strengthen and restore the competency of the immune system and help it fight debilitating disease. My preferred mushrooms for immunity is the Turkey Tail mushroom and Chaga. Turkey Tail is highly studied for its use for immune support for those undergoing chemotherapy. Chaga is known to have the highest amounts of antioxidants than anything else in the world, and contains some of the most antiviral compounds.
My favorite mushroom supplements are from Wild Foods Co, click here to get 12% off your order!
Lower Stress
Breathe. Take a walk. Stress can lead to a host of immune deregulations, so reducing stress during this time is important, although can be a challenge. I add adaptogens to my daily regimen, since adaptogens block stress pathways to the brain and regulate signals to the nervous system. Ashwagandha and Holy Basil are my go-to adaptogens.



Natural Immune Boosting Fire Cider
Have you heard of it? Fire cider is a vinegar herbal tonic, used for supporting the immune system during the cold winter months, and heating up the digestive system. It also has broad-spectrum antimicrobial and antibacterial properties and can help fight infection.
This post may contain some affiliate links. For more information, visit my disclosure page.
F I R E C I D E R
Have you heard of it? Fire cider is a vinegar herbal tonic, used for supporting the immune system during the cold winter months, and heating up the digestive system. It also has broad-spectrum antimicrobial and antibacterial properties and can help fight infection.

Ingredients:
1/2 onion
10-12 garlic cloves
1 jalapeño
1/4 C ginger root
2 rosemary sprigs
1/2 C horseradish root
1 Tb turmeric powder
1 lemon
1 t ceylon cinnamon
1/4 t black pepper
1 small bottle of apple cider vinegar (with The Mother)
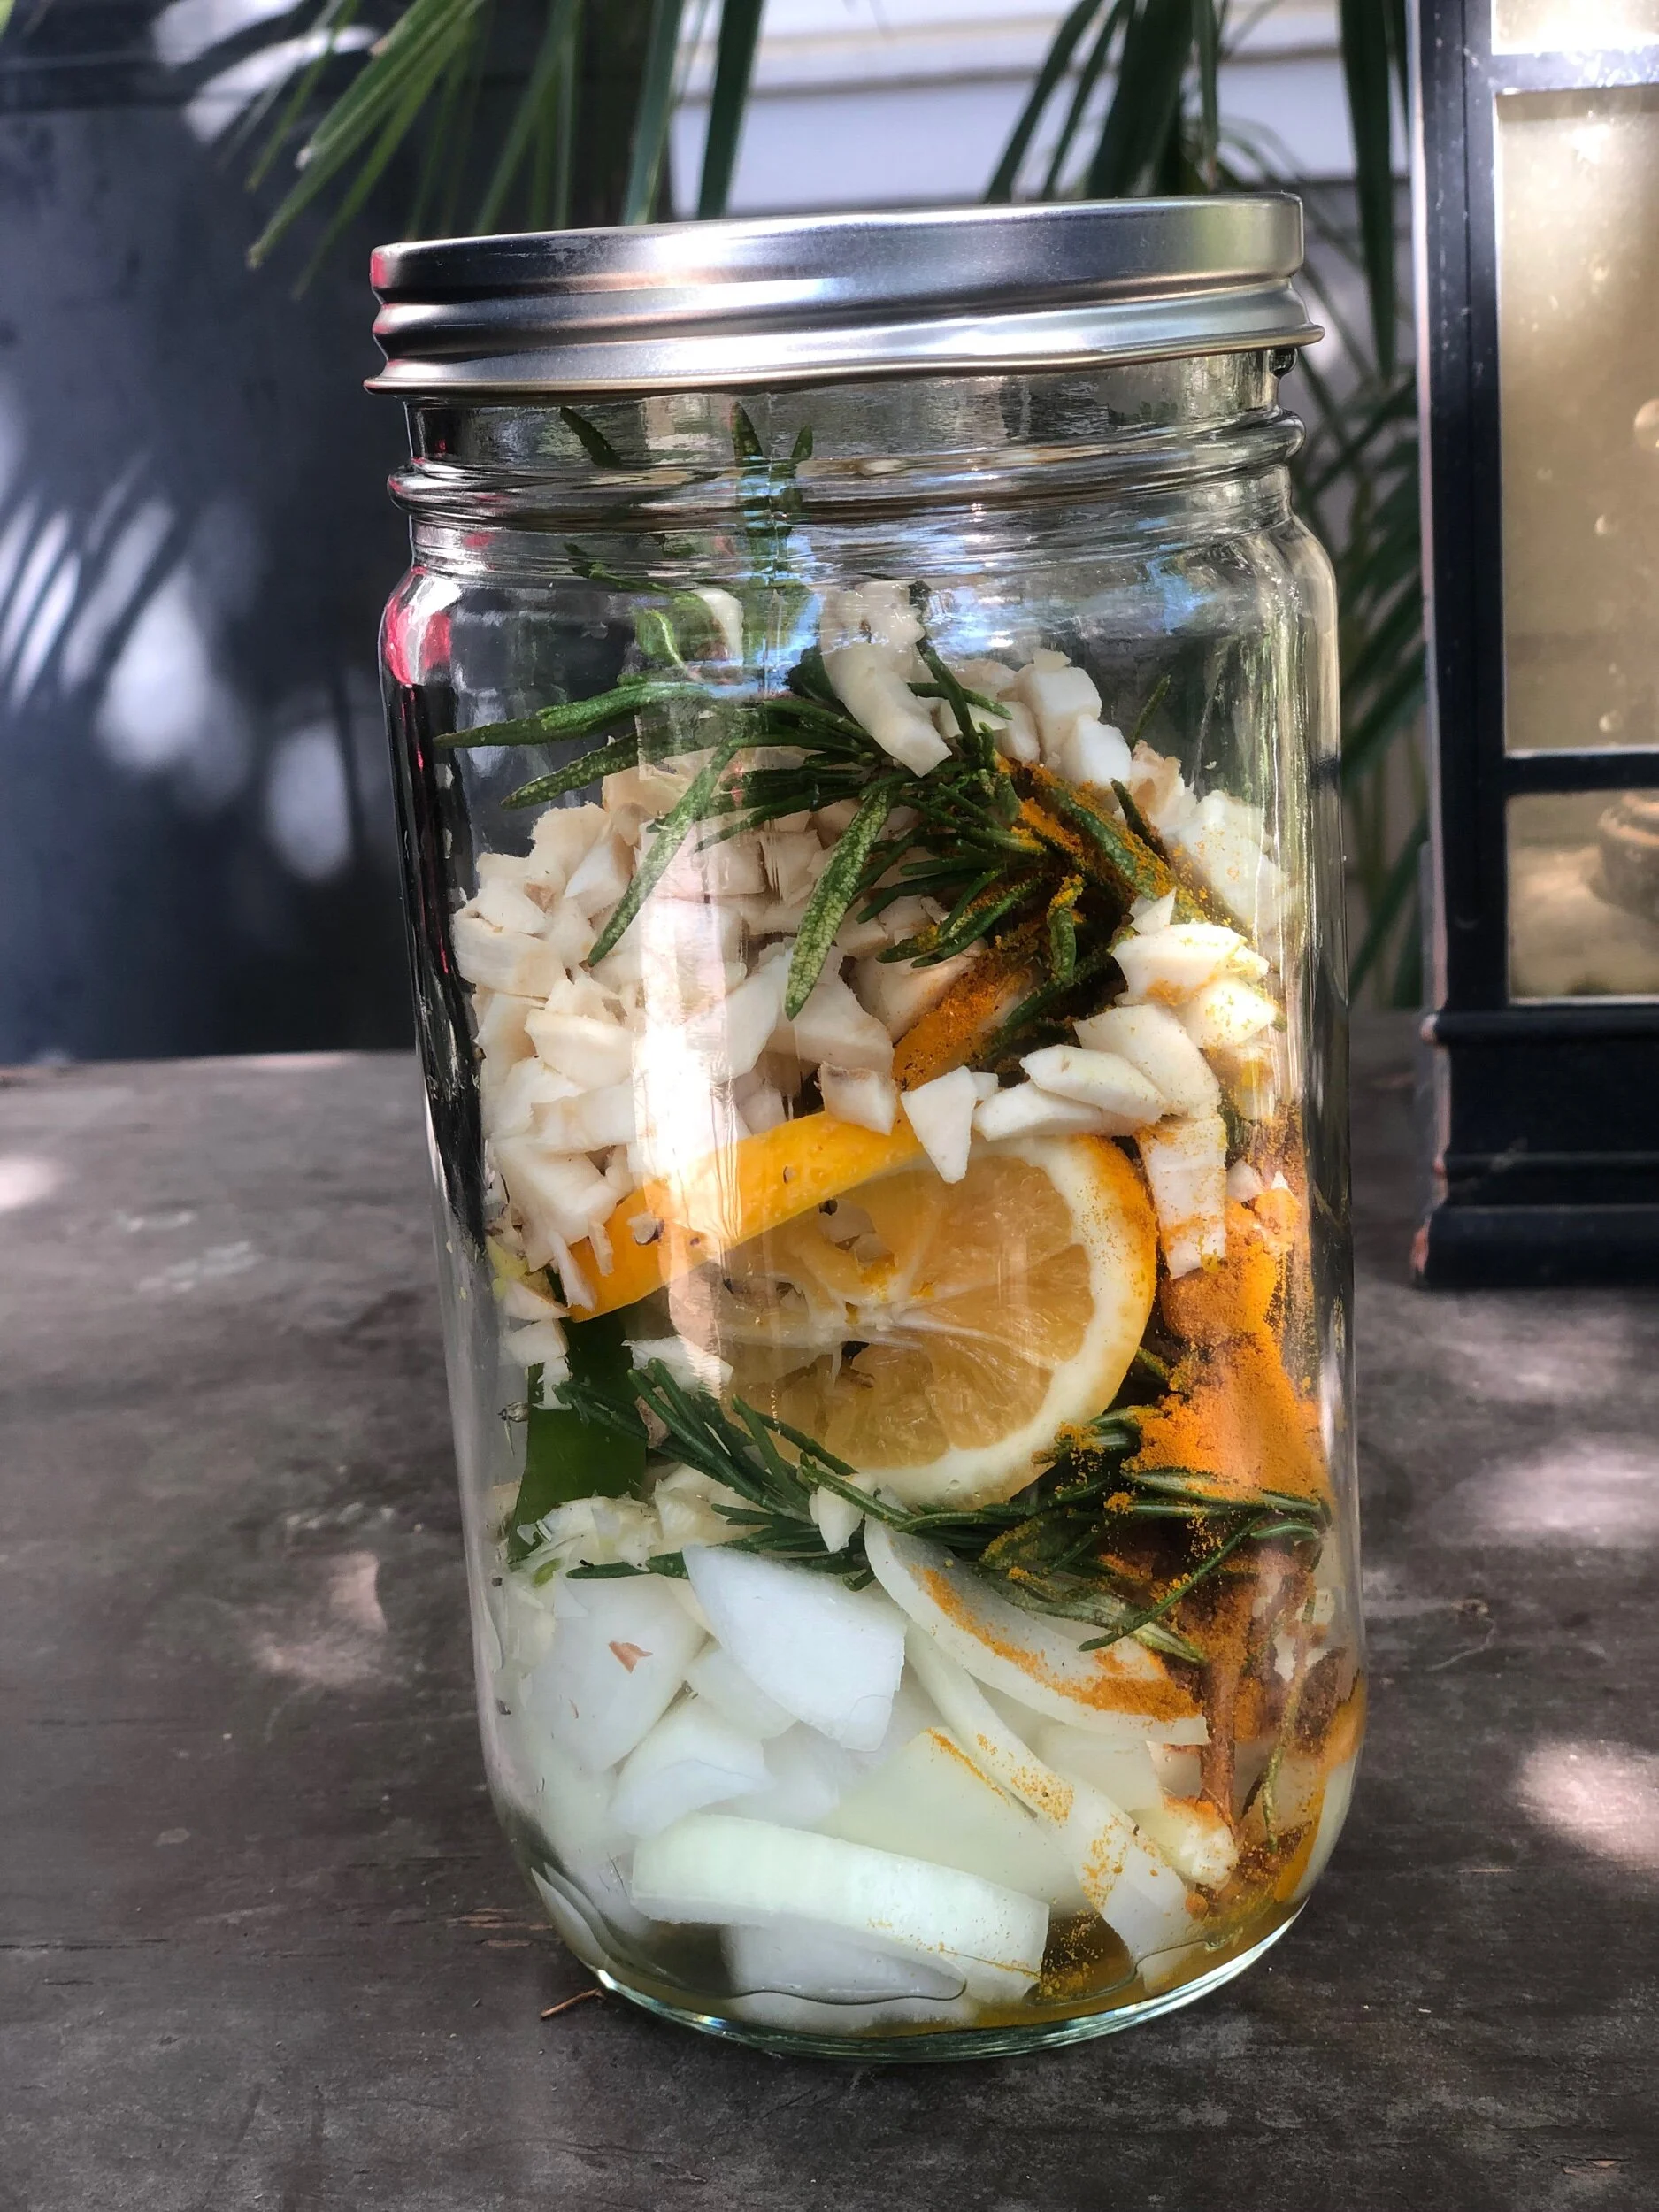
Chop up and place all the plants and herbs into a large quart sized jar. Squeeze the lemon into the jar and then slice before adding the peels in. Fill the jar with the apple cider vinegar- keep the bottle to later strain the finished cider back in. Place a piece of parchment paper on the top of the jar before screwing on the lid, as not to let the metal lid touch the vinegar. Store in a cool dark place for a few weeks. Once ready, strain back into the glass bottle. Take a shot weekly or more to keep the winter bugs away, and the slowed winter digestive system moving.
Play around with it and create your own cider! You can add things like medicinal mushrooms, honey, and elderberry, even thyme and parsley. Make it more or less spicy, and add your own special touch!
Shopping List



Montessori Activities Month 1
Montessori is not just a form of education, but a lifestyle. Montessori can be implemented into your baby’s life as soon as they enter this world, and can continue throughout their life. Here is a quick guide on how to implement Montessori into your home in your infant’s first month of life.
This post may contain some affiliate links. For more information, visit my disclosure page.
“The greatness of the human personality begins at the hour of birth.”
Montessori is not just a form of education, but a lifestyle. Montessori can be implemented into your baby’s life as soon as they enter this world, and can continue throughout their life. Here is a quick guide on how to implement Montessori into your home in your infant’s first month of life.
First and foremost, set your baby’s nursery up the right way. One of the root systems of Montessori philosophy is the prepared environment. Before welcoming your baby, their environment should be set up and ready for them, and be inviting and calming. The home environment is important for the baby to feel protected and separate from the outside world. To learn how to set up your Montessori Nursery, click here.
Activities
Symbiotic Life- creating attachment and trust birth-8 weeks
The first 6-8 weeks of life, the prime focus is symbiosis. Symbiotic life, or life together, can lead to the child’s development of trust in the world. During this time, the caregivers and newborn are creating attachment and forming their new relationship through contact. The three forms of contact which helps to foster the symbiotic relationship are holding, handling, and feeding. Holding the child communicates the mothers acceptance, and gives the infant reassurance and allows them to adapt to the new environment. Handling includes the care of the child, such as dressing, washing, and changing the baby. This offers a positive emotional connection with mother and child, and gives the infant the opportunity to get to know himself, his body, and the world around him. Feeding helps to meet the needs of the newborn, which in turn allows him to gain trust in the world. During the symbiosis period of the first 6-8 weeks of life, the focus and care for the child allows for intimacy between the child and mother to blossom.
Topponcino- from birth

One of the many uses of the Topponcino, helps older children hold the newborn with ease and security.
My favorite activity by far has been utilizing the Topponcino. The Topponcino is a small flat pillow and is the first form of security and consistency for the newborn. I don’t go anywhere without it, and I can instantly see the difference between laying Dahlia down with and without the Topponcino. She physically shows that she is more settled and more secure on it. It is used at her movement area, in her crib, lounging around the home, and traveling elsewhere. It provides the comfort and smells from home, and gives her a consistent base wherever she is, which provides her sense of order. My favorite Topponcino is from the Topponcino Co.
Music- from birth
Singing and music has been a favorite activity together! I use a small music box or play music often, providing calm yet stimulating her audio senses.
Munari Mobile- 2-6 weeks
I introduced the Munari Mobile at about 2 weeks. The Munari Mobile hangs from a cord attached to the ceiling, hung about 10-12 inches away from the baby’s face. Visually, newborns can only see about 12 inches away on only high contrasting colors. The black and white colors of the Munari Mobile provide high contrast, and helps develop focus and concentration.

Munari Mobile in action.

Enjoying mirror time.
Mirror- 2 weeks
One of Dahlia’s favorite activities! A low mirror on the wall next to her movement space. She is often observed staring deeply at the mirror, and often watching us and her mobile through it. You can use a full length mirror attached on its side, or find a thrifted mirror, like I did!
Black and White Cards- 3-4 weeks
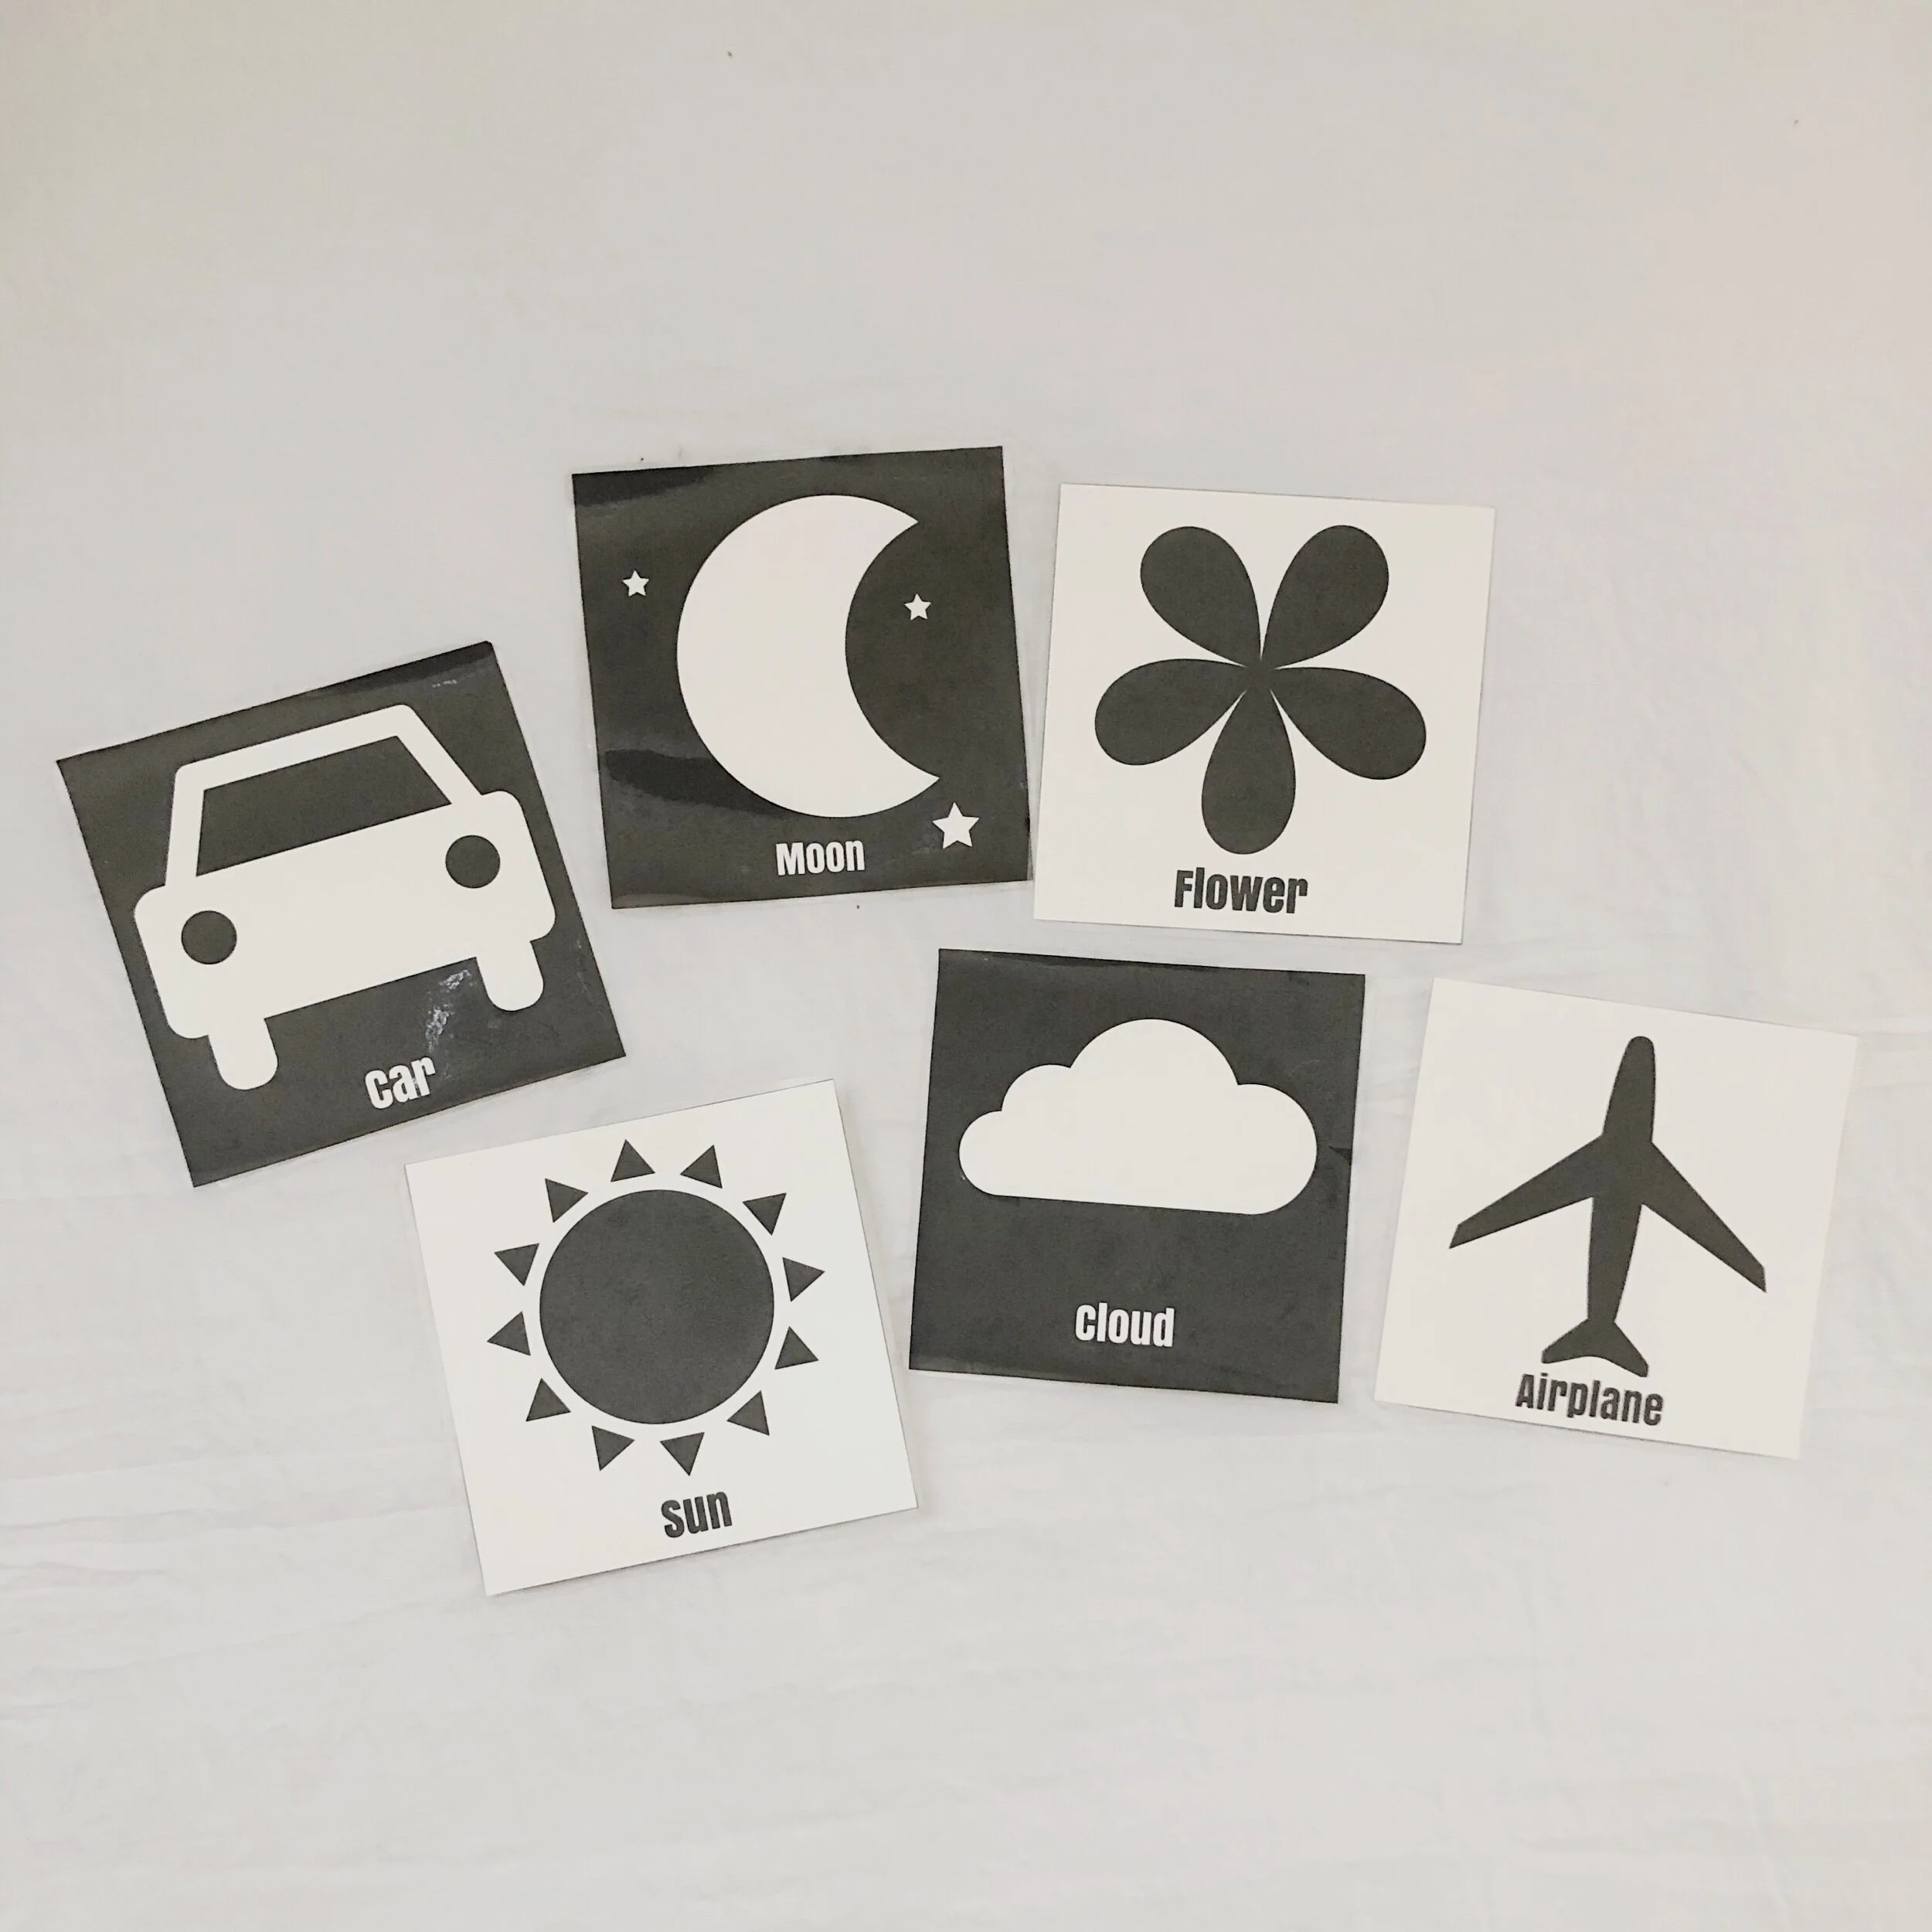
The black and white cards provide an extension to the high contrast colors the Munari mobile also provides. They also provide interactions with others as we hold the cards up for her and provide her the nomenclature of the pictures, giving her rich language. I DIYed my card set by printing the pictures from my computer and laminated them. I used a template from here.
This list is based off of both AMS (American Montessori Society) and AMI (Association Montessori Internationale) studies and manuals. I am trained and hold an infant/toddler montessori credential in AMS.
Shopping list:
Other Reading: Understanding the Human Being by Silvana Montanaro


Montessori From Birth: Designing a Montessori Nursery
When designing an environment for the infant, it is designed to help facilitate self-care, and encourage the child to be independent at an early age. Everything in the environment should have a purpose, with the goal to provide opportunities to achieve development and follow the urge of human tendencies
This post may contain some affiliate links. For more information, visit my disclosure page.
“An adult environment is not a suitable environment for children, but rather an aggregate of obstacles that strengthen their defenses, warp their attitudes, and expose them to adult suggestions.. To assist a child we must provide him with an environment which will enable him to develop freely.” Montessori, The Secret of Childhood

Introduction
Five years ago I accidentally fell into Montessori. I was in between jobs as a toddler teacher, and had observed many schools, all with the same environment: screaming children and teachers that all seemed frustrated. Chaos. I then walked into Valley Montessori School, unaware of what Montessori was besides a place that teaches independence, but what I saw was another story. The supervisor opened up a toddler classroom door and what I saw was a classroom full of children working independently and silently, and teachers down on the floor, working with the children. I saw calm. I knew instantly, this is what I wanted to learn about, and this is what I wanted for my children.
A few months later I began taking the American Montessori Society (AMS) Infant Toddler credential courses, it was in these courses my whole perspective on raising infants was changed. It was also since then that led me to looking forward to creating my own Montessori nursery some day. Five years in the making, I am so excited to share my Montessori Nursery.
Home Environment Birth-12 months
When you walk into a typical home nursery, it is garnished with decor all over the walls. New parents spend time picking out bedroom themes and embellishing a crib with all the bells and whistles. Typical commercial baby items including swings, bassinets, and bouncers are priority. All of these things are meant to bring the baby up into the adult world, is made for the eyes of an adult, and contain the infant in different types of containers. A Montessori nursery focuses on bringing our world down to the infant. Soft, calming neutral colors and pictures low on the wall rather than at adult eye-level. The simplicity of materials allows for optimal freedom of movement for the infant, and focuses on the developmental needs of the child.
The Montessori environment is made up of four areas: Sleeping, feeding, physical, and movement. These areas are to be consistent and reliable.
Sleeping area
Cestina or Moses basket
Feeding Area
Movement and Language Area
Low shelf for materials and books
Pillows for sitting
Heavy Ottoman
Work table for older child who is waking
Physical Care Area
Changing table
Stool for changing and independence
Child-sized wardrobe for clothing
Other
Plants and low hanging pictures on the wall
Soft rug such as lambs wool
Baby gate for the bedroom
When designing an environment for the infant, it is designed to help facilitate self-care, and encourage the child to be independent at an early age. Everything in the environment should have a purpose, with the goal to provide opportunities to achieve developmental stages and follow the urge of human tendencies.
Sleeping Area

Floor bed from Sprout Kids.
The first obvious difference of a Montessori nursery is there is no crib for sleeping. The sleeping area contains a Moses basket in the beginning, and a floor bed. The Moses basket offers comfort while baby is sleeping, and also allows the baby to have a visual because unlike a crib, it does not have bars. The Moses basket can be moved from room to room and go where mom goes. It can be used on the floor bed so that the baby can get familiar with their sleeping area, and also assists the newborn in regulating his temperature in the beginning.
Unlike a typical nursery, a Montessori nursery contains a floor bed, used from birth on. A floor bed provides independence and a clear visual of his environment, unobstructed by bars of a crib. With a crib, there is no way out for the infant, the bars provide the infant with only two choices to get out: either find a way to climb, or cry when they no longer want to be inside. At floor level, the infant can crawl on and off the bed independently, and can choose materials placed on the shelf. The bed is low enough, that if the infant was to roll off during sleep, he wouldn’t get injured. The bed can be placed in the center of the room, or against the wall, however if there is no side on the bed, the bed should be 12 inches away from the wall to provide space if the infant was to roll off. Because the infant is free to move about their environment, the room must be baby proofed. All outlets covered, ensure fragile/breakable items are out of reach, and shelves and dressers must be attached to the wall.
My favorite nursery item is the Topponcino. The topponcino is a soft small mattress pad made of 100% cotton batting and cotton sham. It provides comfort and security to the infant, and gives him consistency of touch and smell wherever he is placed with it. Prior to birth, the topponcino is to be slept with mom so her smell is on it when the infant is born. It also provides a barrier when family and friends are holding the newborn.
There is no “moving” furniture such as swings, bouncers, and rocking bassinets in the environment. These limit the allowance for development of their muscles due to the lack of freedom of movement. They can also cause false movement expectations, to where the infant is used to only sleeping with movement, and is unable to sleep without it. Having consistent, still sleeping places provide the infant with their need for order, and also creates healthy sleeping habits and learning to sleep on mattresses, just as we do as adults.
Feeding Area

Adult nursing chair from Carters by Devinci
Mom should have a space with a rocking chair to support her body and calm her while feeding the baby. The rocking chair is the only moving furniture in the environment, and it is utilized to bring mom to a calm state while nursing and holding the infant. The chair also provides a consistent place to nurse and feed the infant, which supports the child’s need for order. The space I am using for the nursery is smaller than I prefer, however Montessori is ever changing. Once my baby begins walking and being mobile, I plan to remove the rocking chair out of the nursery, and replace it with cushions on the floor and a child-level book shelf for a reading corner. This not only ensures safety from the child climbing on the rocking chair, but also provides an independent space for the child to look at books, and also calm their body.
As the child becomes mobile and starts eating solids, a weaning chair and table to eat at at their level independently, and a high chair with a detachable tray so they can eat at the family table is to be provided.
Movement Area

Movement space set up in the main family living space.
The infant movement area is an area where the baby is to be put while they are awake. It is their work space to practice different movements. They can practice tummy time, and they can work on their own without much adult interaction. The movement area contains a mat and a mirror on the wall. The mirror provides the baby feedback on his body scheme and helps them understand their body. It motivates them to move more and eventually allows them to recognize themself. The movement area should be placed in the main family living space, so the infant can be apart of the family’s activities.
Mobiles are hung in the movement area, they can be hung from the ceiling or from a mobile holder attached to the wall. A low shelf provides a place for a few materials that are developmentally and age appropriate, and provides order. There should be no more than 8 total materials on the shelf, four on the top and four on the bottom. The shelf allows the child to independently choose materials to use on the floor. They first observe materials being taken off by the adult, and eventually begin to imitate the process. When the child begins walking, a work table to work can be provided to take materials to to work on.
As the child begins to practice pulling themself up and cruising, a ballet bar attached to the wall in front of a mirror can be provided. This aids for independence and allows them to practice pulling up and walking. The infant begins to develop self-confidence and self reliance. An ottoman can also be provided for the infant to practice pulling them self up on, and learning to walk around, and can give them confidence as they practice independently.
Commercial Movement items such as walkers, exersausers, and jumpers are not used in the Montessori environment. The child cannot independently get in and out of these items, and they can disrupt muscular development and cause tip toe walking.

Shelf for materials
Physical care
The area for physical care will have a changing table, containers for soiled diapers and clothes, fresh diapers and wipes, and the child’s clothing. As the child becomes mobile, a small child-sized stool can be provided to assist in independent personal care changing out of their own clothes. Clothing should be at the child’s level, either in dresser drawers or hanging at the child’s level.
This environment meets the needs of the child. It provides them with the gift of observation, and freedom of movement. By providing an environment that allows for independence, your child will build a foundation for trusting himself, and builds confidence in the relationships of his world.


My Natural Birth Story
She’s here! After 9 long months, Dahlia Catori was welcomed Earth side on January 31st 2020 at 10:11am. Her birth was everything I imagined, and this is her story.
She’s here! After 9 long months, Dahlia Catori was welcomed Earth side on January 31st 2020 at 10:11am. Her birth was everything I imagined, and this is her story.

Leading Up To The Big Event
Dahlia’s birth did not start the day she entered our world. Her story started 9 months prior to that. Building up to the day I got to meet her had a lot of preparation. Nourishing my body the best way possible, to ensure she was growing as healthy as could be while we shared a body. My daily regimen included Healthforce Vitamineral Green powder, Klaire labs Prenatal and Nursing supplements, and Sprouts private label Fertility herbal supplement that included Red Raspberry leaf, nettles, yellow dock, and red clover for nourishing my womb. I embraced this sacred season of my life to the fullest.
This pregnancy was no walk in the park. It came with a lot of discomforts due to my growing belly, and a lot of false alarms. While it came with the added testing due to previous pregnancy issues (see post here) it also came with its own issues. Towards the end, my growing stomach was not measuring big enough, which was a red flag to my doctor. She sent me to get additional ultrasounds to check the baby’s growth. The ultrasounds showed she was right in the middle, at 50 percentile, yet a month later, I was still measuring small and my doctor sent me yet again, and again she still measured right in the middle. While it’s always a treat to see the baby, it was still very anxiety driven due to my history. Another treat I got to encounter was low iron. My numbers were below normal, so I tried iron supplements, and still the numbers continued to plummet, so I had to do iron infusions for 5 weeks before delivery. My body simply was unable to absorb the iron, which I later found out my mother was also slightly anemic in her pregnancies. Despite all these detours, Dahlia was born as healthy as can be, and without further ado, her birth story.
And So It Begins
Before you read any further, just an FYI I am about to get detailed here.
January 30th I was 39 weeks and 1 day pregnant. My son was born at 38 weeks and 2 days so I was done with being pregnant, and had no signs she was coming. That night, after dinner, I felt my water rupture. It didn’t fully break, but instead had a nice annoying leak that lasted hours and hours. We had plans for my son to go with my parents when the time came, and they just so happened to be in Napa that night because my dad was accepting an award. Luckily we had a back-up plan, my sister lives just a few blocks away and was available for my son to have an overnight. Unfortunately, he also came down with a slight fever, but he was well enough to hang with his cousins, and got to stay home from school and hang out with his Aunt the next day.

After my son went to my sisters, my husband and I prepared all our things. Of course, he was slightly freaked out and wanted to be on the road to the hospital 10 minutes ago. I knew Dahlia wouldn’t be making her entrance anytime soon, however. I had no contractions yet, just the annoying on going leak . So I cleaned the house, because I refused to come back two days later to a dirty house, and I took a shower. Finally we were off to the hospital, 45 minutes away. When we made it, I went to triage to check if I was in fact, in labor, and if it was in fact, my water. We got confirmation that it was, and my contractions were about 9 minutes apart. Since I was planning to have a natural birth, we were offered two options- to go home and labor more at home, or get admitted since my water was broken, even though my contractions weren’t very close. We opted to get admitted since we were so far from home. My biggest fear being far from the hospital, was getting stuck in traffic while in full blown labor, and birthing baby in the car. The hospital had one room with a birthing tub, saved for mothers choosing to have a natural birth. The room is first come first serve, and the maternity ward was busy that night, but low and behold, the room was available. It was like it was all meant to be. Off we went to our room.
By the time we were in the labor room, it was about 11:00pm. We decorated the room with flameless candles, I set up my essential oils for easy access, and we waited. By about 2 am my nurse and another nurse came in to check my progress, I hadn’t progressed much, and I was told by the other nurse that I would either need pitocin administered to get things moving, or we could go home. Whoa, what???? My mind started racing. I explained that the reason we admitted ourselves was due to living so far. The other nurse pushed the pitocin, and my nurse could see in my face I was stressing out. She offered another method to get labor moving- nipple stimulation. I had read about it inducing contractions, but didn’t think it could help labor along. They offered a breast pump- and I was to use it on one breast at a time for 15 minutes, with 15 minute breaks in between. They gave me one hour- and I was told if things didn’t start moving then we would have to consider other interventions. Stress starts now, I felt like I was against a clock. Almost two hours later, my nurse comes in, and she can see the stress of my face. My contractions were still only about 5 minutes apart, slightly stronger but I knew they weren’t where they needed to be yet. My nurse assured me that its progress, which is good, and also comforted me to not stress about what the other nurse said, and to continue what I was doing.
Hello Active Labor
At around 7:00am, I suddenly started getting hit with strong contractions. Still about 3-4 minutes apart. Within 30 minutes I needed my husband to press on my back through the contraction, all my labor was in my back because Dahlia was “sunny side up”- basically the back of her head was pushing on my tail bone. During this time, we also got a new nurse because my first nurses shift ended. This nurse (her name was Jasmine) ended up being our holy grail, and got this baby out!

Once the contractions started getting hard to handle, and after trying a few different positions on the bed, I decided to get into the labor tub. My angel of a husband got in to, because with each contraction, he was helping to push against my back. While the tub didn’t help with the pain, it helped me feel more relaxed. At this point I had to surrender to my body, and let it do it’s thing. I made sounds I never thought I could make. A deep hum was my sound of choice. With each contraction, I focused on making these hums last as long as I could. This focus helped me to not focus on the pain as much. Also, the nurses break room was literally a shared wall to where I was at, and I am pretty sure they could hear everything. Because I didn’t have pain medicine, I could feel the transitions of labor. It started with the heavy back pain and cramping contractions, which is to dilate and efface. Then, along with the cramping, I began to feel a sensation of my stomach pushing everything down. This is the part of labor to push the baby down the birthing canal. Being able to feel everything was exactly why I wanted to birth unmedicated, allowing my body to take control, and allow each sensation to come (although painful as it was).
After nearly an hour and a half of contractions, now at 2 minutes apart, my husband called in our nurse to ask if I was getting close. It was at this point that she helped me more than she knew. I had yet to be checked how dilated I was, but she gave me some advice. She asked what checking would really do for me- if I was, for example, at a 6, would that make me want to get pain medicine, would it help me to know? She said based on the sounds I was making, I wasn’t quite there yet, so I opted not to get checked. It was soon after I felt another transition in my labor. Suddenly my humming turned into straight lioness roars. Again, these sounds were uncontrollable and all part of surrendering to my body and to the birth. My nurse came in and exclaimed that I was probably close, so back on the bed I went to be checked, to which she said “you did it!” It was a relief, but now the pushing would commence.

At 8:45am I began to push. I first tried squatting, which I thought would be my position of choice, but that was a no-go. I ended up on my back, which I thought was not going to be the way I wanted to push, after reading how laying on the back isn’t the body’s natural position to push out a baby, but in that time, it is exactly what my body wanted to do. I pushed without a lot of progress, so I switched to hands and knees, which became excruciating with the back labor I was having, so back to laying on my back I went. Over an hour of pushing, and with a lot of help with my nurse and the midwife, progress wasn’t being made as quickly as expected with a second baby. It was due to her position- being face up meant she was also stuck at my pelvis. By then I was exhausted. I had been awake for over 24 hours, but my nurse continued to direct me to push through it all. Finally I felt it. The ring of fire. You know, the thing so many people talk about as being painful, with examples of a lighter being next to your crotch. Well, for me the ring of fire meant I was just about there, minutes from meeting my daughter. It was relief. I was exhausted to near tears, but my efforts were finally almost here. A few more pushes, and every sensation that goes with it, and finally my baby was out. 10:11am, Dahlia entered our world, and I got to hug and snuggle my baby weighing in at 6 pounds 14 ounces, 19.5 inches long.
The After-math.
We got a full hour of skin to skin. During which, I lost a lot of blood. Most likely due to my anemia- scary, but not the worst. The worst was getting my abdomen pushed on, to deliver the placenta, and then a lot more times after to continuously check my bleeding. One of those things you just don’t learn about at birthing class. That honestly may have been worse than the actual labor itself. I lost 700ml of blood. Typically vaginal births they want it under 500ml, but with a c-section mothers can loose up to 1,000, so I was right in between the two, concerning, but not enough to worry too much. The nice thing about birthing unmedicated, was I was able to get up and use the bathroom soon after. I was able to move, although very sore, with ease. I felt like a warrior when it was all said and done. I still look at her and cannot believe I did it. Women are incredible.
Dahlia was born with a tongue tie, but she nursed like a warrior. The next day when she got weighed, she hadn’t lost any weight. Typically breast-fed babies loose up to 10% of their birth weight in the first 24 hours, but our little cub proved them wrong, despite having a tongue tie on top of it. Before leaving the hospital she had to get her tongue clipped, and our strong little girl took that like a champ, too. Unashamed bragging momma over here.
The Fourth Trimester

The fourth trimester. This is the part we usually don’t talk about. I just pushed a baby out, my body is going through massive changes, but we have to act like all is fine and dandy. We’re bleeding, our hormones have crashed, and our bodies are sore. Oh the soreness was not what I was expecting. My arms felt it the most, because I put everything into my arms with each contraction, and again with each push. I didn’t realize it at the time, but the next day my arms were incredibly sore. That, on top of the ice pack pads, the witch hazel, and soreness in *other parts*, this is the fourth trimester, and it’s time to be easy on myself, rest, nourish, and embrace all the body has been through.
To help ease with the transition of my body’s changes after birth, I encapsulated my placenta from the Harmony Doula Group, using the Traditional Chinese Medicine method of steaming. Taking my placenta helps bring my plummeted hormones back up, lessens postpartum bleeding, brings my iron levels back up, can help with postpartum depression, and helps the milk come in. Two weeks in and I’ve reaped the benefits, and so has Dahlia. Fun fact- my placenta can also be used during menopause, and even for my daughter when she gets her first menses. Interesting, right?? Might be a little too crunchy, but I do like some crunch in my life!
Fourteen days in, and I’m feeling wonderful. Our little family has eased into life with a newborn, and we are all simply smitten by Dahlia’s presence.
Birth is magical no matter how these tiny beings enter the world. Pain killers or not, c-section or vacuums, it is all a miracle, and we all have stories to share. Our bodies made life, and it is to be celebrated. We are the strongest beings on this planet.
We are mothers.


Turmeric Latte aka Golden Milk
Vegan and anti-inflammatory, make your own Turmeric Latte (also known as Golden Milk) right at home! This spicy, warm drink is perfect for cold winter mornings or nights, and has a myriad of benefits.
This post may contain some affiliate links. For more information, visit my disclosure page.
Wow, its been busy over here! Somehow the blog has just slipped away while life has happened, and life sure happened. However, I am determined to get back into it, and get it going consistently. As the colder months move in, why not start with something warm, cozy, and healing to start off after a long break? But first, a little life update of whats been going on while I have been away.
I am now at 30 weeks pregnant, and officially in my third trimester. While I admittedly have not been doing my daily mushroom ritual, I still have kept up with most of my habits. Why no mushrooms? Well, mostly because there hasn’t been a lot of studies done on medicinal mushroom consumption and pregnant women. Although many including reishi, go back into ancient chinese traditions, I have still been a little hesitant. That being said, I have made myself a reishi cacao latte here and there to help with sleep, and added turkeytail into my cuppa coffee while a bad stomach bug was going around my school, but it’s not something I am doing daily. I have been continuing my vitamineral greens supplement powder daily. I like that it helps me know I am getting all my nutrients for the day. I have also been adding a fertility herbal supplement that has raspberry leaf in it, to prepare and keep my uterine lining healthy, strong, and prepare for birth. My daily prenatal of choice is one by Klaire Labs. It smells like beef, and is literally hard to swallow, but the ingredients are unmatched to any other prenatal vitamin. It also has folate instead of folic acid, something very important to me. Here’s a link why. Other than that, I have been surrendering to my body’s changes, stretching daily, keeping up with choosing items in my daily life that are toxin-free (we even bought a toxin-free mattress from Brentwood Home!) and enjoying all that this pregnancy brings.
Our living room. Not much on the walls yet, slowly getting settled. Couch is from Article, Desk from World Market, everything else is vintage or thrifted.
Besides being pregnant, we also moved! Moving included a lot of upsizing, and going through multiple storage units of items. We moved into my parents for a year to save (life in the Bay Area…), so we downsized, and also put a lot of stuff in storage that I refused to deal with the whole year. Well, when we moved, alllllll our stuff did too. I had stuff at my parents, stuff in storage, and stuff that seemed to come from thin air. So the last month has been spent going through everything, getting rid of A LOT, and organizing like Marie Kondo on adderal. We still have some ways to go, but every day we are more and more settled. Oh, and if that isn’t enough, my car got stolen day 2 of staying in our new place. So that was fun. Luckily it was found the next day, unhurt, but talk about stressful.
Since my last post, I have also been back working from summer break. I am a toddler Montessori teacher in a classroom of 18 month olds to 3 year olds, and they definitely keep me busy! Part of Montessori philosophy is following the child, so my team and I are constantly providing the children with fresh materials and ideas to keep them busy, and observing them daily to construct things in the classroom to meet their ever changing needs.
Work, pregnancy, and moving. It’s been a busy one, guys! Without further ado, here is my favorite Turmeric Latte aka Golden Milk. Turmeric is great for inflammation, acts as a powerful antioxidant, and is believed to lift your mood. Healthy fat and black pepper is optimal in any turmeric recipe, to make sure that it reaches into the bloodstream and to enhance absorption. The spices are also perfect for this time of year, and makes you feel like you’re drinking a hug!
Turmeric Latte

1/2 teaspoon turmeric
1 teaspoon ceylon cinnamon
1/4 teaspoon nutmeg
1/4 teaspoon ginger
sprinkle of black pepper
1 tablespoon maple syrup
1/2 teaspoon vanilla
1/2 teaspoon butter or coconut oil
1 cup almond milk
Instructions: Add all the dry ingredients into a cup. Add a small amount of boiling water enough to cover, and let seep, and mix together. Meanwhile, warm up the almond milk in a pan, and add maple syrup, vanilla, and butter or oil. Once hot (not boiling), add milk to the cup, and give another stir. I like to use a frother and make it nice and foamy. Enjoy!


I Honor You, Mama.
I honor you, and your journey through creating life. We all walk a different path in this journey. The ones who struggled to get here, the ones who planned and planned and planned for this miracle, the ones who didn't plan at all and don’t know what to do, the ones still trying, and the ones expecting after a loss. I honor you. This is my story so far.
Pregnancy truly is a beautiful thing. Us women are growing life. However, every pregnancy is unique, and the road to get there is different for everyone. Therefor, everyone harnesses their own emotions and feeling while on this path, that is usually uncomfortable, exciting, scary, stressful, and a miracle.
When you see a woman adorned with her bump, you never know what her journey was, or is, getting there. For some, it took months or years, and maybe even shots and medications. For others, it was an accident, and she’s terrified and so unsure what to do. Maybe she was trying and trying and trying what felt like forever, or maybe she's carrying this miracle for someone else. She could have been through loss, and is scared out of her mind each day that she might lose this one, too. Planned, not planned, first pregnancy, or tenth, every mother is on her own path, and this is mine.
My story doesn't start with this pregnancy, it starts 8 years ago, when I went through the most traumatizing, life-shifting experience of my life. I was 21, naive, young, and selfish. I didn't understand the miracle of what pregnancy was. I got pregnant on accident, but was in denial for most of it, until life slapped me in the face and gave me a reality check. I thought I could keep living my life the same, and a baby would be like taking care of anything else. Find a daycare, keep living life, easy. I truly didn’t understand what it meant, or appreciate the life growing inside. Then I went to my 20 week anatomy scan. It’s all fun, you get to find out the gender, but then something more happened. Something I never knew, or even thought I could handle, at that young adolescent age. They found some things. Her heart didn't look right, and something was going on with her head. Instantly there were doctors in the room, and a huge needle was poked through my abdomen to suck up the amniotic fluid. The next few weeks were a blur. I had to make choices and experience things a 21 year old should never have to. She had a missing piece of her 18th chromosome, and two valves of her heart didn't close properly. She wasn't going to make it. She was a girl, she had a name, and we lost her. Instantly I grew up. I looked at life differently. My path was altered forever.
Fast forward to my next two pregnancies- my son and my current one. The journey of pregnancy is a scary one for me. It’s hard to celebrate and be excited, when the daunting fear at each appointment creeps up on you. What will they find? What will they tell me? A high risk pregnancy with extra testing, conversations with genetic counselors, retelling my story over to them, and more needles poked into my abdomen each time to pull out fluid from the placenta to look closely at the chromosomes and maybe get a little peace of mind if everything comes back negative. This all happens quickly right in the beginning, before 12 weeks, when most are excitedly telling and sharing their news. It still doesn't take the fear away. Even at the 20 week anatomy scan, there's still a tremendous wave of fear that it’ll happen again, and I’ll get news that they've found something wrong. I don't think those feelings will ever go away.
So I see you mama. I see you telling people you just “want the baby healthy” when they ask if you want a girl or a boy. Because trust me, sometimes it really, really is all that mama is hoping for. I see you, scared to share your bump and holding back excitement, in fear of each passing day something could happen. I see you, hurting and fighting back tears with everyone’s pregnancy announcement, wondering when yours will come. I see you, having to make hard decisions about the unexpected life growing inside you. I see you, ashamed of your growing belly, embarassed with no ring on your finger and no partner to support you, but please, please mama, please don't feel shame- feel strength. I see you all, mamas, and I honor you all. We are warriors on our path, and on this beautiful journey.


How to Create a Glamping Tent
Camping has its perks. You get to immerse yourself in the outdoors, sit around a campfire, and enjoy what nature has to offer. Oh, but the tent. Sleeping uncomfortably on the ground is not always ideal. Here are some of my hacks to create a more “glamping” space, from your own tent!
This post may contain some affiliate links. For more information, visit my disclosure page.
Camping has its perks. You get to immerse yourself in the outdoors, sit around a campfire, and enjoy what nature has to offer. Oh, but the tent. Sleeping uncomfortably on the ground is not always ideal. Here are some of my hacks to create a more “glamping” space, from your own tent!

Invest in a Good Air Mattress
Double wide, or even triple wide, creates a space that makes you feel like you are at home in your own bed. I like this air mattress. There’s something about having an elevated bed that just ups the comfort level. If you have kids, I suggest getting them one too, only because they’ll end up in yours like mine did!
Making the bed is also key to go from camping to glamping. Use regular sheets and blankets instead of sleeping bags. I used an old bed set that was sitting in storage anyway, which included the cute throw pillows. We even brought some extra throw blankets for added cozyness. If it gets extra cold, you can always throw an unzipped sleeping bag on top, or use a camping quilt. (Our next investment may be a buddy heater for the tent so we don’t have to worry about it getting too cold!)

2. Create Side Tables
When you have a raised bed, side tables are a must. These are just simple wood crates I already had for decor that were from a craft store. They doubled as storage for packing. I used a lantern as my “lamp”, and had all my things within reach (flashlight, water, mirror, books, and my toiletries ). I also sleep with a sound machine normally, and found a battery operated one on amazon! This particular camping trip was extra buggy, so a citronella candle was also a must when we were in the tent.

3. Light it Up
Sure, we have lanterns, and there’s all the hacks out there with putting a light against a gallon jug. Take it to the next level though, and get some fairy lights. They even come with remotes for easy off and on. They light the whole tent up at night, and add ambiance, too. They were simply strung through the holes along the top of the tent.
Added bonus- the awesome fan that was found on amazon! It was hung from the top to cool down the tent, but could also sit on its own, and had a light.

4. Make it Homey
Adding a few simple touches can really aid in sprucing up your tent. Dollar store rugs for the inside and outside of the door, and a pop up hamper adds that extra homey feel.

5. The Entry Way Matters
It’s not glamping without an entry way. Everything was purchased at the dollar store. Another rug to wipe off your shoes before entering, a basket to keep dirty shoes in and keep them out of the tent, and solar lights to light up the walk way when it gets dark. Don’t forget a dust pan to sweep up any dirt that ends up inside the tent.

These are my simple hacks to go from camping to glamping. What are your simple camping hacks to jazz up your tent?
Shop for these items:


Celebrate Summer Solstice
Summer has come! We are officially halfway through the year. June 21st marks the longest day of the year, also known as Summer Solstice. It’s when the northern hemisphere of the Earth is closest to the sun, giving us the first official day of summer, and the most daylight of the year. This change in the seasons also brings a shift in both Traditional Chinese medicine and Ayurveda.
Summer has come! We are officially halfway through the year. June 21st marks the longest day of the year, also known as Summer Solstice. It’s when the northern hemisphere of the Earth is closest to the sun, giving us the first official day of summer, and the most daylight of the year. Summer Solstice tends to occur between June 20th and June 22nd. This change in the seasons also brings a shift in both Traditional Chinese medicine and Ayurveda.
In Traditional Chinese medicine, the summer season is known as the Yang phase. Yang is the exuberant, expanding, and active stage, as opposed to yin which is the withdrawing, storing, and nutritive stage. Yang brings in longer, lighter, and warmer months. Summer is also a time for heat and fire. Fire is the energy for growth to fullness, full expansion, and warm, loving compassion. Fire represents the element of summer, and is associated with the heart. Heart-opening elements such as rose and red and pink colors are essential during this time. When fire is ignited and in harmony, life is joyous, loving, supported by courage, wisdom, and strength.
In Ayurveda, we enter the season of Pitta. Pitta is both fire and water elements, and again, brings in the heat. We all get a little more fire internally during this time. It is a time we are most active and setting forth in our goals. We are more focused. Too much heat, however, can cause irritability, competitiveness, envy, and easily angered. On our bodies, it can also cause more oil on the skin, heartburn, and excess acid so it is important to keep cool, internally and outwardly. Eating cooling herbs and spices such as mint, cilantro, lime, and cucumber is important during Pitta season (and for pitta doshas). Eating fresh fruits and salads and choosing foods that are naturally sweet, bitter, and astringent helps balance too much pitta. When there is too much pitta, it is ideal to stay away from foods that are sour, spicy, salty, and warming foods. Too much red meat, alcohol, vinegar, and oily foods can also offset pitta balance (sorry delicious fried fair food!)

Summer Solstice, also known as Litha or midsummer, is a time to create new rituals, and allow your body to move through the changing seasons. This energy is great for manifesting, expressing gratitude, and making changes in your life for the next few months. Now is the best time to create new morning rituals to enhance your living. It is a time to find ways to keep cool during the heat, and balance our bodies to maintain health, live with joy, and have vibrant energy.
Here are some easy practices to lead you through the weekend of Summer Solstice, along with the summer months ahead of Yang and Pitta energies.
Create a morning ritual
This can be anywhere from 10 minutes to one hour. A morning ritual helps get the day started, especially when our lives are hectic or busy. Set your alarm a little early and begin incorporating some of these into your morning routine:
Meditate
Stretch
Make tea or coffee with herbs
Sip on lemon water
Yoga
Go outside barefoot for grounding and earthing
Burn incense
Write out affirmations and intentions for the day or week
Play music or listen to your favorite podcast
Light a candle
Dry brushing and massaging
Diffuse your favorite essential oil
Splash your eyes with cool water (they always have heat, especially from exposure to artificial light and screens)
Incorporate rose scents and flowers to activate and open the heart.
‘When life gets busy, self care is the first thing we sacrifice! It doesn't need to be complex or take a lot of time. We have to reduce the gap between self depletion and self care!’ remember- it takes 21 days to form a new habit. Give yourself time!
Celebrate the sun
Greet the sun! Watch the sun rise, it will jumpstart your energy.
Wear colors associated with Litha. Reds, oranges, yellows, and whites.
Set out stones associated with the colors of Litha. Citrine, Clear quartz, jade, tigers eye, and peridot.
Enjoy a summer salad or fresh fruit, while sitting outside.
Light candles at night or start a bon fire.
Open up the windows in your home and air it out and cleanse.
Indulge in self care- make a face mask or get a massage.
Garden and water your plants.
Make a flower crown.
Sit in the sun and soak it up!
Make Sun Water or Sun Tea
Sun Tea or Sun water is a great way to utilize the sun’s energy.
Here is a simple sun tea recipe:
1 part mint
1 part chamomile
1/2 part rose
Place your herbs in a jar and steep in the sun. Add sweetener if desired and strain when you are ready to enjoy! Garnish with lemon.
Summer reminds us to slow down and enjoy the sunshine and what Mother Earth provides. How will you be celebrating Summer Solstice, and the coming summer months ahead?

Further reading:
The Ancient Wisdom of the Chinese Tonic Herbs by Ron Teegarden
Photos by Erin Northcutt @erinorthcutt