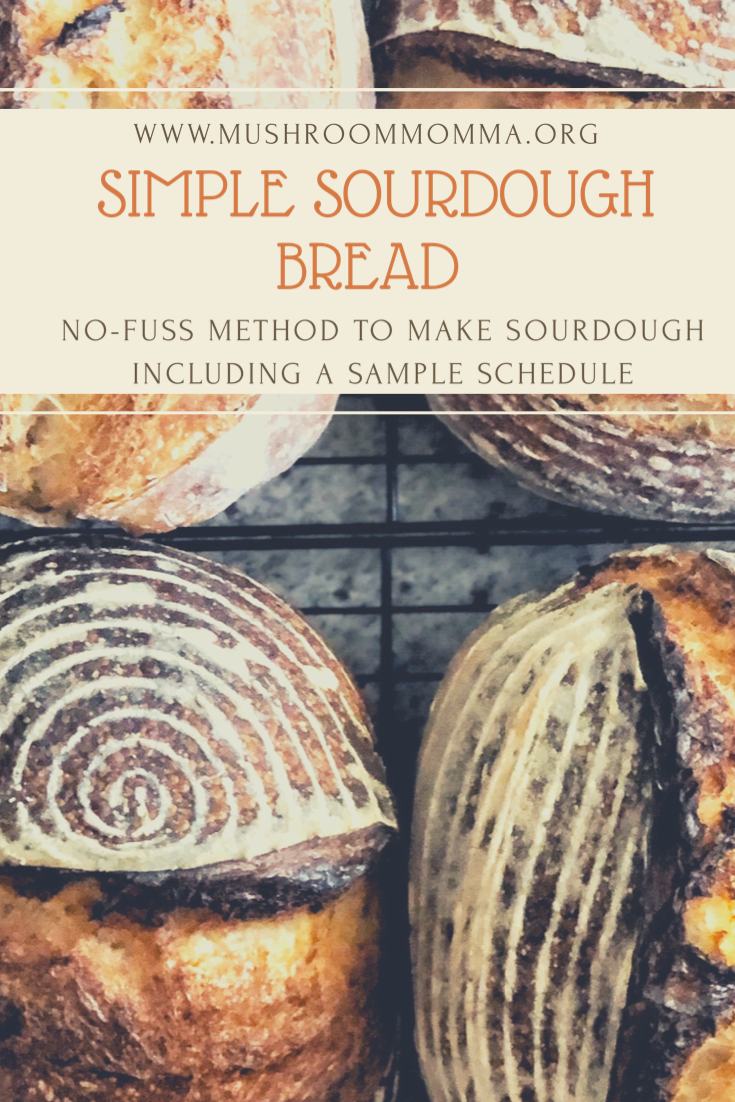
Simple Sourdough Bread

So you want to make sourdough bread? When I first decided to dive into the world of sourdough, it was very overwhelming. All I wanted to do was bake a simple loaf of bread, but I wanted it to taste good and be done right. With a quick search, there are so many different methods out there and so many different levels of mastery when it comes to this sticky, bubbly dough. Making sourdough bread is a process that teaches patience, and learning to trust all your senses. It is not about simple measurements, but instead is about learning how your dough behaves, and working with it. The reward at the end is no other feeling, the moment you pull out a beautiful naturally risen loaf of bread.
This is my no-fuss, simple sourdough method and sample schedule. It is great for both beginners and experienced bakers who want an easy recipe, but still get artisan bread results. This is also a great schedule that fits into a work schedule, so you can make fresh bread during the week!
This post may contain some affiliate links. For more information, visit my disclosure page.
What You’ll Need
Ingredients:
Active sourdough starter. I made mine by following this video.
Bread flour
All purpose flour
Sea salt
Supplies:
Food Scale Sourdough bread is more predictable when everything is measured by weight. I was a sceptic, but having a scale in my kitchen is now my more favorite tool!
Dutch Oven or Clay Bread Baker This doesn’t have to be an expensive high-end dutch oven. In fact, my little clay baker I found at a thrift store produces better results than my dutch oven, in my opinion! Use what works. I have even used a roasting pan with a lid.
Bowl Scraper It makes handling the dough much easier when taking it out of the bowl.
Bench Scraper Another tool that is necessary when handling and shaping the dough.
Parchment Paper You don’t want your dough stuck to the pan!
Banneton- These specialized baskets made for proofing the dough really upped my bread game and produce better results. The shape of your banneton depends on what you are using to bake with. Get a round one if you’re using a dutch oven, and an oval one if you’re using a clay baker. You can also use a bowl and towel.
Danish Dough Whisk Optional, but I like using it while stirring my dough.
Lame Knife Optional, for scoring the dough. You can also use a regular sharp knife.

Sample Schedule and Instructions:
Day 1
3:30pm Feed starter
I like to feed my starter with rye or whole wheat flour. These flours contain more bacteria for the yeast, and often produce a more active and bubbly starter. When the starter has doubled in size, it is ready for baking. Depending on the temperature of your home, your starter could take longer or shorter to double in size. When my house is extra cold or extra hot, I put my starter in the oven to give it more of a consistent temperature. Turning the light on in the oven produces just enough warmth for a happy starter if your house get very cold. You can put a rubber band around the jar holding your starter to give you a line on where it began, so you can visually track its growth.
I follow this recipe when feeding my starter
25g starter (discard the rest)
25g All purpose flour
25g whole wheat or rye flour
50g water
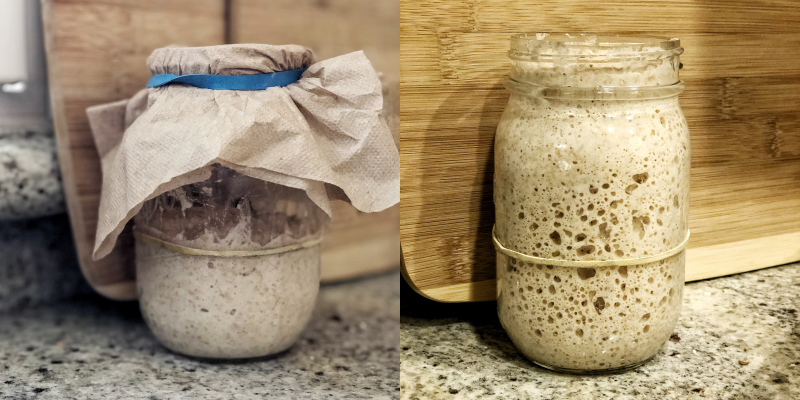
My starter when I first mixed it, to 5 hours later and ready for baking.
8:30pm Mix dough
My starter takes roughly 5 hours to double in size. Yours may be ready earlier or later. Once it has doubled in size, it is ready for making dough!
50g active starter that has doubled in size
250g Bread flour
250g All purpose flour
350g luke warm water
9g sea salt
I like to use half bread flour and half all purpose. Bread flour has a higher protein content, and helps the dough rise more when baking. All purpose flour gives the dough a more airy texture and flavor. I begin by first mixing the water and starter, to ensure the starter gets fully mixed. I then add the flours and salt. I combine all of the ingredients using the danish whisk, and then finalize the mixing with my hand, to ensure all of the flour is mixed in. Tip: Wet your hand first to get less dough to stick. Expect to still get messy!

Left to right: Starter, starter + water, flour + salt, mix with danish whisk, after mixing by hand & ready to rest
You don’t need to mix it fully, it will be lumpy. Let is rest for 30 minutes covered with a damp towel or plastic wrap.
After 30 minutes it is time to give the dough a stretch and fold. This helps to strengthen the gluten, producing a strong and tight, yet airy bread. First loosen the dough from the sides of the bowl with your hand. Then pick up a corner, stretch just enough as not to break the dough, and fold over the top. Grab the next corner and repeat. Do this for about 1 minute, until a ball begins to form with the dough.

Stretch and fold. After stretching each side and folding down towards the center until you feel the dough strengthen (about 1 minute) it is ready for bulk ferment.
9:30 pm Bulk Ferment

Now it is time to bulk ferment over night. Cover the bowl again with the damp towel or plastic wrap. Again, you can put your bread in the oven to ensure it has a consistent temperature all night long. During the winter I keep the light on as well, to give the dough a little warmth. Let it sit for 8-10 hours.
Day 2
7:00am Preshape
Take the dough out using a bowl scraper. I try to take it all out in one big scoop by first scraping all the sides. Try not to handle it too much. I then preshape it into a ball using my bench scraper. Make sure to flour your hands and the bench scraper. I do this by pushing the bench scraper into the bottom of the dough ball, and turning it slightly. As you keep doing this, the dough begins to form a ball and tightens at the top. Again, try not to handle the dough a lot. You can even just let the dough rest as-is. Once in preshape, let rest for 10 minutes.
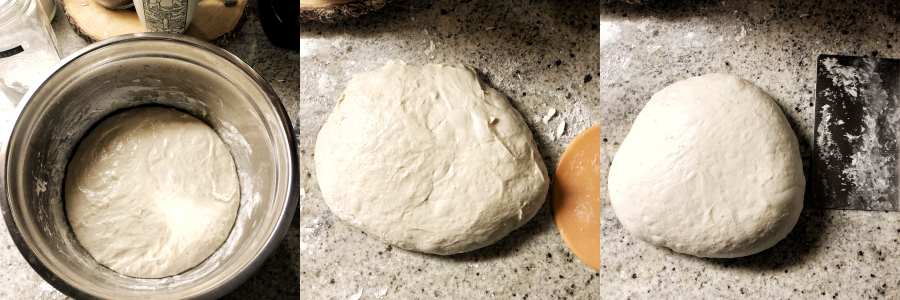
From left to right: After resting, before preshaping, and after preshaping.
7:15am Shape
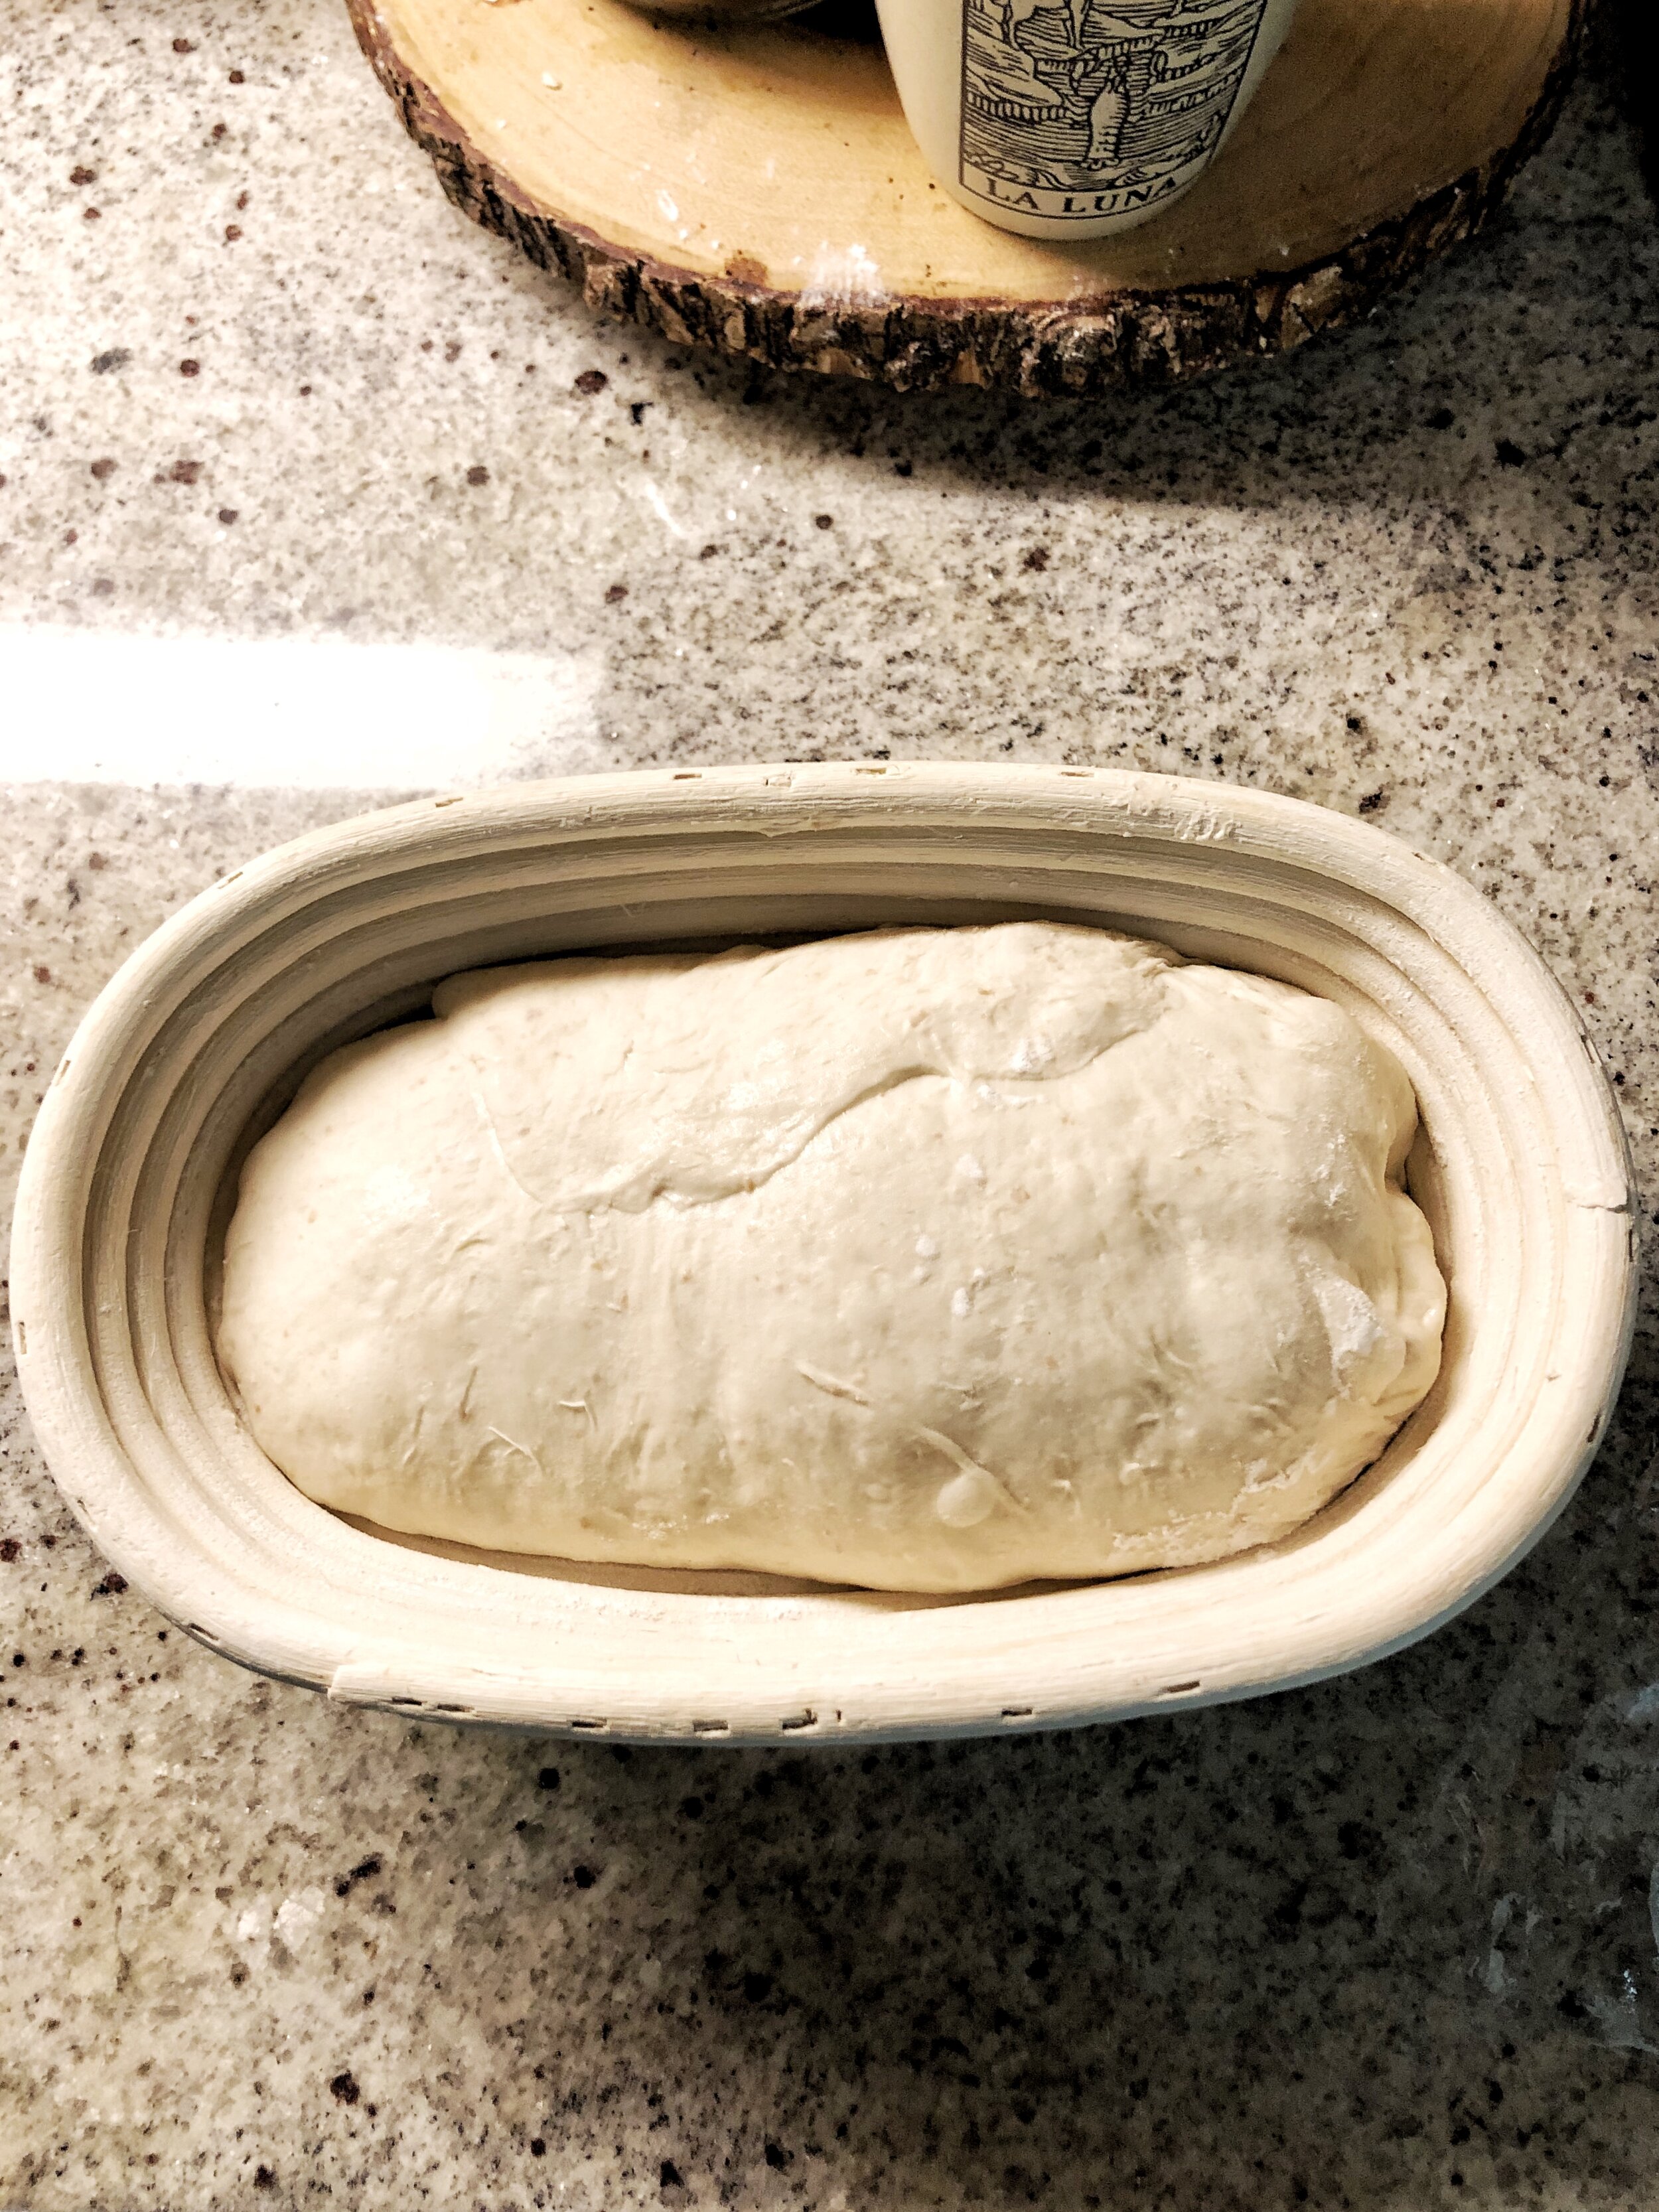
After shaping. Placed in the banneton.
Flour the top of the dough ball and flip it over using the bench scraper. Take the right side (using your bench scraper to help if the dough is sticky onto the surface) and stretch is over toward the left side. Then take the left side and stretch it over toward the right. Next take the bottom and stretch it toward the top. Finally, take the top, and roll it down. Depending on the shape of your proofing basket or bowl, you can keep it round for a bowl shape, or roll it tight so it becomes more oblong for an oval shape. The key here is to try to make it tight. I then flip it back over and give it a generous layer of flour. Rice flour is great for creating a nonstick surface, but any flour will work. Gently pick up your dough ball, and place it into the proofing basket, face down. Cover it with plastic wrap or a towel, and let it proof at room temperature for 30 minutes to an hour.
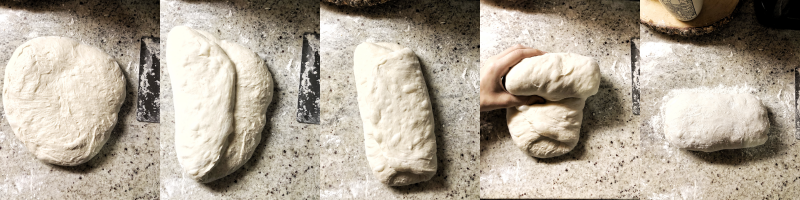
Shaping
8:00am Cold Retard

Ready for the fridge.
At this time, I like to give my dough a cold proof, or retard the dough. This firms it up so it holds its shape better. I place the dough and basket into a plastic bag, rubber band the end, and put it in the fridge for at least an hour. It can stay in the fridge all day long if needed, I have even heard of people letting the dough retard for nearly a week! (I have never let mine sit that long, so don’t take my word for it) if you’re running low on time and want to get your dough baked, you can also stick it in the freezer for 15 minutes, or bake it without the cold retard. In my personal opinion, the cold proof gives the dough a better shape overall.
10:00am Bake (Turn on the oven at 9:00am)
Preheat the oven with the pan inside at 500°f 1 hour before baking. You want the oven and pan HOT. Take out the dough right before baking. I put cold dough directly into the hot pan. Tip: Use parchment paper! I cut my parchment paper so it has little handles, so I can easily take the bread out once done. Take the dough out of the fridge and out of the bag, place the parchment paper on the dough and flip over onto the counter. Quickly score your dough, make sure to go deep enough. Sometimes I need to make a few passes to ensure its a deep enough cut. The score will help your dough rise more, I like to do a simple slit down the middle. Place the dough right into the pot, and put the lid back on and straight into the oven. The lidded pot produces steam inside, which allows the bread to rise before the crust gets too hard. If there isn’t enough steam, the crust will harden before the dough rises all the way.
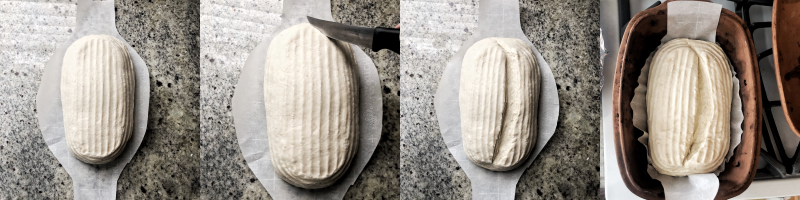
Scoring.
Bake for 20 minutes lid on at 500°f
Take off the lid, reduce heat to 450°f, and bake another 30 minutes until the crust develops a deep brown color.
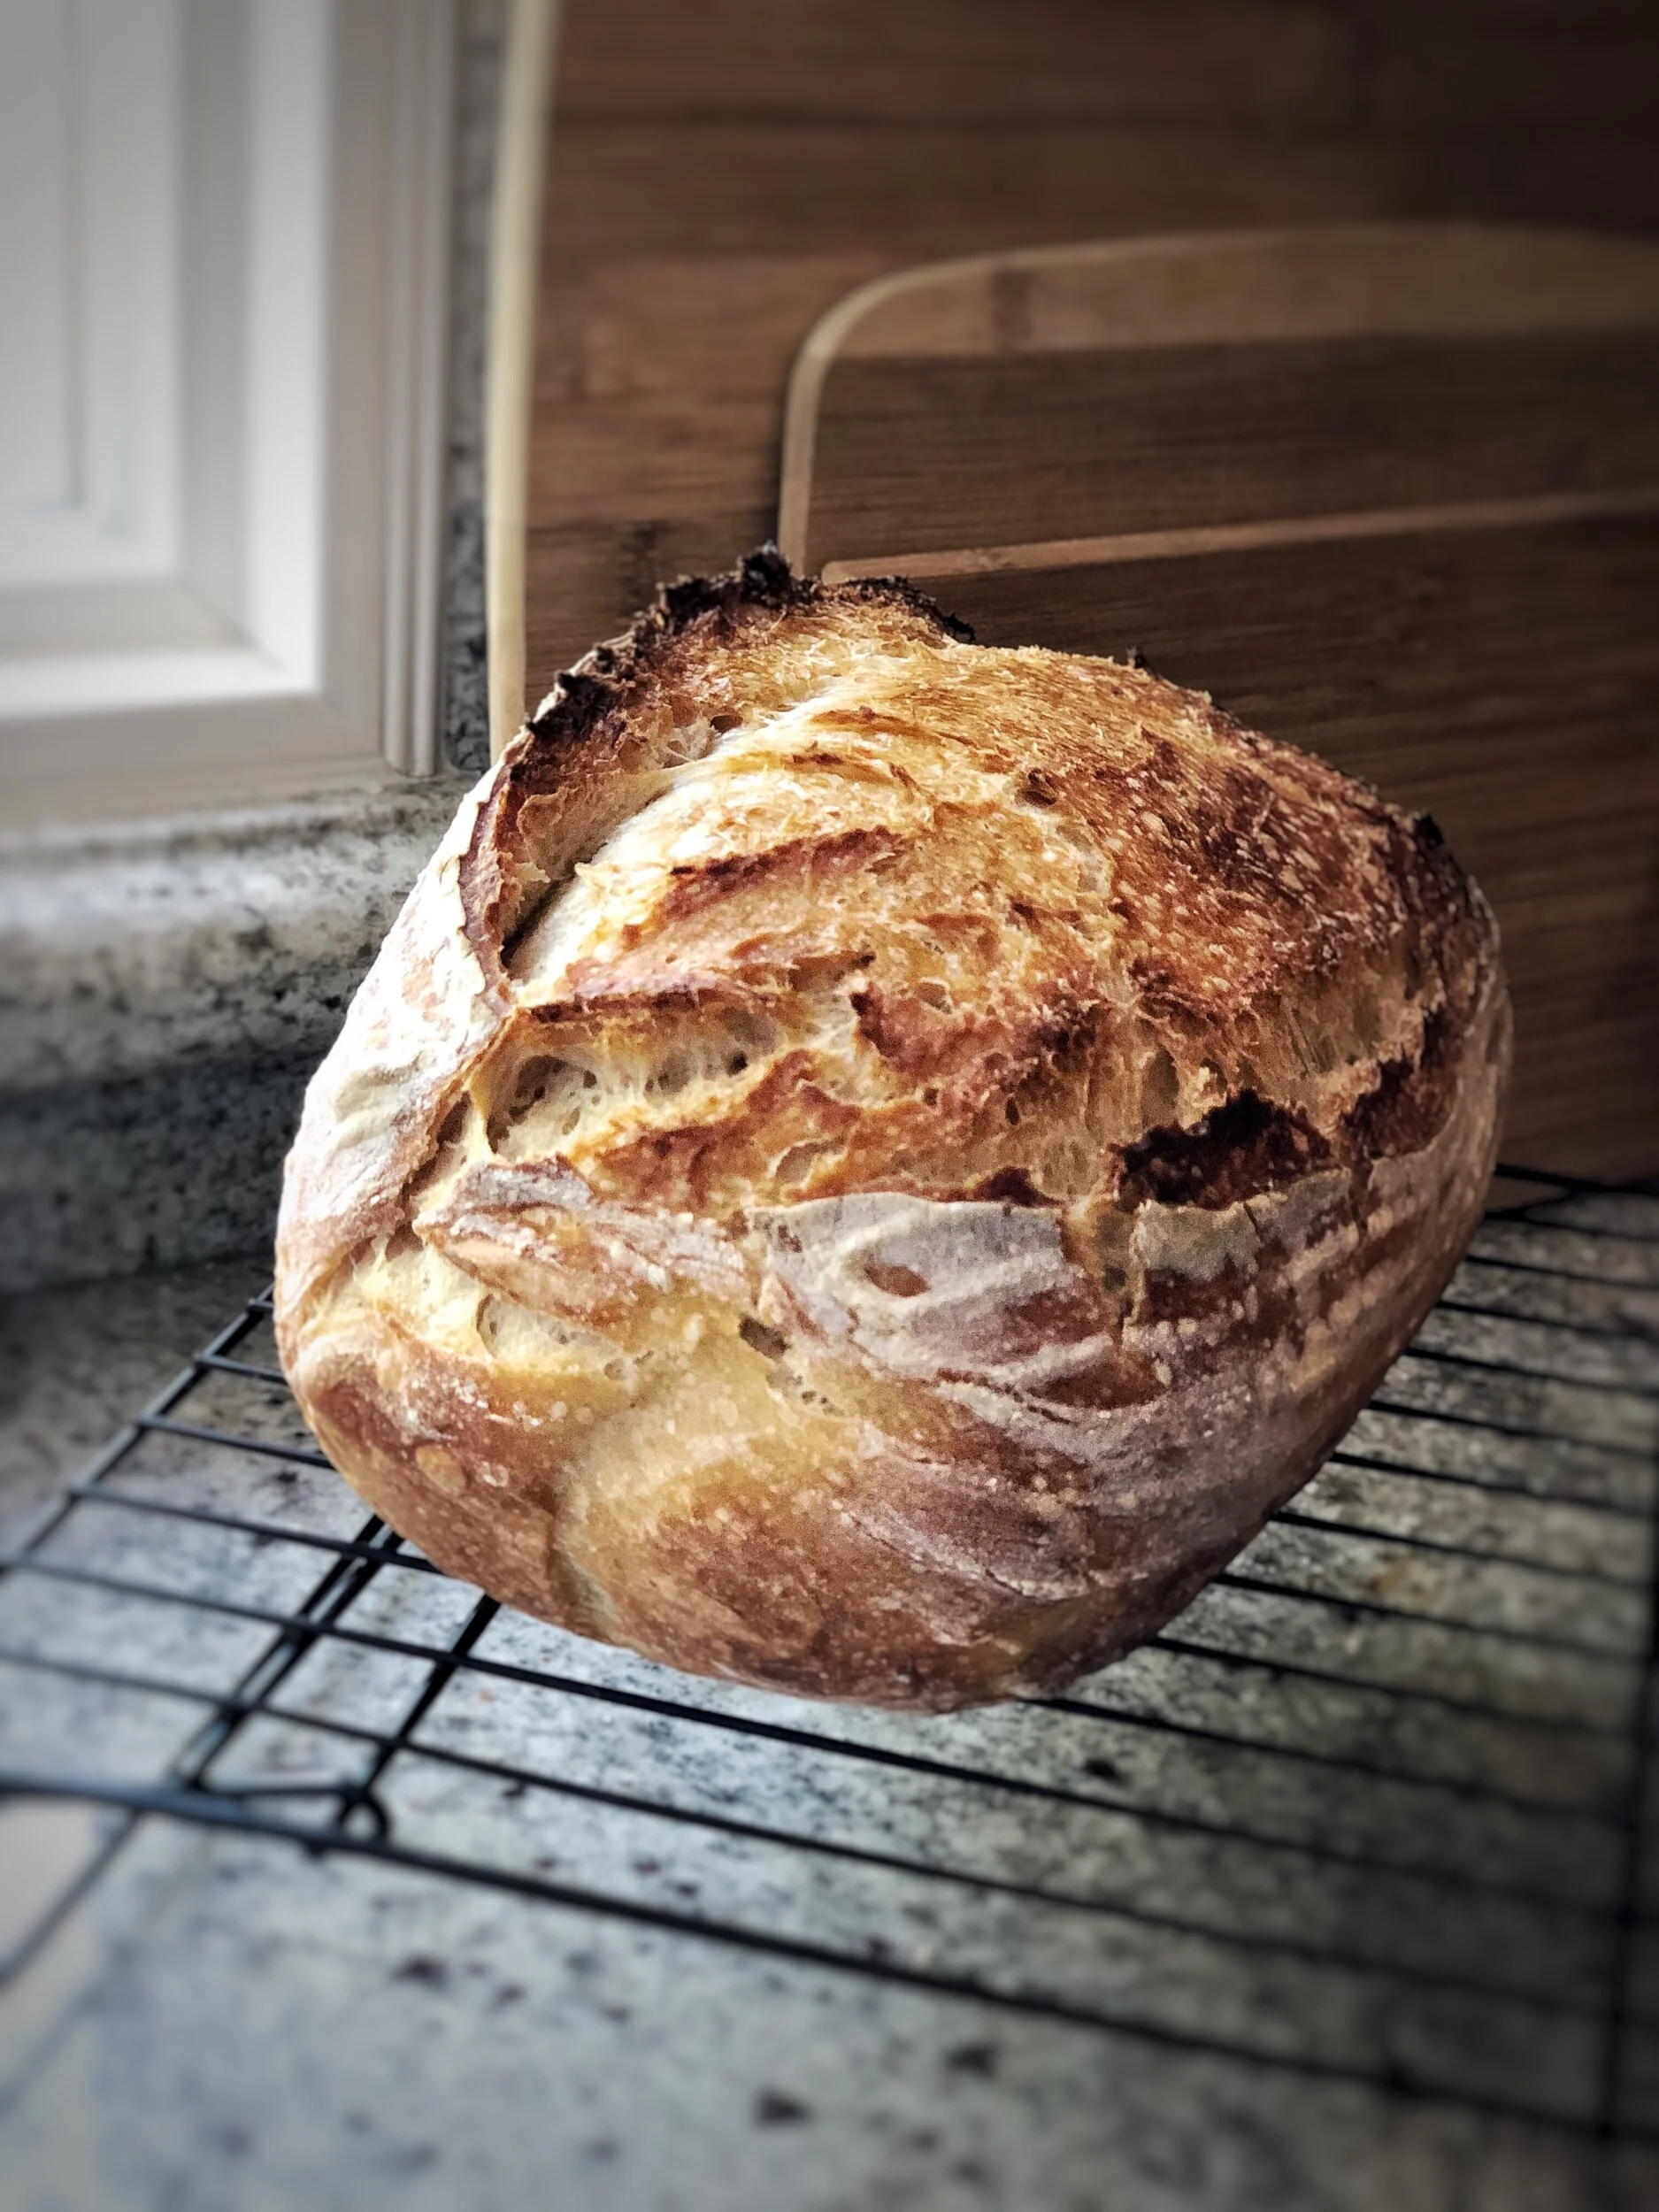
Take out, cool, and enjoy! Best served warm, with butter and sea salt. :)
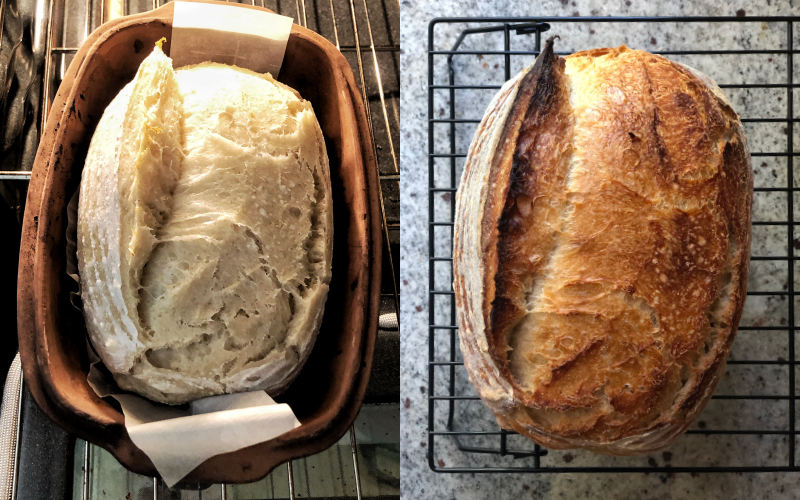
After 20 minutes in the oven with the lid on vs. the final product.
Shopping List
Bread Flour
All Purpose Flour
Whole Wheat Flour
Round Banneton (for dutch oven)
Oval Banneton (for clay baker)